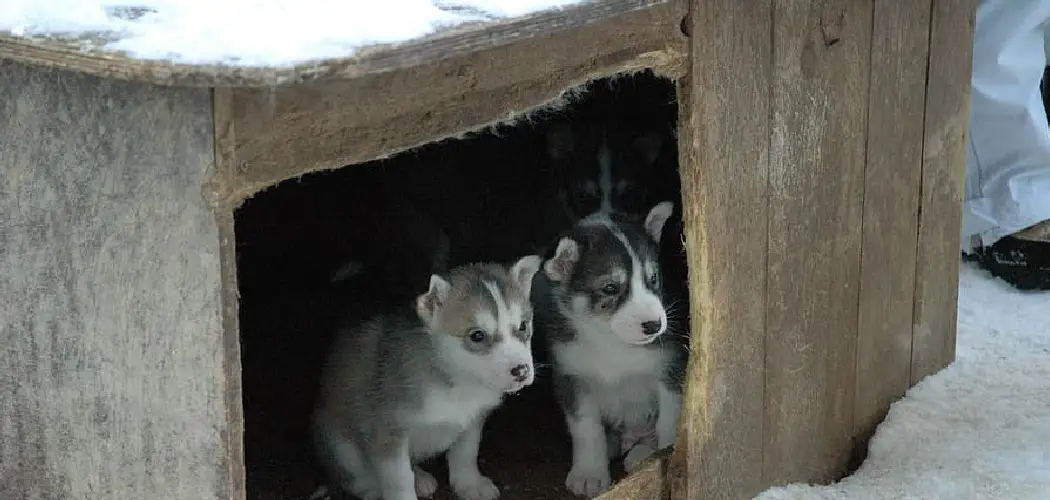
Are you facing a cold winter and want to ensure your pup’s kennel is properly insulated? Don’t worry! Winterizing a dog kennel is not as hard as it seems.
During winter, protecting your dog’s kennel is an important part of keeping them safe and comfortable. While most pet owners focus on items such as warm bedding and clothing for their pets when preparing for colder temperatures, it’s also essential to winterize the kennel itself. Not only will this keep the structure from warping or deteriorating due to exposure to harsher elements, but it can help create a sense of protection from cold winds and provide additional warmth.
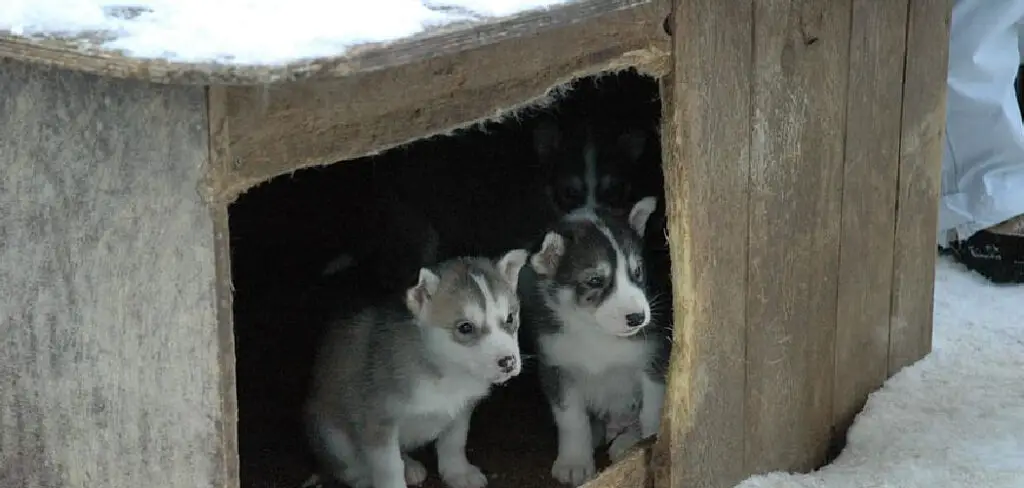
Thankfully, with some simple materials such as heavy duty tarps and wooden boards, you can easily weatherproof a dog kennel in no time! In this blog post, we’ll discuss how to winterize a dog kennel so they stay comfy throughout the season.
What Will You Need?
Before you begin, gather the necessary materials to winterize your pet’s kennel. You will need the following:
- Heavy duty tarp
- Wooden boards
- Hammer and nails
- Tape measure
Once you have gathered these items, you are ready to start winterizing your pet’s kennel.
10 Easy Steps on How to Winterize a Dog Kennel
Step 1: Measure & Cut The Tarp
First, measure and cut the tarp in order to fit your dog’s kennel size. Use a tape measure to determine the perimeter of the kennel, adding an extra foot or two for slack. Then cut the tarp according to the measurements using scissors.
Step 2: Secure The Tarp To The Kennel
Once you’ve measured and cut the tarp, use a hammer and nails to secure it tightly around each panel of the kennel. Make sure that the tarp is fastened securely so it will not blow off in the wind. As an extra precaution, you could add strips of duct tape to help sealed the edges further.
Step 3: Attach Wooden Boards
Next, attach wooden boards to the top and bottom of the kennel. This will help insulate your pup’s space from cold winds and temperatures. Measure each panel of your dog’s kennel and cut the boards accordingly with a saw or jigsaw. Then use nails to secure them in place.
Step 4: Cover The Wooden Boards With Tarp
Once you have attached all of the wooden boards to the panels, use another layer of tarp overtop for added insulation. Simply measure, cut, and nail the tarp as you did in step one. This will also help keep out any rain or snow that may fall during winter.
Step 5: Install Weather Stripping
Install some weather stripping around the edges of your dog’s kennel for added protection from the elements. This will provide a barrier between the cold air outside and your pup’s warm space inside. Make sure to seal all gaps or cracks with weather stripping for maximum insulation.
Step 6: Insulate The Floor of The Kennel
To further protect your pup from cold floors, it is important to insulate the floor of their kennel as well. Place several layers of tarps on the ground and then cover them with thick blankets. This will help keep your pup’s paws warm and comfortable all winter long.
Step 7: Add Bedding
Now that you have insulated your dog’s kennel, it is time to add some bedding! Place an old blanket or a few cushions inside the kennel for extra warmth and comfort. You can also use a straw, sawdust, or shredded paper as bedding material too.

Step 8: Install A Heater
If the temperatures are particularly cold, consider installing a small heater in your pup’s kennel to provide additional warmth and comfort during those freezing nights. Make sure to place the heater out of reach of your pup, as well as away from any fabrics that may be combustible. Don’t forget to keep a fire extinguisher close by, just in case!
Step 9: Add Some Toys And Treats
Finally, make your pup’s kennel an inviting space with some fun toys and treats! This can help keep them entertained during the winter when it’s too cold to go outside. Choose some durable toys, such as rope or chew bones, that will withstand the elements and provide hours of entertainment for your pup.
Step 10: Monitor Your Pet’s Comfort Level
Once you have completed all ten steps, monitor your pet’s comfort level throughout the winter months. Make sure they have enough bedding, warmth, and protection from the elements so they stay comfortable and safe. If you notice any issues with your pup’s kennel or they are not responding to the temperature changes, it may be time to make some adjustments or add more insulation.
By following these ten simple steps, you can easily winterize your pup’s kennel and keep them warm, comfortable, and happy all season long! With the proper preparation, your pup will be able to enjoy the cold weather months with no worries about the chill outside.
5 Additional Tips and Tricks
- Keep extra bedding on hand. Stock up on blankets, towels, and other items you might need to insulate the kennel. Place a layer of these items over the floor of the kennel and keep adding layers handy in case they get wet or dirty during use.
- Add weather stripping along any windows or doors in the kennel area to prevent drafts coming inside when temperatures drop outside if your dog has an outdoor run attached to their kennel, secure weather stripping around the connection points between the two structures.
- Invest in a quality dog house to provide additional protection against harsh winter conditions. Ensure your dog’s kennel is situated in a well-ventilated area and free of any drafts or wind tunnels.
- Keep ice and snow away from the entrance of the kennel by placing a rug or mat at its entryway. Place a roof overhang above it to keep precipitation off the doorway during storms if possible.
- Consider using heated water bowls or bowls with built-in insulation to keep your pup’s water from freezing in cold weather. This can help ensure they have access to fresh, clean drinking water during winter.
By following these simple tips and tricks when winterizing a dog kennel, pet owners can rest assured knowing their furry friends are safe and well-protected from the elements all throughout the cold season.

5 Things You Should Avoid
- Avoid Using Plastic or Cardboard Materials: They won’t provide enough insulation to keep your pup warm during the colder months and could potentially lead to drafts. Moreover, these materials can break down easily in wet or windy conditions.
- Don’t Place the Kennel in an Area Exposed to Strong Winds: Wind chill can drop temperatures far below what is comfortable for a dog, so make sure they have a safe spot sheltered from harsh winds. This could be in a garage, shed, or any other enclosed space.
- Avoid Using Any Space Heaters: These heat sources can become dangerous if not monitored properly and quickly overheat your pup’s living space. You should also never use an open flame, such as a candle or campfire, to keep your dog’s kennel warm.
- Don’t Let Snow or Ice Build Up Around the Entrance to the Kennel: Make sure you regularly brush away any accumulation of ice or snow at the entrance of the kennel and keep it free from any blockages. This snow and ice can quickly lead to a dangerous situation as the temperature drops.
- Don’t Forget to Check on Your Pup Regularly: Make sure you take time throughout the winter season to ensure your dog stays warm and healthy in their kennel. A quick visit or two just to check in can make all the difference when it comes to winterizing a dog’s living space.
By avoiding these common pitfalls when winterizing a dog kennel, pet owners can rest assured knowing their furry friends are safe and comfortable even during harsh weather conditions. With a few simple precautions, you can ensure that your pup is protected throughout the cold season every year.
Conclusion
Winterizing your dog kennel will not only help ensure your pet’s comfort but their safety as well. Following a few simple steps, you can keep your canine companion cozy and safe during cold winter. Adding a warm blanket or straw to the kennel, wrapping pipes with insulation foam, and raising the kennel off the ground are all great ways to winterize this space.
Additionally, sealing cracks or gaps in the kennel with caulk may also provide valuable protection from wind, snow, and moisture. Lastly, always check on your furry friend every so often to ensure they’re warm enough and comfortable in their new cozy wintertime home! Taking the extra time to turn an ordinary dog kennel into a winterized one can be incredibly beneficial to both you and your pup.
Hopefully, the article on how to winterize a dog kennel provided you with the tips and tricks needed to keep your pup safe in their outdoor living space during the cold winter months. With a few simple steps, you can ensure that your furry friend stays cozy and comfortable all season long! Thanks for reading!
About
Outdoor Fixes is a distinguished figure in the world of Diy design, with a decade of expertise creating innovative and sustainable Diy solutions.
His professional focus lies in merging traditional craftsmanship with modern manufacturing techniques,
fostering designs that are both practical and environmentally conscious. As the author of diy,
outdoorfixes delves into the art and science of outdoorfixes-making, inspiring artisans and industry professionals alike.
Education RMIT University
(Melbourne, Australia) Associate Degree in Design (Outdoor Fixes) Focus on sustainable design, industry-driven projects,
and practical craftsmanship. Gained hands-on experience with traditional and digital manufacturing tools, such as CAD and CNC software.
Nottingham Trent University
(United Kingdom) Bachelor’s in outdoorfixes.com and Product Design (Honors) Specialized in product design with a focus on blending creativity with production
techniques. Participated in industry projects, working with companies like John Lewis and Vitsoe to gain real-world insights.
Publications and Impact
In diy, Outdoor Fixes his insights on indoor design processes, materials, and strategies for efficient production.
His writing bridges the gap between artisan knowledge and modern industry needs, making it a must-read for both budding designers and seasoned professionals.