
A pool pump timer is the unsung hero of pool maintenance, diligently turning your pump on and off to keep your water circulating and clean while saving energy. However, there are times when you need to take manual control. Whether you are dealing with a post-storm debris cleanup, super-chlorinating (shocking) the pool, or troubleshooting an issue, you might need the pump to run continuously outside its programmed schedule. For many pool owners, the timer box can seem like an intimidating maze of wires and switches. This guide is here to change that. It will provide safe, clear instructions on how to bypass a pool pump timer systems, empowering you to manage your pool’s needs on your own terms.
To successfully bypass your pool pump timer, it’s essential to understand the basic components of the timer box and how they function. This approach will ensure you can make adjustments safely and effectively without causing damage to the system. Whether you’re a seasoned pool owner or new to pool maintenance, following step-by-step instructions will give you the confidence needed to handle this task with ease. Safety is paramount, so always ensure the power is turned off before you begin working on the timer.
Understanding Why You Might Need to Bypass
Understanding why you might need to bypass your pool pump timer is crucial for making an informed decision. There are several common scenarios where this may be necessary. For instance, if the timer mechanism is malfunctioning or has worn out over time, bypassing it can serve as a temporary solution to keep your pool pump running while awaiting repairs or replacement. Additionally, in cases where continuous pump operation is required, such as during pool cleaning, extreme weather conditions, or chemical treatments, bypassing the timer ensures uninterrupted functionality. Knowing the specific reason helps you approach this task with clarity and purpose, reducing the risk of improper handling.
Key Maintenance Tips for Your Pool Pump
- Regular Inspection: Frequently check the pump for signs of wear, leaks, or unusual noises to catch potential issues early.
- Clean the Filter: Keep the pump’s filter clean and free of debris to maintain optimal water flow and efficiency.
- Monitor the Timer: Ensure the timer is functioning correctly and adjust settings as needed to align with your pool’s usage requirements.
- Lubricate Moving Parts: Regularly lubricate seals and other moving components to prevent wear and prolong the pump’s lifespan.
- Check Electrical Connections: Inspect and secure all electrical connections to ensure safety and reliable operation.
- Maintain Proper Water Levels: Avoid overworking the pump by keeping water levels consistent to prevent air from entering the system.
By following these tips, you can enhance the longevity and performance of your pool pump while ensuring a well-maintained swimming environment.
Step-by-Step Guide on How to Bypass Pool Pump Timer
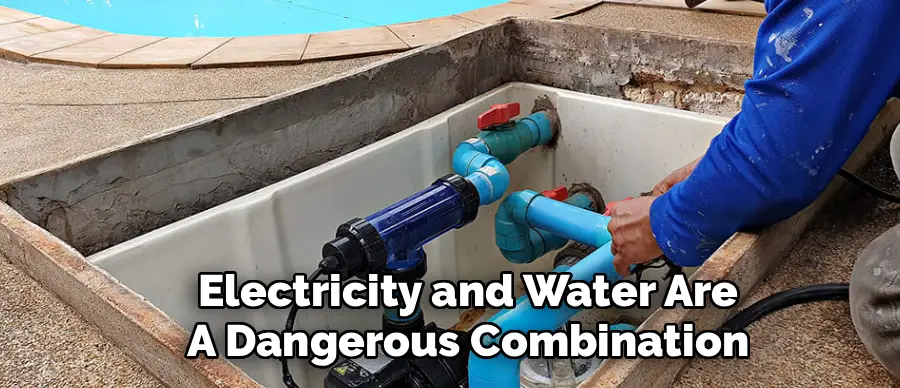
Step 1: Ensure Your Safety by Turning Off the Power
Before you touch any part of your pool’s electrical system, your absolute first priority must be safety. Electricity and water are a dangerous combination, so you must eliminate any risk of electric shock. Go to your home’s main circuit breaker panel and locate the breaker that controls your pool pump and all related equipment. Flip this breaker to the “OFF” position. For an extra layer of safety, you can use a voltage tester to confirm that no power is flowing to the timer box. This simple but critical step ensures you can work on the equipment without the risk of serious injury.
Step 2: Locate and Open the Timer Box
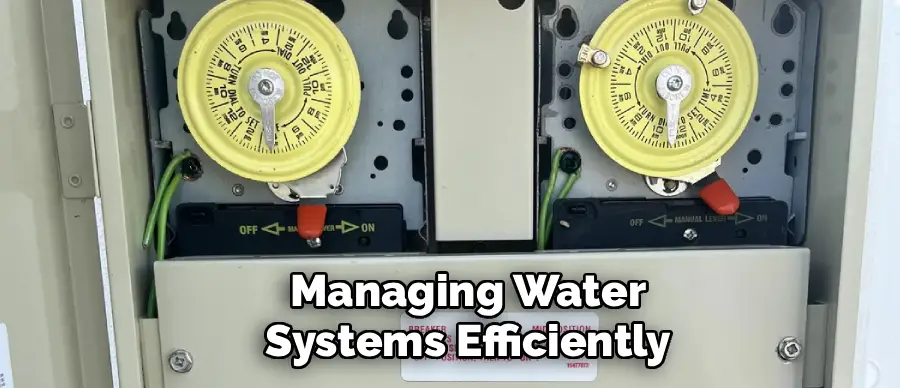
Your pool pump timer is typically housed in a gray or beige metal or plastic box mounted on a wall near your pool equipment pad. It is the control center that connects the power from your house to the pump itself. Once you have located it, you will need to open the cover. Most timer boxes have a simple latch or clip on the side or bottom that you can easily flip open with your fingers or a flathead screwdriver. Opening the box will reveal the inner workings, including the timer mechanism, wiring, and the override switch you will be using.
Step 3: Understand the Components Inside Your Timer
With the box open, take a moment to familiarize yourself with the components. You will see a circular dial, which is the mechanical clock face of the timer. Around this dial are small clips or pins (usually called “trippers”) that dictate the on and off times. You will also see a set of wires connected to terminals, usually labeled “LINE” (power coming in) and “LOAD” (power going out to the pump). Most importantly, you should see a small switch located either on the timer mechanism itself or nearby. This is the manual override switch, your key to bypassing the programmed schedule.
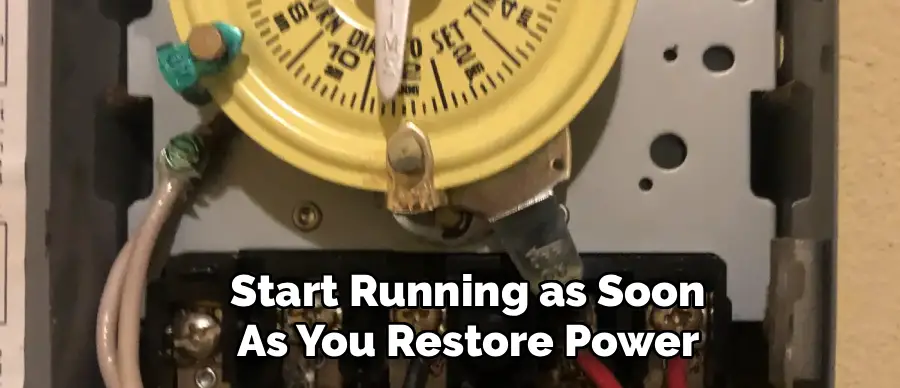
Step 4: Use the Manual Override Switch
The easiest and most common way to run your pump manually is by using the built-in override switch. This switch typically has three positions: “ON,” “OFF,” and “AUTO.” When the switch is in the “AUTO” position, the timer operates according to the schedule set by the tripper pins. To bypass this schedule and force the pump to run, simply move the switch to the “ON” position. This creates a direct connection, sending power to the pump regardless of what the timer’s clock says. The pump will start running as soon as you restore power.
Step 5: Test the Bypass by Restoring Power
After you have flipped the override switch to “ON,” it is time to test your work. Close the timer box cover securely to protect the internal components from the elements. Go back to your main circuit breaker panel and flip the pool equipment breaker back to the “ON” position. Your pool pump should immediately turn on and start running. If it does, you have successfully bypassed the timer. The pump will now run continuously until you either turn the power off at the breaker or return the manual override switch to the “AUTO” or “OFF” position.
Step 6: Remember to Re-engage the Timer
Running your pump 24/7 is not sustainable or energy-efficient for normal operation. The bypass function is a temporary tool. Once you have finished the task that required continuous circulation—such as dissolving chemicals or clearing up cloudy water—you must remember to set the system back to its automatic schedule. To do this, first, turn the power off again at the main circuit breaker. Then, open the timer box and move the manual override switch from the “ON” position back to the “AUTO” position. This will allow the timer to resume its normal, energy-saving schedule.
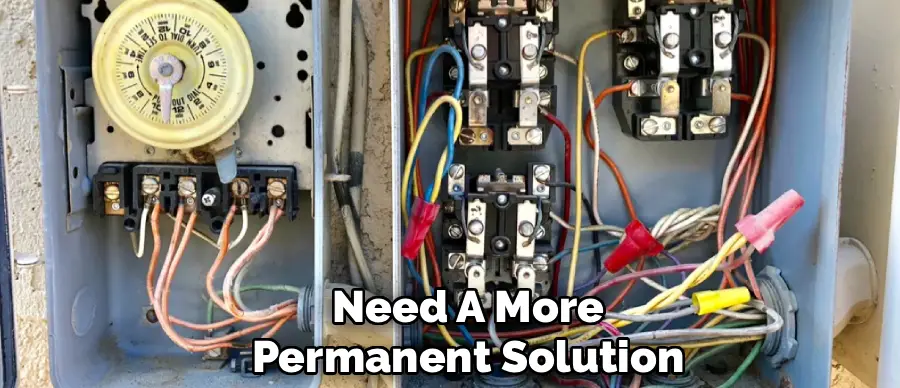
Step 7: For a More Permanent Bypass
In some rare situations, such as a broken timer mechanism, you might need a more permanent solution. This involves rewiring the timer box to completely remove the timer from the circuit. This is a more advanced task that requires electrical knowledge. It involves disconnecting the “LOAD” wires (going to the pump) from the timer terminals and connecting them directly to the “LINE” wires (coming from the breaker).
This essentially turns the timer box into a simple junction box with an on/off switch. If you are not completely comfortable with electrical wiring, it is highly recommended that you hire a qualified electrician for this task.
Step 8: Close the Timer Box
Once all the wiring changes have been properly secured, carefully place the wires back into the timer box. Ensure there’s no excessive tension or exposed wire within the box. Close the timer box cover and screw it tightly to protect the internal components from dust, debris, and moisture.
Installing a timer for your electrical devices can greatly enhance convenience and energy efficiency.
By automating the operation of your appliances, you can ensure they run only when needed, saving both time and electricity. This guide will walk you through the essential steps to safely and effectively install a timer, providing helpful tips to ensure a smooth process.
Step 9: Restore Power
Turn the power back on at the circuit breaker. After restoring power, test the setup to ensure the pump operates correctly. Flip the on/off switch to confirm the pump activates and deactivates as expected. If the pump does not work, turn off the power and retrace your steps to identify any issues.
Installing a timer for your pump can significantly improve its efficiency and convenience, saving you both effort and energy.
With the right tools and a clear understanding of the process, this project can be completed with minimal hassle. Whether you’re looking to automate your irrigation system or manage your pool pump, this guide provides all the information you need to get started.
Step 10: Monitor the Setup
Observe the pump running for a few minutes to ensure everything is functioning smoothly. Listen for unusual noises or signs of malfunction. Check the wiring and connections again after a brief run to verify there is no overheating or irregularities. If the system operates without issues, the modification is complete.
When it comes to managing water systems efficiently, having the right setup can make all the difference. Proper planning, installation, and monitoring ensure that your system runs seamlessly while saving time and resources. This guide aims to simplify the process and help you achieve optimal performance with minimal hassle.
Common Timer Issues
Timers play a crucial role in managing water systems, but they can occasionally encounter problems that disrupt functionality. One prevalent issue is incorrect programming, where settings such as start times, durations, or frequencies are not properly configured. This can lead to either overwatering or underwatering, both of which can damage the system or the landscape it supports.
Another common problem is a power disruption, which may reset the timer or wipe its programming entirely, requiring recalibration. Additionally, wear and tear on internal components or exposure to harsh weather can cause malfunctions over time. Regularly inspecting and maintaining the timer can help prevent these issues, ensuring the system stays on schedule and operates efficiently. If persistent issues arise, consulting the user manual or reaching out to a professional may be necessary.
Frequently Asked Questions
What Is the Difference Between a Mechanical and a Digital Timer?
A mechanical timer, the most common type, uses a physical clock motor and tripper pins to set on/off times. A digital timer uses an electronic interface with an LCD screen and buttons for programming, offering more flexibility with multiple schedules. While the bypass process for a mechanical timer involves a physical switch, a digital timer usually has a “MANUAL” or “SERVICE” mode button that you press to achieve the same result.
Is It Safe to Leave My Pool Pump Running Continuously?
While it is safe for the equipment to run continuously for a few days, it is not recommended for long-term use. Pool pumps are designed for heavy use, but running 24/7 will lead to significantly higher electricity bills and can accelerate wear and tear on the motor and seals, potentially shortening the pump’s lifespan. Use the bypass function only when necessary for specific maintenance tasks.
Why Won’t My Pump Turn On When I Use the Bypass Switch?
If the pump doesn’t start when you use the override switch, the problem is likely not with the timer. First, check that the main circuit breaker is on. If it is, the issue could be a bad capacitor, a seized motor, or an internal wiring problem in the pump itself. The bypass switch simply sends power to the pump; if the pump doesn’t work, it indicates a problem further down the line.
Can I Bypass My Variable-Speed Pump’s Internal Timer?
Yes. Variable-speed pumps (VSPs) have sophisticated digital controllers, and their internal timers are usually bypassed through the control panel menu. Look for a “Manual” or “Service Mode” setting. Activating this mode will allow you to run the pump at a specific speed indefinitely, overriding any programmed schedules. Some VSPs also have a “Quick Clean” button that runs the pump at high speed for a set period.
What Do the “On” and “Off” Trippers Do?
On a mechanical timer dial, the trippers are the small metal or plastic clips that tell the pump when to turn on and off. As the clock dial rotates, these trippers physically engage a lever that flips the power switch. You set your schedule by attaching the “ON” tripper to the dial at the desired start time and the “OFF” tripper at the desired stop time.
Conclusion
Knowing how to manage your pool’s circulation manually is a valuable skill for any pool owner. While timers are essential for daily, energy-efficient operation, tasks like shocking the water or clearing debris often require the pump to run outside its normal hours. The process is usually as simple as turning off the power, opening the timer box, and flipping the manual override switch to the “ON” position.
Always prioritize safety by cutting the power at the breaker, and remember to return the switch to “AUTO” when you are finished. By following this guide on how to bypass pool pump timer systems, you can confidently take control of your pool maintenance with ease and safety.
About
Outdoor Fixes is a distinguished figure in the world of Diy design, with a decade of expertise creating innovative and sustainable Diy solutions.
His professional focus lies in merging traditional craftsmanship with modern manufacturing techniques,
fostering designs that are both practical and environmentally conscious. As the author of diy,
outdoorfixes delves into the art and science of outdoorfixes-making, inspiring artisans and industry professionals alike.
Education RMIT University
(Melbourne, Australia) Associate Degree in Design (Outdoor Fixes) Focus on sustainable design, industry-driven projects,
and practical craftsmanship. Gained hands-on experience with traditional and digital manufacturing tools, such as CAD and CNC software.
Nottingham Trent University
(United Kingdom) Bachelor’s in outdoorfixes.com and Product Design (Honors) Specialized in product design with a focus on blending creativity with production
techniques. Participated in industry projects, working with companies like John Lewis and Vitsoe to gain real-world insights.
Publications and Impact
In diy, Outdoor Fixes his insights on indoor design processes, materials, and strategies for efficient production.
His writing bridges the gap between artisan knowledge and modern industry needs, making it a must-read for both budding designers and seasoned professionals.