
Do you have a small patio or walkway made of pavers that need compacting, but don’t own a plate compactor? It is important to know how to compact pavers without a plate compactor. No need to worry—there are still plenty of ways and tricks you can use for effectively compacting them without the expensive machinery!

Read on to learn more about how you can get the job done yourself using simple tools and techniques. From basic DIY hacks to professional contractors’ methods, this article will help you find cost-effective solutions which deliver incredible results right at home!
Tools You Will Need
- Shovel
- Hand tamper or tamper tool
- 2×4 lumber board
- Hammer (optional)
- Level (optional)
6 Steps Guide on How to Compact Pavers Without a Plate Compactor
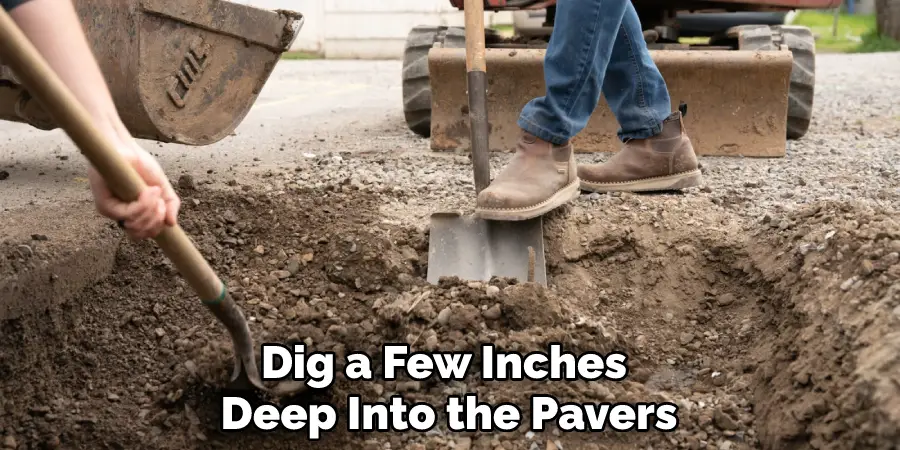
Step 1: Remove Any Grass and Soil
Digging into the pavers may sound daunting, but it is necessary to ensure a stable foundation for compaction. Take your shovel and dig a few inches deep into the pavers, carefully separating any grass or soil that may be caught in between. This will provide more cohesion for when you eventually have to compact the pavers without using a plate compactor.
To ensure all the pieces fit snuggly together, pat the back of each paver with your hand so it sits evenly with the surrounding ones. If done correctly and thoroughly, this process will lead to optimal stability for your outdoor hardscape when completed.
Step 2: Place Your Hand Tamper or Tamper Tool
Compacting pavers by hand is a labor-intensive task, but it works just as effectively as running a plate compactor. To start, you will need to locate a hand tamper or tamper tool. Once that’s done, simply place it on top of the surface of the pavers and begin compacting it into the soil below.
Moving in a circular or figure-eight motion will give you the most even results. Keep an eye out for any soft spots, making sure you are thoroughly improving soil contact from paver to paver so that everything interlocks tightly when finished. It may take multiple rounds to achieve desired results, but once complete you’ll have a sturdy surface that will last for years!
Step 3: Place the 2×4 Lumber Board
Compacting pavers without a plate compactor can be done easily with a few materials from around the home. After performing the initial tamping process, grab a 2×4 lumber board and place it over the top of the pavers. Using either a hammer or another heavy object.
Gradually tap on the board to further compact the pavement and create the tight bond necessary for a strong surface area. During this process, be sure not to apply too much pressure. Instead, it is recommended to use light ramping over multiple areas until achieving an even connection between each paver.
With these steps, you will be able to successfully create a sturdy surface area without a plate compactor.
Step 4: Use a Level to Check the Surface
Using a level to check the surface if you feel that your work isn’t adequately completed is an easy way to guarantee top-notch results. Make sure that the surface is flat and even by re-checking it with the level after every step, such as compacting the pavers without a plate compactor.
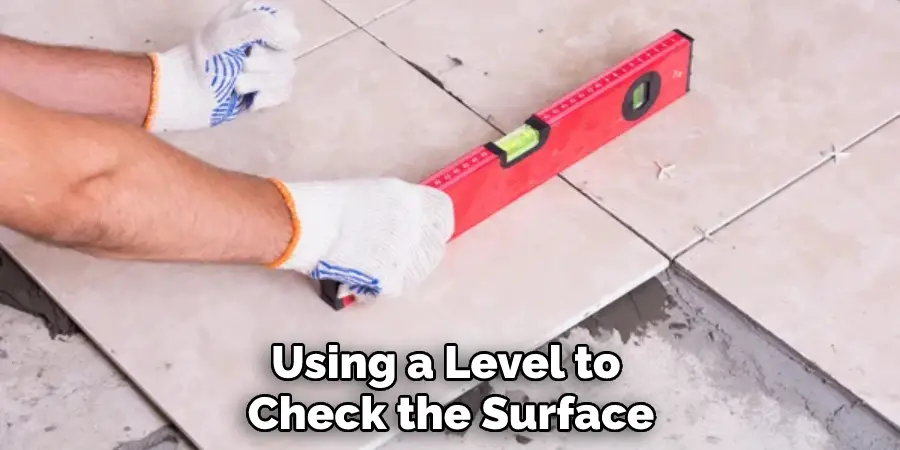
If it is not satisfactory for you, repeat steps two and three until your desired outcome has been achieved. With this approach, you can make sure that your work is on par with professional-grade quality!
Step 5: Prevent Weeds and Grass From Growing
After the pavers have been laid, the last step is to fill in any joints between them with either sand or crushed stone. Applying this filler material will help secure the pavers in place while also blocking weeds and grass from taking root and growing.
This helps create a smoother look overall, free of any discoloration or unevenness caused by unwanted growth. Be sure that whatever material you use is firmly pounded down to ensure a well-compacted surface. Doing so will not only preserve your hard work but also enhance its longevity and aesthetic value.
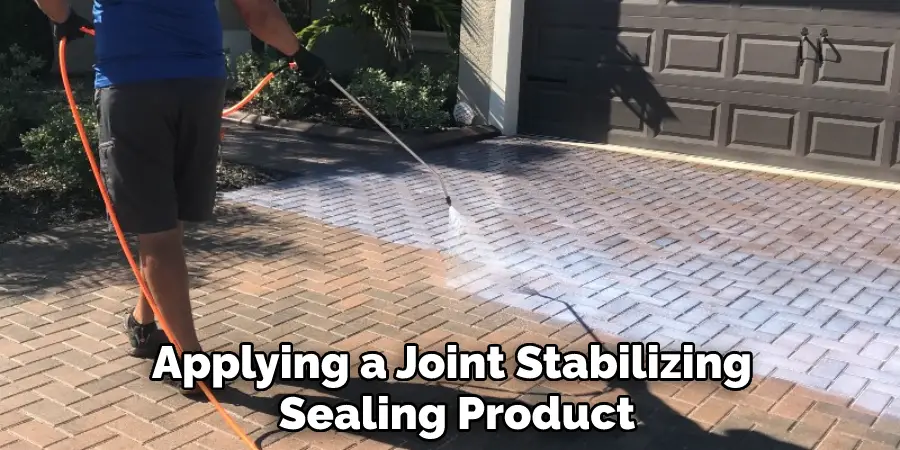
Step 6: Sweep Away the Excess Material
After applying a joint stabilizing sealing product to the Compact Pavers, it is time to clean up the excess material to complete the project. A leaf blower or broom can be used to do this easily and quickly.
Of course, you need to prepare before cleaning: make sure no children, animals, or plants are around; wear protective equipment; and remove solid objects, such as furniture or jewelry, from the area.
When using a leaf blower, always point it away from your face so that all particles will be shot away without any hazard. Keep in mind that sweeping with a broom should start in a circular motion, rather than back and forth, for maximum efficiency and covering. This way it’s easier for you to get rid of all visible filler and obtain an overall good-looking surface.
Now you have successfully compacted your pavers without using a plate compactor! As a result, you have saved money and completed the job yourself in no time! Well done!
Tips to Compact Pavers Without a Plate Compactor
- Remove weeds and other debris from the area where you will be working. This will help to ensure that your pavers are as level as possible.
- Use a garden hose or sprayer to wet down the pavers. This will help to prevent them from drying out too quickly while you are working on them.
- Place the plate compactor on the pavers and turn it on. Slowly move it over the area, making sure to compact each paver evenly.
- Use a level to check the pavers for any high spots. If you find any, use the plate compactor to compact those areas again.
- Once the pavers are all evenly compacted, use a garden hose or sprayer to wet them down again. This will help to settle any dust that may have been created during the process.
- Allow the pavers to dry for at least 24 hours before walking or driving on them.
Frequently Asked Questions
How to Achieve Professional-Grade Results When Compact Pavers by Hand?
Compact pavers are an important component in the construction process, but achieving professional-grade results can be tricky by hand. To verifiably achieve desired results, there are a few steps that need to be taken before and during the compaction process.
It is key to create a gradual increase of force which will make sure that the loose fills and layers won’t be pushed aside during the compaction process. When compacting, it is best to walk the paver back and forth with even pressure not only to guarantee the best results but also to prevent damage to the unit or surface.
Additionally, keeping a constant focus on areas around edges and corners with slow movements help fill all voids present within each section of paver work as this area would usually wear faster than other parts due to traffic. Considering these few steps every time will ensure well-compacted pavers which provide great structural integrity for any project being carried out.
How to Secure your Patio with Perfectly Leveled, Professionally Finished Paved Stones – No Plate Compactor Required!
Securing patio with perfectly leveled, professionally finished paved stones is simple and achievable for any DIY enthusiast. All you need are the right materials and tools. Start by buying quality paving materials such as flagstone, slate, or interlocking pavers, which come in a variety of shapes and sizes.
Then, purchase sand that’s specifically formulated for compacting pavement materials and make sure to get enough to completely bed underneath your stone patio.
As soon as it’s delivered, lay out the stones and check their level using a spirit level before compacting the sand underneath with a regular hand-held tamper or rubber mallet. With these easy steps, you can forget about lugging around an expensive plate compactor as you create an attractive stone patio that’s long-lasting and secure.
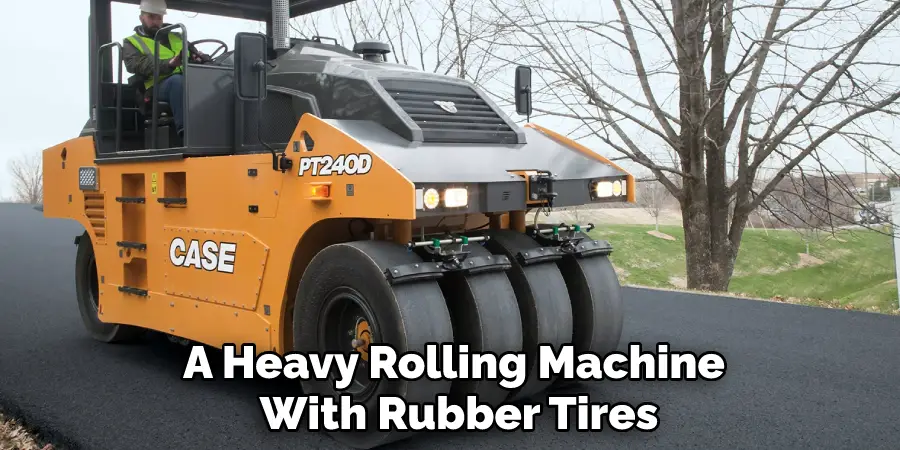
How to Easily Compact Your Pavers without A Plate Compactor?
If you are looking to compact your pavers and don’t have access to a plate compactor, there is an alternative method of doing so. Make sure that the surface of the paving project is even. Then, use a heavy roller to press down on each paver in succession until they are evenly pressed into the ground or sand base.
To get good coverage and even pressure, move back and forth over the newly laid pavers using either a walk-behind roller or a heavy rolling machine with rubber tires. This process can easily be done by hand as well if you don’t have access to rollers or machines.
To ensure that you get the best results possible for your paver-compacting endeavors, it is strongly suggested that you wear appropriate safety gear including protective glasses, sturdy work boots, and gloves when shipping materials by hand. Following these steps will make sure that your project is completed correctly without using costly equipment.
Conclusion
Although a plate compactor is the best way to compact pavers, other methods can be used in a pinch. You should carefully determine how to compact pavers without a plate compactor.
By following the steps outlined above, you should be able to successfully compact your pavers without a plate compactor. Do you have any other tips for compacting pavers? Share them with us in the comments below!
About
Outdoor Fixes is a distinguished figure in the world of Diy design, with a decade of expertise creating innovative and sustainable Diy solutions.
His professional focus lies in merging traditional craftsmanship with modern manufacturing techniques,
fostering designs that are both practical and environmentally conscious. As the author of diy,
outdoorfixes delves into the art and science of outdoorfixes-making, inspiring artisans and industry professionals alike.
Education RMIT University
(Melbourne, Australia) Associate Degree in Design (Outdoor Fixes) Focus on sustainable design, industry-driven projects,
and practical craftsmanship. Gained hands-on experience with traditional and digital manufacturing tools, such as CAD and CNC software.
Nottingham Trent University
(United Kingdom) Bachelor’s in outdoorfixes.com and Product Design (Honors) Specialized in product design with a focus on blending creativity with production
techniques. Participated in industry projects, working with companies like John Lewis and Vitsoe to gain real-world insights.
Publications and Impact
In diy, Outdoor Fixes his insights on indoor design processes, materials, and strategies for efficient production.
His writing bridges the gap between artisan knowledge and modern industry needs, making it a must-read for both budding designers and seasoned professionals.