When it comes to maintaining or replacing your above ground pool liner, accurate measurements are essential to ensure a proper fit. An ill-fitting liner can lead to wrinkles, leaks, and reduced durability, ultimately affecting the functionality and aesthetics of your pool.
This guide on how to measure above ground pool liner will walk you through the steps needed to measure your above ground pool liner correctly, helping you achieve a seamless installation and years of enjoyment.
Understanding the Different Types of Above Ground Pool Liners
Above ground pool liners come in several types, each offering unique features and benefits. The most common types are overlap, beaded, and unibead liners.
Overlap Liners:
These liners are installed by overlapping the pool wall and securing them with coping strips. They are typically more affordable and easier to install, making them a popular choice for many pool owners.
Beaded Liners:
Designed with a pre-attached bead, these liners snap into a track along the pool wall, providing a snug and elegant fit. Beaded liners are often preferred for their clean appearance and ease of replacement.
Unibead Liners:
A versatile option, unibead liners can be installed as either a beaded liner or an overlap liner. They offer flexibility and are compatible with various pool types, making them a convenient solution.
Choosing the right liner for your pool depends on factors such as budget, pool design, and personal preference. Understanding these differences helps ensure you select a liner that meets your needs for both form and function.
Tools and Materials You May Need:
- Tape measure
- Utility knife
- Vinyl liner vacuum head
- Telescopic pole
- Pool wall brush
- Water source (such as a garden hose)
- Duct tape or vinyl liner patch kit
8 Simple Step-By-Step Guidelines on How to Measure Above Ground Pool Liner
Step 1: Identify Your Pool Shape and Type
Before you even unroll your measuring tape, the very first critical step is to correctly identify the shape of your above-ground pool because the measuring technique varies significantly between shapes. Most above-ground pools are round or oval, but rectangular options exist as well. Determining the shape dictates which specific dimensions you need to capture to ensure a perfect fit for the new liner. You also need to confirm the type of bottom your pool has. Most standard above-ground pools have a flat bottom, but some have a “dished” or expandable bottom designed for deeper water in the middle or at one end. Knowing this distinction is vital because a standard flat-bottom liner will not stretch into a deep end without failing.
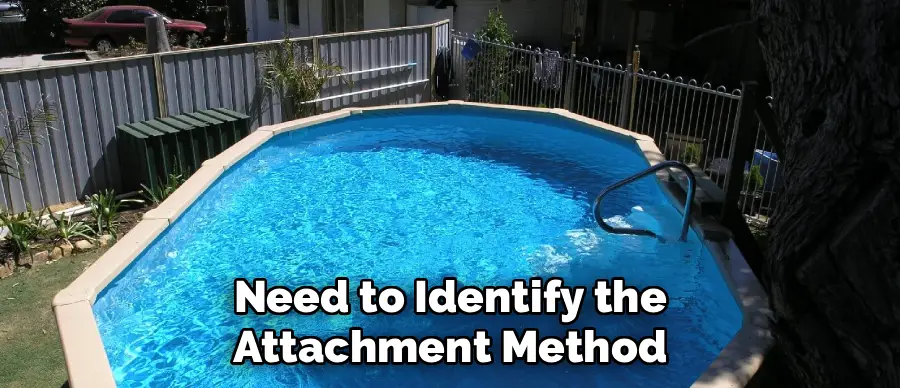
Furthermore, you need to identify the attachment method of your current liner, as this affects what you order. Is it an overlap liner that hangs over the wall and is clamped down? Is it a beaded liner that snaps into a track? Or is it a J-hook/Unibead liner that hangs on the wall top? Misidentifying the attachment style won’t affect the measurements of the pool shell itself, but it is a critical piece of information to have alongside your dimensions. Take a close look under the top rail to see how the liner is secured. Once you are certain of the shape (Round, Oval, Rectangular) and the bottom type (Flat vs. Deep), you can proceed with the specific measurements required for that configuration. This initial assessment prevents you from wasting time measuring the wrong parameters or ordering a liner that is physically incompatible with your pool’s structure.
Step 2: Measure the Wall Height
Measuring the wall height correctly is essential because pool walls come in standard sizes—typically 48, 52, or 54 inches—but assuming your size based on a brochure or memory can be a costly mistake. To get an accurate measurement, you must measure from the outside of the pool. Place your measuring tape at the very bottom rail where the pool wall meets the ground track. Extend the tape measure straight up to the very top of the pool wall, right under the top rail. Do not measure from the inside of the pool if there is a sand cove or built-up floor, as this will give you a false, shorter reading of the actual metal wall height.
You should perform this measurement at three or four different locations around the perimeter of the pool to ensure consistency. Sometimes, ground settling can cause slight variations, but the metal wall itself should be a standard manufacturing height. If you measure 51.5 inches, you likely have a 52-inch wall; if you measure 47.5 inches, it is likely a 48-inch wall. Always round up to the nearest standard size if you are very close, but be careful not to confuse the wall height with the water depth. The water level is always lower than the wall height. Your goal here is to determine the size of the steel or resin sheet that holds the water, not how deep the water is currently sitting. This vertical dimension ensures the liner has enough material to reach from the floor to the top rail without being overstretched or leaving too much excess material bunching at the bottom.
Step 3: Measure the Width or Diameter (Inside Wall to Inside Wall)
When measuring the width or diameter, you must measure the actual pool structure, not the top rails or the uprights. The liner fits inside the pool wall, so your measurement needs to be from the interior face of the metal wall to the opposite interior face. For a round pool, you need to find the true diameter. Take your measuring tape and go from one side of the pool wall to the other, making sure you are bisecting the center of the pool. If you measure from top rail to top rail, your measurement will be inaccurate because top rails often overhang the inside of the pool or extend outward. The liner does not attach to the outer edge of the top rail; it sits against the wall.
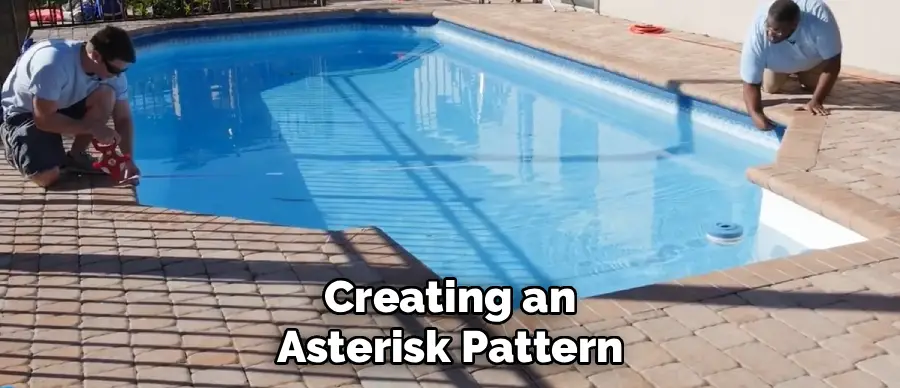
It is absolutely crucial to take this measurement in multiple directions to ensure the pool hasn’t shifted out of round over time. For a round pool, measure across the diameter at least two or three times from different starting points, essentially creating an asterisk pattern with your measurements. If you get slightly different numbers (e.g., 23′ 10″ and 24′ 2″), your pool might be slightly out of round. In this scenario, you typically use the largest measurement or the standard size closest to it (likely 24 feet in this example). For oval pools, you will measure the width at the ends and the middle. Do not assume a pool sold as a “24-foot pool” is exactly 24 feet. Installation variances can occur, and knowing the precise inches ensures you don’t order a custom liner when a stock one would fit, or vice versa.
Step 4: Measure the Length (For Oval and Rectangular Pools)
If you have an oval or rectangular pool, simply measuring the width is not enough; the length is the primary determinant of the liner size. Similar to measuring the width, you must measure from the inside of the metal wall on one end to the inside of the metal wall on the opposite end. You should measure down the center of the pool to get the full length. Just like with the width, do not measure the top caps or the rails. You want the distance between the actual walls that will contain the water. This can be tricky with oval pools because the rounded ends make it hard to find the exact center apex, so having a helper hold the “zero” end of the tape against the wall is vital.
It is recommended to take two measurements for length as well, perhaps slightly offset from the center line, to check for symmetry. For an oval pool, the “length” is the longest dimension. Common oval sizes like 15×30 or 18×33 are standards, but again, installation could have made your 30-foot pool actually 29 feet 10 inches. If your measurement falls within a few inches of a standard size (e.g., 29′ 11″), you are generally safe ordering the standard 30′ size. However, if you have a significant deviation, you may need to investigate further or consult a liner specialist. Accurately capturing the full length ensures the liner won’t be stretched tight like a drum skin across the length, which would cause it to pull away from the walls or tear prematurely.
Step 5: Determine the Corner Radius (For Rectangular Pools)
Rectangular above-ground pools (and some ovals) do not have sharp 90-degree corners like a house; they usually have rounded corners. The measurement of this curve is called the corner radius. If you order a liner with a square corner for a pool with a rounded corner, it will bunch up. Conversely, if you order a rounded corner liner for a square corner pool, it will rip instantly under the water weight. To measure this, you need two rulers or straight edges. Place one straight edge against the length wall and the other against the width wall so they intersect at a 90-degree angle in the corner, creating a gap between the rulers and the curved pool wall.
Measure the distance from the point where the straight edge leaves the wall (where the curve begins) to the corner intersection of the two rulers. Alternatively, you can measure from the inside of the curve to the intersection of the rulers. Typical radii are 6 inches, 9 inches, or sometimes larger, depending on the brand. This measurement is subtle but critical for a smooth fit. Most round and standard oval pools do not require this step as the entire end is a radius, but for rectangular pools or ovals with straight sides and specific corner designs, failing to measure the radius is a common point of failure. If you are unsure, tracing the corner on a piece of cardboard and mailing it to the liner manufacturer is a foolproof way to get it right.
Step 6: Check for a Deep End or Hopper Bottom
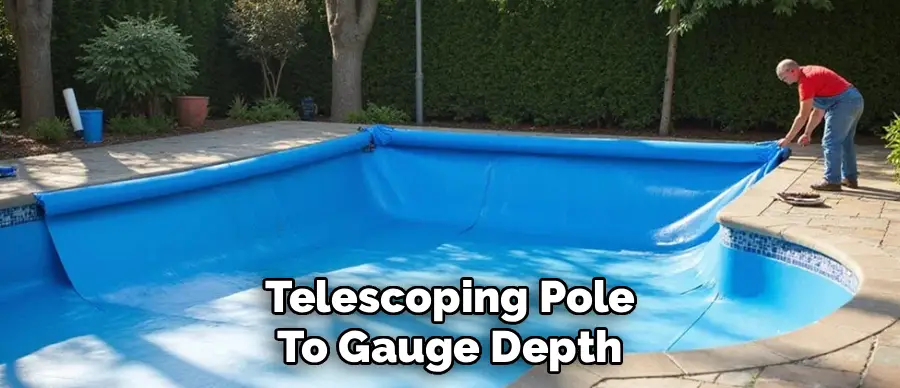
While most above-ground pools have flat bottoms, some are installed with a “deep end” or a dished center. This is done by excavating the ground deeper in the middle before the liner is installed. If you have this feature, a standard flat-bottom liner will not fit. You need to measure the depth of the deep end and the slope dimensions. To do this, you need to measure how much deeper the center is compared to the walls. You can run a string line across the top of the pool (from wall to wall) and measure down to the bottom in the center, then subtract the wall height to find the extra depth.
You also need to know the dimensions of the flat shelf around the edge (if any) and the slope length. This requires mapping out the bottom of the pool. If the pool is full of water, this is difficult and may require a telescoping pole to gauge depth. If the pool is empty, you can walk inside and measure the “break lines” where the floor starts to slope. You will need to provide the manufacturer with the depth of the shallow end, the depth of the deep end, and the length and width of the deep area. Specialized expandable liners are made for these pools, capable of stretching into the deeper excavated areas. Ordering a standard liner for a dished pool will result in a liner that floats above the floor, eventually tearing due to water pressure.
Step 7: Verify the Attachment Type (Bead, Overlap, Unibead)
We touched on this in Step 1, but now you must verify and measure the specific attachment if necessary. For “Beaded” liners, there is a thick vinyl bead along the top edge of the liner that snaps into a track on the pool wall. You need to know if it is a standard bead (also called a coping bead) or a specific type like Esther Williams or Wilkes, which have different bead shapes. If you are unsure, you might need to take a small sample or a photo to a pool store. Measuring the bead itself isn’t usually done with a tape measure, but identifying the type acts as a measurement of compatibility.
For “Overlap” liners, the measurement is more forgiving. These liners simply drape over the wall and are clamped with coping strips. The excess is visible on the outside. For these, you mainly need the wall height and pool diameter. “Unibead” or “J-Hook” liners hang on the wall like a hook and can often be converted to beaded liners. Verifying this ensures the liner stays up. If you mistakenly order a beaded liner for a pool that only has overlap coping, you will have no way to attach it. Conversely, ordering an overlap liner for a pool designed for a bead track might look messy or interfere with top rails. This step is about measuring the compatibility of the connection interface, ensuring the new liner physically integrates with your existing pool hardware.
Step 8: Double-Check All Dimensions
The final step in the guideline is a redundancy check. Do not trust your first set of numbers blindly. Go back and re-measure the length, width, and wall height one more time. Ideally, have a different person read the tape measure this time, or swap ends with your helper. If you wrote down 24 feet, verify it isn’t actually 24 feet and 6 inches. Small discrepancies can often be absorbed by the vinyl’s elasticity, but large errors cannot. It is much cheaper to spend an extra 15 minutes measuring a second time than to pay return shipping and restocking fees on a heavy box of vinyl.
During this second pass, also inspect the pool structure for any abnormalities that might affect measurements, such as bowed walls or leaning uprights. If the pool is significantly out of square or round, you may need to fix the structure before measuring for a liner, or the new liner will never fit properly. This step is about quality assurance. Review your notepad. Do the numbers make sense? For example, does the wall height match a standard industry size? If you measured 50 inches, re-measure to see if it’s actually 48 or 52, as 50 is not standard. Confirming your data against industry norms is a great way to catch calculation or reading errors before they become purchase orders.
Following these steps on how to measure above ground pool liner will help ensure that you have accurate measurements for a perfect fit. However, it is important to note that these steps may vary depending on the type of above ground pool and liner being used. It’s always best to consult with the manufacturer or a professional if you are unsure about any step in the measurement process.
Common Mistakes to Avoid
One of the most frequent errors is measuring the pool cover instead of the pool itself; covers are sized larger to drape over, so this will lead to an oversized liner. Another mistake is assuming your pool size based on what the previous homeowner told you without verifying it personally.
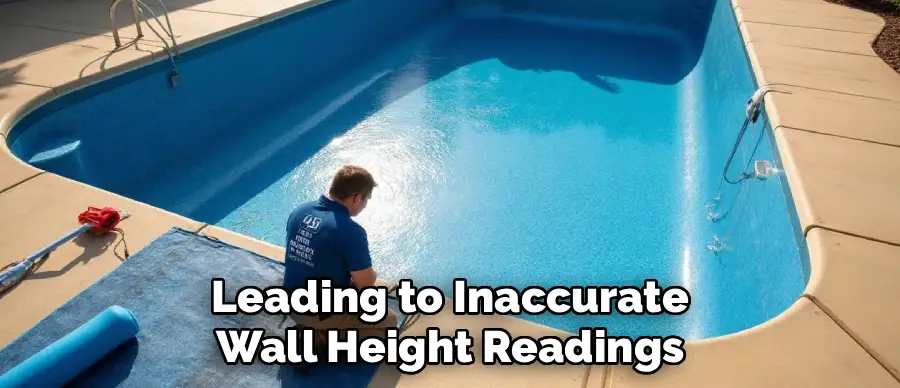
Many people also forget to account for the sand cove (the slope at the bottom edge) when measuring depth, leading to inaccurate wall height readings. Lastly, measuring from the top rail instead of the wall creates false width data.
Recording and Verifying Measurements
Once you have completed the physical labor of measuring, the task of recording and verifying is what safeguards your investment. It is not enough to simply scribble numbers on a scrap of paper; you should sketch a diagram of your pool shape and label each dimension clearly (Length, Width, Wall Height, Corner Radius). This visual aid helps prevent transposing numbers, such as swapping length and width, which is disastrous for oval pools.
After recording, compare your numbers to standard pool sizes available in the market. Above-ground pools are mass-produced, so they almost always adhere to specific dimensions like 15′, 18′, 21′, 24′, 27′ round, or 12’x24′, 15’x30′ oval. If your measurements are odd—say, 18′ 7″—you need to verify if the pool has shifted or if your measurement technique was flawed. If your numbers don’t align with a standard size, call a professional liner dealer. They can tell you if you need a custom cut or if your variance is within the acceptable tolerance for a standard liner. This verification step bridges the gap between your raw data and the manufacturing standards.
Selecting the Right Pool Liner
Selecting the right liner goes beyond just size; it involves choosing the right thickness (gauge) and pattern. Liner thickness is typically measured in mil or gauge, with higher numbers indicating thicker, more durable vinyl. A 25-gauge liner will generally last longer and resist punctures better than a 20-gauge liner, though it will be heavier and slightly harder to install. You must balance your budget against longevity.
Additionally, consider the aesthetic impact of the liner pattern. Darker blue patterns can help absorb heat from the sun, warming your water slightly, and they hide dirt well. Lighter patterns give the water a classic, sparkling turquoise look but may show debris more easily. You also need to decide on the attachment style if your pool allows for switching (e.g., moving from overlap to Unibead for a cleaner look). Finally, check the warranty. A “25-year warranty” usually is prorated, meaning you only get full replacement value in the first few years. Read the fine print to understand what “seam separation” coverage actually entails versus user-inflicted damage.
Frequently Asked Questions
Q1: What Is The Difference Between Mil And Gauge In Liner Thickness?
The terms “mil” and “gauge” are often used interchangeably in the pool industry, but they are not the same measurement standard, which can be confusing for buyers. A “mil” is a precise measurement equal to 1/1000th of an inch, meaning a 20-mil liner is 0.020 inches thick. “Gauge,” on the other hand, is a trade term that lacks a standardized definition across manufacturers; a “25-gauge” liner from one brand might only measure 20 mils in reality. It is always safer to ask for the mil spec to ensure you are comparing apples to apples when shopping for durability.
Q2: Can I Install A Round Liner In An Oval Pool?
No, you absolutely cannot install a round liner in an oval pool, nor can you use a rectangular liner for an oval pool, even if the square footage seems similar. Pool liners are tailored to the specific geometry of the pool’s frame, and the stress points on an oval pool are different from those on a round pool. Using the wrong shape will result in massive wrinkles in some areas and extreme overstretching in others, leading to immediate structural failure of the liner. You must purchase a liner specifically designed for your pool’s shape and dimensions.
Q3: How Much Does A New Above-Ground Pool Liner Cost?
The cost of a new liner varies significantly based on the size of the pool, the thickness of the vinyl, and the complexity of the pattern. Generally, you can expect to pay anywhere from $150 for a small, thinner round liner to over $600 or more for a large, heavy-duty oval or rectangular liner. This price is just for the material itself; if you hire a professional for installation, you will need to budget several hundred dollars more for labor, water delivery, and replacement of faceplates and gaskets.
Q4: Should I Buy An Overlap Or Beaded Liner?
The choice between overlap and beaded liners often depends on your existing pool setup and aesthetic preference. Overlap liners are generally cheaper and more forgiving to install because you can adjust the tension by pulling more or less vinyl over the wall, but they leave visible vinyl hanging on the exterior. Beaded liners offer a cleaner, more professional look because they snap into a track and sit flush, but they require precise measurements because there is no excess material to adjust. If your pool has a bead track, stick with beaded; if not, overlap is the universal standard.
Conclusion
Replacing an above-ground pool liner is a manageable DIY project that can dramatically improve your swimming experience, but success relies entirely on preparation. By taking the time to gather the right tools and following the step-by-step measurement guidelines on how to measure above ground pool liner, you eliminate the guesswork that leads to installation nightmares. Remember that the liner is the skin of your pool; it needs to fit perfectly to function correctly.
Always double-check your numbers, verify your wall height, and understand your attachment type before clicking “buy.” Avoiding common mistakes like measuring top rails or guessing depths will save you time, money, and stress. With accurate measurements in hand and a clear understanding of your options
About
Outdoor Fixes is a distinguished figure in the world of Diy design, with a decade of expertise creating innovative and sustainable Diy solutions.
His professional focus lies in merging traditional craftsmanship with modern manufacturing techniques,
fostering designs that are both practical and environmentally conscious. As the author of diy,
outdoorfixes delves into the art and science of outdoorfixes-making, inspiring artisans and industry professionals alike.
Education RMIT University
(Melbourne, Australia) Associate Degree in Design (Outdoor Fixes) Focus on sustainable design, industry-driven projects,
and practical craftsmanship. Gained hands-on experience with traditional and digital manufacturing tools, such as CAD and CNC software.
Nottingham Trent University
(United Kingdom) Bachelor’s in outdoorfixes.com and Product Design (Honors) Specialized in product design with a focus on blending creativity with production
techniques. Participated in industry projects, working with companies like John Lewis and Vitsoe to gain real-world insights.
Publications and Impact
In diy, Outdoor Fixes his insights on indoor design processes, materials, and strategies for efficient production.
His writing bridges the gap between artisan knowledge and modern industry needs, making it a must-read for both budding designers and seasoned professionals.