
Are you new to fencing and wondering how to use fence pliers? Look no further! This guide will discuss everything you need to know about using fence pliers, from their basic functions to some advanced techniques.
Fence pliers are the best tool for building and maintaining fences.
They allow you to easily cut, twist, and shape metal fence material and effectively complete any fencing job in no time. Not only do they help make installation easier, but they also aid in repairs or modifications long after the project is completed. It is a must-have tool for any fencing project.
With their versatility and convenience, fence pliers are a crucial component of any handyman’s toolkit – so if you want to learn how to use this must-have item, read on!
What Will You Need
Before we dive into the steps of using fence pliers, let’s gather all the necessary materials to ensure a smooth fencing experience.
- Fence pliers
- Fencing material (wire, mesh, etc.)
- Gloves for protection
- Safety glasses
- Measuring tape or ruler (optional)
Now that you have everything you need, let’s get started on using fence pliers.
10 Easy Steps on How to Use Fence Pliers
Step 1. Protect Yourself:
Before you start, wear gloves and safety glasses to protect your hands and eyes from sharp edges and flying particles. It’s always best to prioritize safety. If you’re using an electric fence, turn off the power before starting any work. Be careful of any other hazards in the area, too.
Step 2. Handle the Pliers Correctly:
Fence pliers should be held correctly for optimal use. Hold the pliers’ handles in your dominant hand, just like you would hold a hammer. Make sure your grip is firm but comfortable.
The flat side of the hammerhead should be facing up, and the plier jaws should be closed. This allows you to use the hammer feature of the pliers effectively and keeps the jaws ready for when they are needed.
Step 3. Measure and Mark:
If you’re installing a new fence, using a measuring tape or ruler, measure and mark where you want to place your fence material. This step ensures that your fence is installed evenly and correctly.

If you’re repairing or modifying an existing fence, identify the area you need to work on. You can mark this with a piece of chalk or a temporary marker for easy identification.
Step 4. Cut the Fencing Material:
Now, it’s time to cut the fencing material. Open the jaws of the fence pliers and place the material between them. Make sure the area you want to cut is positioned at the back of the jaws for a cleaner cut. Then, squeeze the handles together to cut through the material.
Be sure to apply steady pressure and avoid any sudden movements to ensure a clean cut. If the material is thick or difficult to cut, never hesitate to apply more force or use both hands. Remember to keep your other hand at a safe distance to avoid any injury.
Step 5. Position the Fencing Material:
Take the cut piece of fencing material and position it correctly on your fence. If installing a new piece, align it with your previously marked measurements. If you’re repairing a section, ensure the new piece matches the size and pattern of the existing fence. Hold the material in place, ready for attachment.
Step 6. Attach the Fencing Material:
Firmly hammer the fencing material onto the fence posts using the hammerhead side of the fence pliers. Apply steady and consistent force to ensure a secure attachment. The amount of force required may vary depending on the fence material type and your fence posts’ sturdiness. After hammering, check if the material is securely attached by gently pulling on it. If it stays in place, you’ve attached it correctly. If not, repeat this step until it’s secure.
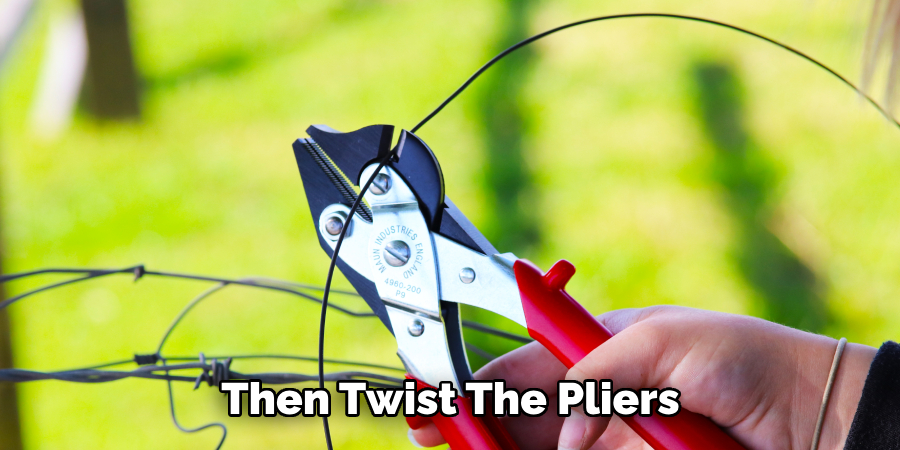
Step 7. Twist or Bend the Fencing Material:
Fence pliers come with a built-in staple puller and wire twister for a reason. If you need to join two pieces of wire together or shape the wire a bit, this is where the twist function comes in handy.
Simply insert the end of the wire into the hole in the pliers’ jaws, close the jaws, and then twist the pliers. Keep twisting until you’ve achieved the desired result. If you need to bend a wire, use the pliers’ jaws to grip the wire where you want the bend to be, and then apply force to create the bend. Always remember to do this gently to avoid breaking the wire.
Step 8. Remove Old Staples or Nails:
If you’re working on an old fence with staples or nails that need to be removed, the fence pliers will be handy. Position the staple puller notch in the center of the jaws under the staple or nail you want to remove. Apply a levering motion to pry out the staple or nail.
Hold the pliers firmly and apply steady pressure to avoid slipping and causing injury. Once you’ve removed the old staples or nails, you can attach new ones if necessary.
Step 9. Install New Staples or Nails:
You might need to install new ones after removing any old and unwanted staples or nails. Locate the section of the fence where the new staple or nail is needed. Position the staple or nail against the fence and use the hammerhead side of the pliers to drive it into the fence post.
Make sure to hit it straight and firm, ensuring it is securely embedded in the post. Be mindful of your fingers and hand placement during this step to avoid accidents.
Step 10. Review Your Work:
Once you’ve attached all the fencing material and installed the staples or nails, it’s time to review your work. Take a step back and inspect the fence from different angles. Check for loose areas, ensure all the material is aligned, and that all staples and nails are firmly in place.
Make any necessary adjustments using your fence pliers. After a thorough inspection and necessary adjustments, you have successfully used your fence pliers!
Following these steps, you can confidently and efficiently use fence pliers for any fence installation or repair project.
5 Additional Tips and Tricks
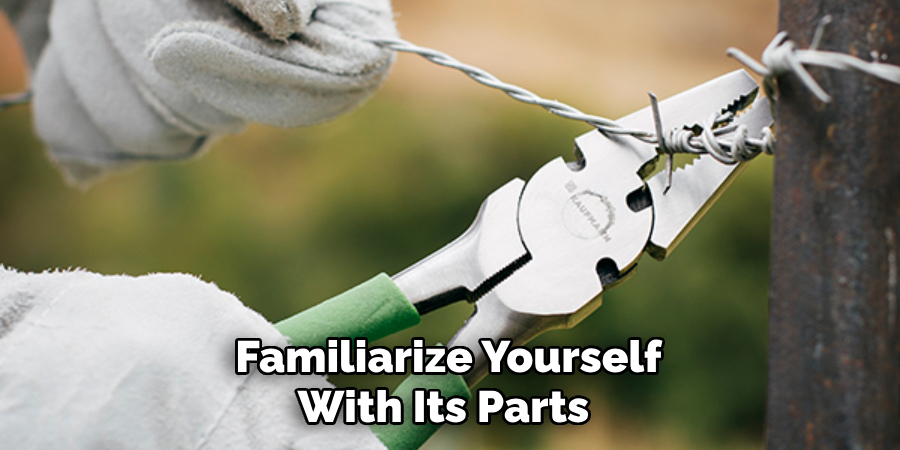
- Understand Your Tool: Knowing how to use fence pliers starts with understanding the tool. Familiarize yourself with its parts: the jaws for gripping, the wire cutters for cutting, and the hammerhead for pounding staples.
- Safety First: Always wear gloves and safety glasses when using fence pliers. They can protect you from sharp wire edges and debris.
- Keep Your Pliers in Good Condition: Regularly oil your fence pliers to keep them functioning smoothly. Rust and grime can compromise their performance.
- Practice Makes Perfect: The more you use your fence pliers, the more proficient you’ll become. Start with simple tasks, like removing or hammering staples, before moving on to more complex tasks.
- Right Tool for the Job: While fence pliers are versatile, they’re not a one-size-fits-all solution. Use them with other appropriate tools for tasks they’re not specifically designed for.
With these additional tips and tricks, you’ll become a pro at using fence pliers in no time. Remember always to prioritize safety and maintenance for optimal performance.
5 Things You Should Avoid
- Avoid Using Dull Pliers: Using pliers with dull or blunt jaws can damage the fence wire or make your task more difficult. Always ensure your tool is sharp and in good condition before starting any work.
- Avoid Pulling Too Hard: Excessive force can lead to slippage or breakage. Approach your work with patience and care to avoid accidents.
- Never Use Pliers as a Hammer: Although some fence pliers have a hammering side, not all do. Using the plier side as a hammer can damage the tool and cause injury.
- Avoid Ignoring Safety Measures: Never underestimate the importance of safety glasses and gloves. Overlooking these protective measures can lead to serious injuries.
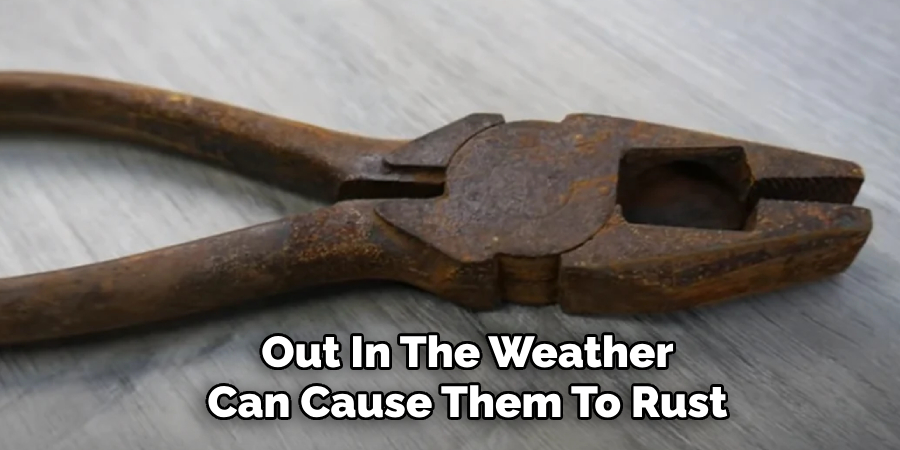
- Avoid Leaving Your Tools Exposed to Elements: Leaving your tools, especially fence pliers, out in the weather can cause them to rust and degrade faster. Always clean and store your tools in a dry place after use.
With these avoidance tips, your experience using fence pliers will not only be effective but safe and long-lasting, too.
Conclusion
Fence pliers are a must-have tool for anyone with a fenced enclosure or wired landscape. With their simple design, convenience in storage, and versatile application for simple repair and maintenance jobs, fence pliers are an invaluable asset to your tool shed. It’s the perfect option for any DIYer or homeowner looking to quickly and cheaply keep up the appearance of their yard or garden.
Additionally, with its superior grip and leverage, fence pliers will spare you time and energy that would otherwise be better spent on other projects! Whatever your fencing needs, this is one tool you simply can’t do without.
Hopefully, this guide has provided you with all the necessary information on how to use fence pliers effectively and safely. Remember always to prioritize safety and maintenance for optimal performance, and utilize these additional tips and tricks for a seamless experience. Happy fencing!
About
Outdoor Fixes is a distinguished figure in the world of Diy design, with a decade of expertise creating innovative and sustainable Diy solutions.
His professional focus lies in merging traditional craftsmanship with modern manufacturing techniques,
fostering designs that are both practical and environmentally conscious. As the author of diy,
outdoorfixes delves into the art and science of outdoorfixes-making, inspiring artisans and industry professionals alike.
Education RMIT University
(Melbourne, Australia) Associate Degree in Design (Outdoor Fixes) Focus on sustainable design, industry-driven projects,
and practical craftsmanship. Gained hands-on experience with traditional and digital manufacturing tools, such as CAD and CNC software.
Nottingham Trent University
(United Kingdom) Bachelor’s in outdoorfixes.com and Product Design (Honors) Specialized in product design with a focus on blending creativity with production
techniques. Participated in industry projects, working with companies like John Lewis and Vitsoe to gain real-world insights.
Publications and Impact
In diy, Outdoor Fixes his insights on indoor design processes, materials, and strategies for efficient production.
His writing bridges the gap between artisan knowledge and modern industry needs, making it a must-read for both budding designers and seasoned professionals.