
Picture this: It is a beautiful Saturday morning, the grass is getting long, and you are ready to tackle the lawn. You climb onto your trusty riding mower, turn the key, and… nothing. Just a sickening silence or a faint click. Your battery seems fine, but the engine refuses to crank. Before you call a mechanic or haul the machine to a repair shop, there is a handy trick you should know.
Learning how to jump start lawn mower with screwdriver is an old mechanic’s secret. It is a specific method used primarily when the starter solenoid—the component that connects the battery to the starter motor—fails. While it sounds like a MacGyver maneuver, it is actually a straightforward way to bypass a faulty connection and get your machine running again.
This guide will walk you through the process safely so you can get back to cutting grass.
What are the Benefits?
Why should you learn this specific DIY hack? There are several compelling reasons to keep this trick up your sleeve.
- Saving Precious Time: Loading a heavy mower onto a trailer and driving it to a shop can take hours. This method takes less than five minutes, allowing you to finish your chores on schedule.
- Avoiding Repair Costs: Mechanics charge a premium for diagnostics. If you can start the mower yourself, you can confirm the issue is just a solenoid and order a cheap replacement part online instead of paying for labor.
- Self-Reliance: There is a satisfying feeling of independence when you can troubleshoot your own equipment. Understanding how your engine starts gives you confidence in maintaining your tools.
What Will You Need?
You do not need a fancy toolbox for this procedure. In fact, you likely have everything you need right now.
- A Screwdriver: Ideally, use a flat-head screwdriver with a sturdy shaft. Crucial: It must have a rubber or plastic handle that is well-insulated.
- Safety Gloves: Rubberized gloves provide better grip and an extra layer of protection against sparks.
- Safety Glasses: You will be working near electrical sparks, so eye protection is non-negotiable.
- A Wire Brush or Rag: Useful for cleaning off the terminals before you begin.
10 Easy Steps on How to Jump Start Lawn Mower With Screwdriver
This section outlines exactly how to perform the bypass. Please read all steps thoroughly before attempting the procedure to ensure safety and success.
Step 1: Secure the Lawn Mower and Ensure Safety
Before you even touch a tool, you must ensure the environment is safe. Park your lawnmower on a completely flat, level surface. Engage the parking brake firmly. This is vital because once the engine starts, the vibration could cause the mower to roll if it is on an incline or if the brake is loose.
Next, ensure the mowing deck is disengaged. You do not want the blades to start spinning the moment the engine fires up. If you have a manual transmission mower, make sure it is in neutral. Finally, put on your safety glasses and gloves. You are dealing with electricity and moving parts; taking thirty seconds to gear up can prevent serious injury.

Step 2: Locate the Battery and Starter Solenoid
To perform this jump start, you need to find the starter solenoid. In most riding mowers, this component is located near the engine or under the seat, close to the battery. You might need to lift the hood or tip the seat forward.
Look for a small, black cylindrical or box-shaped component. It will typically have two large posts (terminals) with thick red cables attached to them. One cable runs directly from the positive terminal of your battery, and the other cable runs to the starter motor on the engine. This little box is the bridge we are about to cross manually.
Step 3: Inspect the Connections for Corrosion
Before you attempt to jump the mower, take a close look at the terminals on the solenoid. Over time, grass clippings, dirt, and moisture can cause corrosion. If the metal posts look green, white, or rusty, the connection might be poor.

Use your wire brush or a dry rag to clean the terminals. You need clean metal to create a strong electrical arc. If the area is covered in oil or gasoline, do not proceed. Clean the area thoroughly with a degreaser and wait for it to dry. Sparks near fuel or oil residue are a recipe for a fire, so a clean workspace is essential for safety.
Step 4: Verify the Ignition Key Position
Even though we are bypassing the solenoid, the rest of the mower’s electrical system needs to be active for the engine to run. Insert your key into the ignition switch and turn it to the “On” or “Run” position.
Do not turn it all the way to “Start”—just leave it in the position where the lights or gauges would normally turn on. If the key is in the “Off” position, the engine might crank when you use the screwdriver, but it will not actually fire up because the spark plugs won’t be receiving any signal to ignite the fuel.
Step 5: Identify the Two Large Terminals
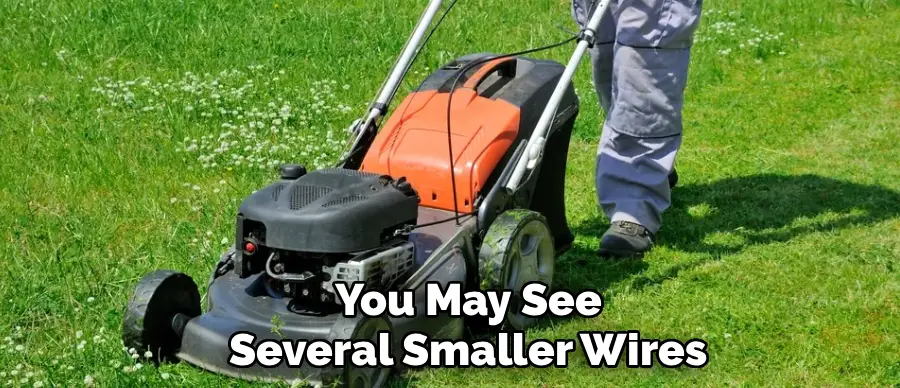
On the solenoid, you may see several smaller wires, but you are interested only in the two large metal posts. As mentioned in Step 2, these are the high-current terminals. One brings power in from the battery; the other sends power out to the starter.
The goal of this entire operation is to connect these two specific posts directly, effectively doing the job that the internal switch of the solenoid has failed to do. Double-check that you are looking at the heavy-duty posts, not the small control wire terminals, which are much thinner and usually located on the side or bottom of the unit.
Step 6: Position the Screwdriver Correctly
Grip your screwdriver firmly by the insulated handle. Do not touch the metal shaft of the screwdriver. If your hand slips onto the metal while you are doing this, you will receive a nasty electrical shock.
Bring the screwdriver down towards the solenoid. You want to position the metal shaft of the screwdriver so that it can touch both large terminals simultaneously. Do not make contact yet; just rehearse the movement to ensure you have enough room to maneuver without your hand hitting the engine block or the hot exhaust muffler.
Step 7: Bridge the Connection (The Jump)
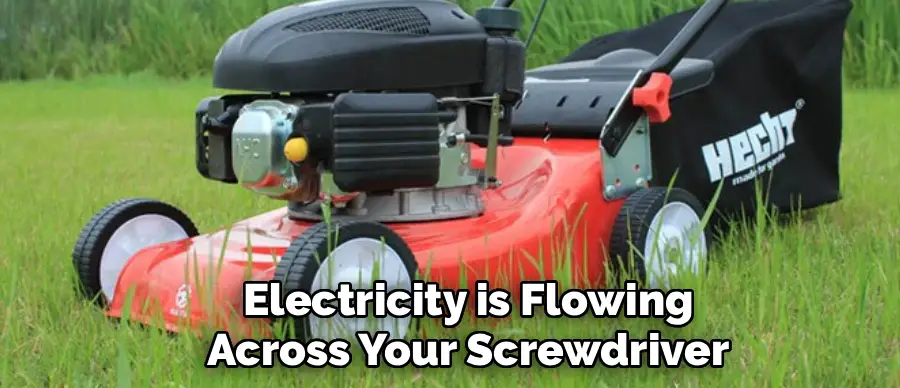
This is the moment of truth. Swiftly and firmly touch the metal shaft of the screwdriver to both large terminals at the same time. You are creating a metal bridge between the two posts.
As you make contact, expect to see sparks. This is completely normal and indicates that electricity is flowing across your screwdriver. Do not be startled and pull away; if you pull away too quickly, the engine won’t have enough momentum to start. Hold the screwdriver firmly against both posts to maintain the connection.
Step 8: Listen for the Engine to Crank
As soon as you bridge the terminals, the starter motor should engage, and you will hear the engine cranking (the chugging sound). It should sound exactly like it does when you turn the key normally.
If the engine cranks but sounds weak or slow, your battery might be too low to start the engine, even with the bypass. However, if it cranks strongly, keep holding the screwdriver in place for a few seconds until the engine catches and starts running on its own fuel power.
Step 9: Remove the Screwdriver Immediately
The second you hear the engine roar to life, pull the screwdriver away from the terminals. Breaking the connection stops the starter motor from spinning.
If you leave the screwdriver there too long after the engine starts, you can damage the starter motor or the flywheel gear because the starter gear will be grinding against a fast-moving engine. Think of this like letting go of a car key once the car has started—you want to disengage the starter immediately.
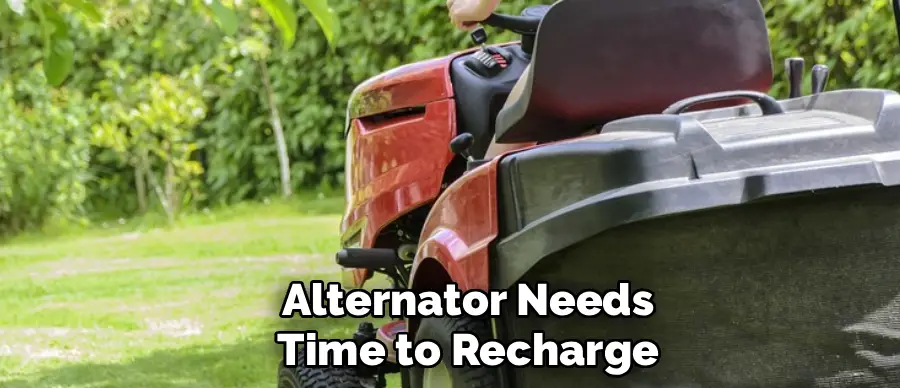
Step 10: Let the Engine Idle and Diagnose
Once the screwdriver is clear and safe, let the mower idle for a few minutes. Do not shut it off immediately, especially if your battery was slightly low; the alternator needs time to recharge the system.
Now that the mower is running, you have confirmed your diagnosis: your starter motor works, and your battery works. The problem lies in the solenoid or the ignition switch. You can now finish mowing your lawn, but remember that you will need to replace that solenoid soon to avoid having to use a screwdriver every time you want to cut the grass.
5 Things You Should Avoid
Safety is paramount when working with electrical currents and gasoline engines. Here are the major pitfalls to avoid.
- Touching the Metal Frame: When bridging the terminals, ensure the screwdriver does not touch the metal frame of the mower. Touching the frame can cause a short circuit, potentially welding the screwdriver to the mower or damaging the battery.
- Using Non-Insulated Tools: Never use a wrench or a screwdriver with a bare metal handle. The voltage used to start a mower is high enough to cause injury. Always use a tool with a thick rubber or plastic grip.
- Ignoring Fuel Leaks: If you smell gas, stop immediately. The sparks generated during this process can easily ignite gasoline vapors. Fix the leak before attempting any electrical work.
- Leaning Over the Engine: Keep your face and loose clothing away from the engine area. If the engine backfires or starts suddenly, being too close can be dangerous.
- Forcing the Starter: If the mower doesn’t start after 5-10 seconds of bridging, stop. Holding the connection too long can overheat the starter motor and melt the cables. Give it a rest before trying again.
Conclusion
Knowing how to jump start lawn mower with screwdriver is a valuable skill that can save your Saturday afternoon from disaster. It is a quick, effective way to bypass a faulty solenoid and get your machine back to work.
By following these ten steps and adhering to safety precautions, you can confidently troubleshoot your mower. Remember, this is a temporary fix—use it to finish the job, but make sure to order that replacement part so your mower starts reliably with the turn of a key next time.
Hopefully, this guide has helped you understand how to jump-start a lawnmower with a screwdriver. Now, let’s take a closer look at some common issues that may cause your mower to not start.
About
Outdoor Fixes is a distinguished figure in the world of Diy design, with a decade of expertise creating innovative and sustainable Diy solutions.
His professional focus lies in merging traditional craftsmanship with modern manufacturing techniques,
fostering designs that are both practical and environmentally conscious. As the author of diy,
outdoorfixes delves into the art and science of outdoorfixes-making, inspiring artisans and industry professionals alike.
Education RMIT University
(Melbourne, Australia) Associate Degree in Design (Outdoor Fixes) Focus on sustainable design, industry-driven projects,
and practical craftsmanship. Gained hands-on experience with traditional and digital manufacturing tools, such as CAD and CNC software.
Nottingham Trent University
(United Kingdom) Bachelor’s in outdoorfixes.com and Product Design (Honors) Specialized in product design with a focus on blending creativity with production
techniques. Participated in industry projects, working with companies like John Lewis and Vitsoe to gain real-world insights.
Publications and Impact
In diy, Outdoor Fixes his insights on indoor design processes, materials, and strategies for efficient production.
His writing bridges the gap between artisan knowledge and modern industry needs, making it a must-read for both budding designers and seasoned professionals.