
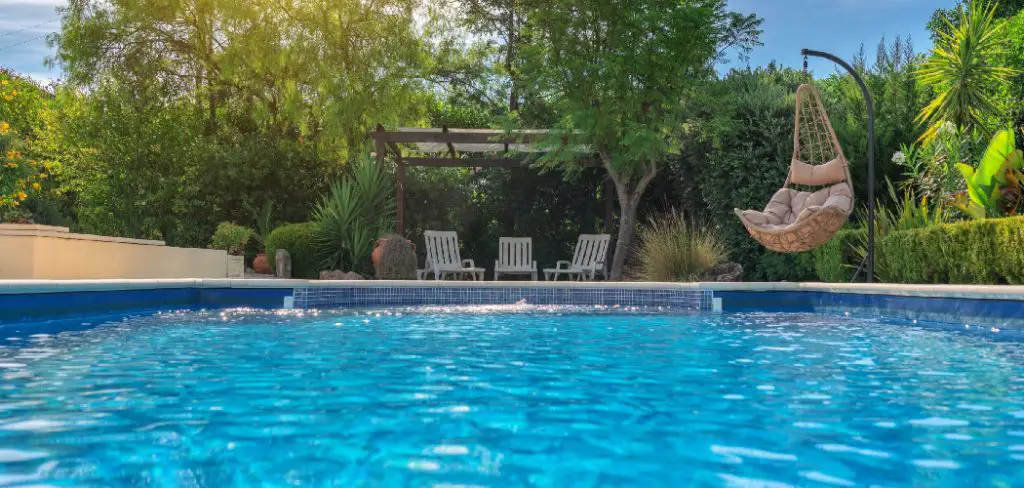
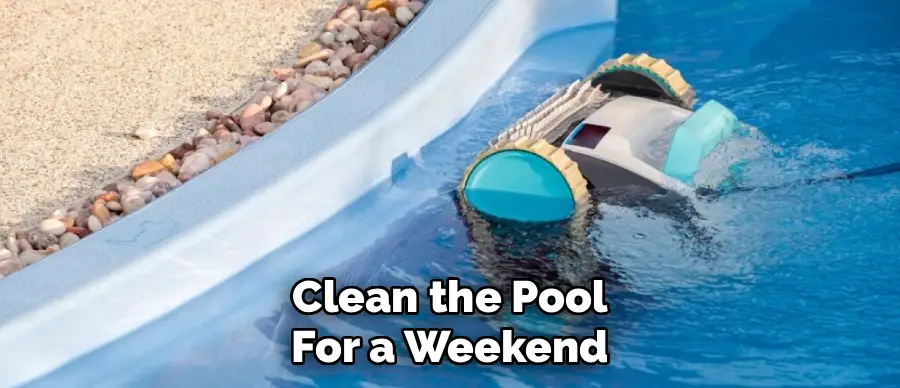
Keeping your Intex pool sparkling clean is essential for ensuring a safe and enjoyable swimming experience for your family throughout the hot summer months, but debris like leaves, dirt, and sand inevitably settles at the bottom, making regular maintenance a crucial part of pool ownership that simply cannot be ignored if you want crystal clear water.
Vacuuming might seem like a daunting chore at first, especially if you are new to owning an above-ground pool, yet mastering the proper technique for vacuuming your Intex pool is actually quite straightforward once you understand the mechanics of your pump system and follow a few logical steps to remove that unsightly sediment effectively.
In this guide on how to vacuum a intex pool, we will cover the necessary steps to keep your pool looking its best.
Tools and Materials You May Need
Before getting started, here are some tools and materials that you may need for vacuuming your Intex pool:
- Intex pool vacuum head attachment
- Telescopic pole (the one that came with your pool should work)
- Vacuum hose (also included with your pool)
- Skimmer net or rake (for removing any large debris before vacuuming)
- Pool brush (optional)
It’s important to note that every Intex pool model may have slightly different parts and attachments. Refer to the instructions manual that came with your specific pool for more information on the exact tools and materials needed.
8 Step-by-step Guidelines on How to Vacuum a Intex Pool:
Step 1: Assemble Your Equipment and Prime the Pump
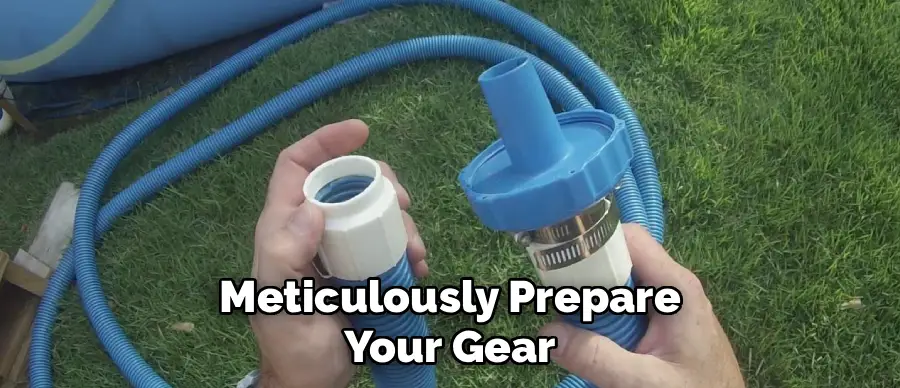
Before you even touch the water, it is absolutely critical that you gather all the necessary components of your vacuum system and inspect them thoroughly to ensure there are no cracks in the hose or damage to the vacuum head, as these issues can significantly reduce suction power and make the job much harder than it needs to be.
You will need to attach the vacuum head securely to the end of your telescopic pole and then connect the swivel cuff end of the vacuum hose to the head, ensuring a tight seal that won’t come loose while you are maneuvering it across the pool floor. Once everything is physically connected, check your pump to ensure the filter cartridge or sand is clean because a dirty filter will drastically reduce water flow and make vacuuming ineffective.
The second part of this preparation involves getting your pump ready for the extra workload it is about to undertake, which means you must ensure the water level is high enough to cover the inlet completely, preventing air from being sucked into the system, which could damage the motor.
You should also take a moment to clear the skimmer basket of any large leaves or floating debris that might clog the line immediately once suction begins, allowing for a smoother start to the process. By taking these few extra minutes to meticulously prepare your gear and your pool’s filtration system, you are setting yourself up for a hassle-free cleaning session rather than a frustrating battle with poor suction and constantly disconnecting hoses.
Step 2: Submerge the Vacuum Head and Hose
Now that your equipment is assembled, carefully lower the vacuum head attached to the telescopic pole into the water, being mindful not to scrape the sides of the liner, and push it all the way to the bottom of the pool while keeping a firm grip on the pole.
The goal here is to get the head flat against the floor so it is ready to work, but the most important part of this step involves removing all the air trapped inside the long vacuum hose, because if air enters your pump intake, it will cause the pump to lose its prime and stop circulating water entirely. You cannot simply throw the hose in; you must feed it into the water slowly and methodically.
To properly purge the air, keep the vacuum head on the pool floor and slowly push the hose down into the water vertically, hand over hand, starting from the vacuum head and working your way back toward the loose end that will eventually connect to the pump. As you push each section of the hose underwater, you will likely see bubbles rising to the surface, which is a good sign indicating that water is displacing the air inside the tube.
Continue this process until you reach the very end of the hose and water begins to flow out of the connector, confirming that the entire line is filled with water and free of airlocks, which is absolutely vital for maintaining strong, consistent suction throughout the entire cleaning process.
Step 3: Connect the Hose to the Filter Pump Inlet
With the hose completely submerged and filled with water, keep the open end underwater to prevent air from re-entering, and locate the inlet connector on the inside wall of your Intex pool where water is normally drawn out to the filter pump. Depending on your specific Intex model, you might need to unscrew the strainer grid that normally protects the inlet or insert a special vacuum adapter or skimmer plate that came with your pool maintenance kit.
It is essential to perform this connection quickly and underwater to maintain the prime you just established in the previous step, ensuring that the transition from static water to active suction is seamless.
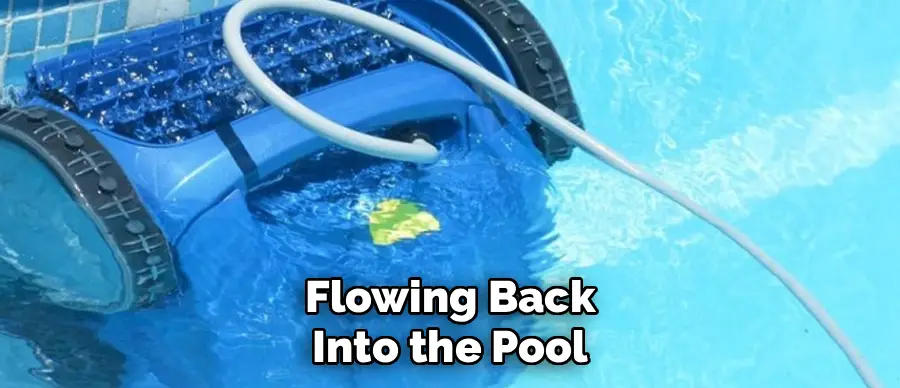
Once you have identified the connection point, firmly press the hose adapter or the hose end itself onto the inlet or into the skimmer plate, creating a secure seal that directs the pump’s suction power entirely through the vacuum hose rather than the general pool water.
As soon as this connection is made, you should immediately notice the suction starting to pull water through the vacuum head at the bottom of the pool; you can often verify this by seeing if the hose stiffens slightly or by checking the return jet to see if water is flowing back into the pool. If the flow seems weak or nonexistent, you may have introduced air into the line during the connection process, in which case you will need to detach the hose and repeat the submersion process to remove the air bubbles before trying to connect it again.
Step 4: Adjust the Filter Settings for Vacuuming
If you are using a standard cartridge filter pump common with smaller Intex pools, this step is relatively simple as the system is always “on,” but you must ensure any air release valves on top of the pump housing are closed tight to maintain maximum pressure.
However, if you are lucky enough to have an Intex sand filter pump, you will need to switch the multi-port valve to the “Filter” setting for light cleaning or the “Waste” setting if the pool is extremely dirty and full of heavy algae or sludge. Using the “Waste” setting is particularly useful for heavy debris because it bypasses the sand filter and pumps the dirty water directly out of the drain port, preventing your filter from getting clogged instantly, though it does lower the water level rapidly.
For those using the standard filtration setting, keep a close eye on the pressure gauge or the flow rate returning to the pool, because as you vacuum up dirt and debris, the filter will naturally begin to clog and the pressure will rise while the flow decreases. If you notice a significant drop in suction power midway through the job, you will likely need to pause your vacuuming to rinse out the cartridge or backwash the sand filter to restore proper flow rates.
Understanding how to manipulate your specific pump settings allows you to customize the vacuuming process to the level of dirt in your pool, ensuring you are cleaning efficiently without putting unnecessary strain on your pump motor or ruining your filter media with excessive heavy muck.
Step 5: Vacuum the Pool Floor in Slow Motion
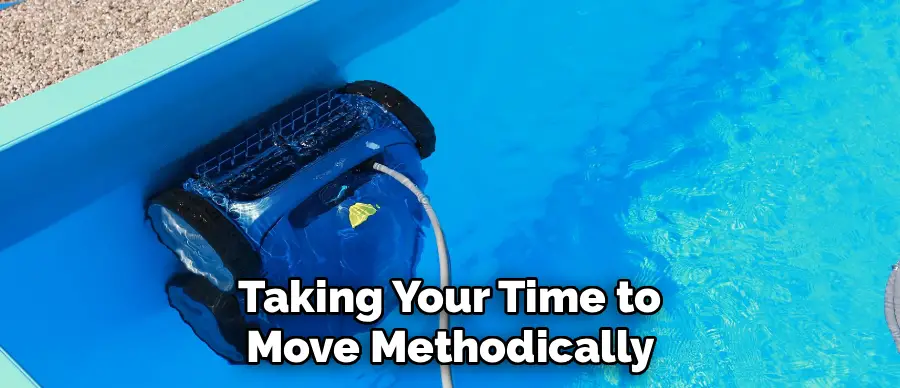
Now comes the actual cleaning part, and the golden rule here is patience; you must move the vacuum head slowly and deliberately across the bottom of the pool to ensure you are actually picking up the dirt rather than just stirring it up into clouds that will settle later.
Visualize the pool floor as a grid and work in overlapping rows, moving the vacuum head from one end of the pool to the other in long, straight lines, overlapping each pass by about half the width of the vacuum head to ensure you don’t miss any spots. If you move too fast, the movement of the vacuum head will create currents that kick the dust and debris up into the water column, where the vacuum cannot catch it, forcing you to wait for it to settle again before you can finish the job.
As you navigate the pool floor, pay special attention to the seams and edges where the wall meets the floor, as these are the areas where dirt tends to accumulate the most and can be harder to reach with a quick pass. You may need to change the angle of your approach or use the brush bristles on the vacuum head to gently scrub stubborn dirt loose so it can be sucked up by the hose.
Remember that vacuuming is not a race; taking your time to move methodically ensures that you capture all the sediment on the first pass, leaving you with a pristine pool floor and saving you from having to repeat the entire process the next day because you rushed through it and missed half the debris.
Step 6: Monitor Water Levels and Filter Performance
Throughout the vacuuming process, it is easy to get “in the zone” and forget about the mechanics of the pool, but you must periodically check the water level, especially if you are vacuuming to “Waste” or if you splash a lot of water out during the setup.
If the water level drops below the skimmer or the inlet suction port, the pump will start sucking in air, which can cause the pump to lose prime, overheat, and potentially suffer permanent damage if left running dry.
It is often a good idea to have a garden hose running into the pool to top off the water level while you vacuum, ensuring that the water line remains well above the intake ports regardless of how much water is lost during the cleaning process.
In addition to water levels, you must keep a vigilant eye on the return jet flow, because as the vacuum sucks up dirt, leaves, and bugs, your filter cartridge or sand bed is rapidly filling up with that debris. A noticeable decrease in the strength of the water returning to the pool is a clear indicator that the filter is clogged and suction at the vacuum head is diminishing, making your efforts less effective.
When this happens, stop vacuuming immediately, turn off the pump, and clean the cartridge or backwash the sand filter before resuming; trying to push through with a clogged filter is a waste of time and energy as it won’t pick up debris effectively and puts tremendous strain on the pump motor.
Step 7: Clean Up and Store Equipment
Once you have successfully vacuumed the entire pool floor and the water is looking clear, carefully disconnect the vacuum hose from the inlet or skimmer plate while keeping the end underwater for a moment to avoid a sudden rush of air into the system if the pump is still running.
Pull the hose and vacuum head out of the pool, allowing all the water inside the hose to drain back into the pool or onto the lawn, depending on how dirty it is and your preference for water conservation. It is important to rinse the vacuum head, hose, and telescopic pole with fresh water from a garden hose to remove any chlorinated pool water or chemical residue that could degrade the plastic materials over time if left to dry in the sun.
Coil the vacuum hose loosely to prevent kinks and store it in a shaded area away from direct sunlight, as UV rays can make the plastic brittle and prone to cracking, which would ruin your suction power for the next cleaning session. Store the telescopic pole and vacuum head in a dry place where they won’t be tripped over or damaged.
Taking care of your equipment after the job is just as important as the preparation, ensuring that your tools last for many seasons and are ready to go the next time your pool needs a touch-up. Proper storage prevents the frustration of finding a cracked hose or a broken handle right when you are ready to clean the pool for a weekend party.
Step 8: Final Chemical Check and Pump Run
Vacuuming the pool often disturbs the water chemistry because you are removing debris, potentially adding fresh water, and stirring up the water column, so the final step is always to test and balance your water.
Use your test strips or liquid test kit to check the pH, alkalinity, and chlorine levels, adjusting them as necessary to bring the water back into the ideal range for swimming. Adding a little extra shock or chlorine at this stage can help sanitize any minute particles that were stirred up but not filtered out, ensuring the water remains crystal clear and safe.
Finally, let the filter pump run for several hours after you finish vacuuming to circulate the water and catch any fine floating particles that were kicked up during the cleaning process but didn’t get sucked into the vacuum. This circulation period helps distribute any chemicals you just added and polishes the water to a high shine. By following this last step of chemical balancing and extended filtration, you ensure that your hard work vacuuming pays off with water that isn’t just free of debris on the bottom, but is also chemically balanced, sanitary, and invitingly clear for the next swim.
Following these steps on how to vacuum a intex pool will not only keep your pool clean but also extend the life of your filter and pump, saving you time and money in the long run. It is important to regularly vacuum and maintain your pool to prevent any potential issues such as algae growth or cloudy water.
Common Mistakes to Avoid
One of the most frequent errors pool owners make is moving the vacuum head too quickly, which stirs up debris rather than removing it. Another common mistake is failing to remove all air from the hose before connecting it, leading to loss of pump prime.
Many people also neglect to check the filter during vacuuming, not realizing that a clogged filter kills suction power. Finally, forgetting to top up water levels can damage the pump if air gets sucked into the intake.
Frequently Asked Questions
Q1: How Often Should I Vacuum My Intex Pool?
You should aim to vacuum your Intex pool at least once a week during the active swimming season to prevent algae growth and staining on the liner floor. However, if your pool is located under trees or in a windy area where debris accumulates quickly, you may need to vacuum more frequently, perhaps twice a week or after any major storm. Regular vacuuming is much easier than trying to clean a neglected pool that has turned green.
Q2: Why Is My Vacuum Losing Suction Power?
Loss of suction is usually caused by air trapped in the vacuum hose, a clogged filter cartridge or sand bed, or a blockage in the hose itself from large debris like leaves. Check that the hose is completely full of water, clean or backwash your filter immediately, and inspect the hose and intake for any obstructions. Ensuring a tight seal at the connection point to the pump is also critical for maintaining pressure.
Q3: Can I Vacuum Algae With A Standard Filter?
While you can vacuum dead algae with a standard filter, live algae can quickly clog a cartridge or pass right through sand filters back into the pool. If you are dealing with a significant algae bloom, it is best to kill the algae with shock and algaecide first, letting it settle to the bottom. Then, vacuum to “Waste” if your pump has that setting, bypassing the filter entirely to remove the algae permanently from the pool.
Q4: Do I Need To Get In The Pool To Vacuum?
No, you typically do not need to get into the pool to vacuum if you have a telescopic pole that is long enough to reach the center of the pool from the sides. Standing outside the pool allows you to see the debris on the floor better without the ripples caused by your own movement in the water. However, for very large Intex pools, getting in might be necessary to reach the very center, but try to move slowly to avoid stirring up the dirt.
Conclusion
Proper pool maintenance is essential to ensure clean, safe water for swimming and to extend the life of your pool. Regularly skimming, vacuuming, and cleaning the pool not only improves its appearance but also helps prevent the buildup of harmful bacteria and debris.
With the right tools, techniques, and a consistent cleaning schedule, maintaining your pool can be a straightforward and rewarding process. Always remember to follow recommended guidelines for your specific pool type to achieve the best results and keep your swimming experience enjoyable. Thanks for reading this guide on how to vacuum a intex pool.
About
Outdoor Fixes is a distinguished figure in the world of Diy design, with a decade of expertise creating innovative and sustainable Diy solutions.
His professional focus lies in merging traditional craftsmanship with modern manufacturing techniques,
fostering designs that are both practical and environmentally conscious. As the author of diy,
outdoorfixes delves into the art and science of outdoorfixes-making, inspiring artisans and industry professionals alike.
Education RMIT University
(Melbourne, Australia) Associate Degree in Design (Outdoor Fixes) Focus on sustainable design, industry-driven projects,
and practical craftsmanship. Gained hands-on experience with traditional and digital manufacturing tools, such as CAD and CNC software.
Nottingham Trent University
(United Kingdom) Bachelor’s in outdoorfixes.com and Product Design (Honors) Specialized in product design with a focus on blending creativity with production
techniques. Participated in industry projects, working with companies like John Lewis and Vitsoe to gain real-world insights.
Publications and Impact
In diy, Outdoor Fixes his insights on indoor design processes, materials, and strategies for efficient production.
His writing bridges the gap between artisan knowledge and modern industry needs, making it a must-read for both budding designers and seasoned professionals.