
A healthy, green lawn often hides a sneaky problem beneath its surface. Over time, a tangled layer of dead grass, roots, and debris builds up between the soil and the living blades. This layer, called thatch, can block water, air, and nutrients from reaching the roots. When that happens, even the most carefully watered lawn starts to look tired and patchy. Verticutting is the simple fix that breaks through this barrier and brings your grass back to life.
Learning how to verticut your lawn is easier than you might think, and you do not need to be a landscaping pro to do it well. With the right timing, a few basic tools, and a little patience, you can refresh your turf and encourage thicker, stronger growth. In this guide, we will walk through the entire process step by step, answer your most common questions, and give you the confidence to tackle the job yourself. Let us dig in and help your lawn breathe again.
Why Verticutting Your Lawn Matters
Verticutting does more than tidy up your yard. It slices through built-up thatch and allows water, oxygen, and fertilizer to reach the roots where they do the most good. When roots feed properly, grass grows denser, greener, and far more resistant to drought, disease, and weeds.
There are real, measurable rewards too. A freshly verticut lawn absorbs rain instead of letting it run off, which saves you money on watering. It also creates the perfect seedbed if you plan to overseed, since new seeds make direct contact with the soil. Think of verticutting as a deep reset for your turf, clearing away the old so the new can thrive. A little effort now pays off with a lawn that looks better all season long.
Step-by-Step Guide to How To Verticut Your Lawn
Step 1: Check Your Lawn for Thatch Buildup
Before you start, take a moment to inspect your turf. Dig out a small wedge of grass about two inches deep and look at the brown spongy layer sitting above the soil. If that layer is thicker than half an inch, your lawn will benefit from verticutting. Knowing how to verticut your lawn begins with this simple check, because it tells you whether the job is truly needed.
Push your fingers into the grass and feel for a springy, mat-like texture. A firm, bouncy feeling usually means heavy thatch. Spotting the problem early saves you time and helps you plan the rest of the process with confidence.

Step 2: Pick the Right Season
Timing matters more than most beginners expect. The best moment to verticut depends on your grass type. Cool-season grasses like fescue and ryegrass respond best in early fall or spring, when temperatures are mild and growth is steady. Warm-season grasses such as Bermuda and zoysia prefer late spring through early summer, right as they enter their active growth phase.
Avoid working during extreme heat, drought, or dormancy, since stressed grass struggles to recover. Choosing the right window gives your lawn the energy it needs to heal quickly and fill in any bare spots. When the season is right, the results come faster and stronger.
Step 3: Mow and Water in Advance
A little prep work makes the whole job smoother. Mow your lawn slightly shorter than usual a day or two before you begin, cutting roughly one-third off the normal height. Shorter grass lets the verticutting blades reach the thatch layer without snagging on tall blades.

Watering also plays a key role. Lightly moisten the soil a day ahead so it is soft but not soggy. Damp ground allows the blades to slice cleanly, while dry, hard soil can dull equipment and leave uneven results. Skip heavy watering right before you start, since muddy conditions clog the machine and make cleanup far messier than it needs to be.
Step 4: Choose and Set Up Your Equipment
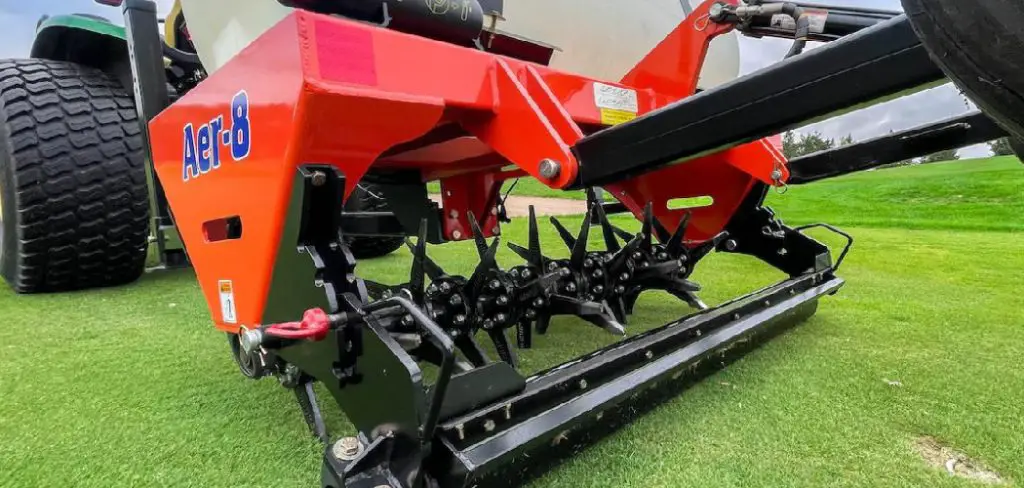
You have a few solid options depending on your lawn size and budget. A dedicated verticutter or dethatcher works best for large areas, and you can rent one from most garden centers. For smaller yards, a manual thatch rake or a tow-behind attachment gets the job done with less expense.
Once you have learned how to verticut your lawn properly, setting blade depth becomes the most important detail. Adjust the blades so they reach the thatch and lightly graze the soil surface without digging deep into the roots. Start with a shallow setting and lower it gradually until you see clean, even cutting across the turf.
Step 5: Work in Straight, Overlapping Passes
Now comes the main event. Guide your machine across the lawn in steady, straight lines, much like mowing. Keep a consistent walking pace so the blades cut evenly and avoid tearing chunks of healthy grass. Slow and controlled always beats fast and rushed.

When you finish one direction, make a second pass at a slight angle to the first, overlapping each row a little. This crisscross pattern lifts thatch more thoroughly and prevents missed strips. Pay extra attention around edges, slopes, and tight corners where buildup tends to hide. Working methodically ensures every part of your lawn gets the same fresh, even treatment.
Step 6: Rake and Remove the Debris
Verticutting pulls up a surprising amount of loosened thatch, dead grass, and soil bits. Leaving this debris on top will smother new growth, so cleanup is not optional. Use a sturdy leaf rake or a lawn sweeper to gather everything into manageable piles.
Take your time here and collect as much material as you can. You can compost the healthy clippings or bag them for disposal, depending on local rules. Once the surface is clear, walk across the lawn and look for any spots you missed. A clean, debris-free surface sets the stage for water, air, and nutrients to flow freely down to the roots.
Step 7: Feed, Seed, and Water for Recovery
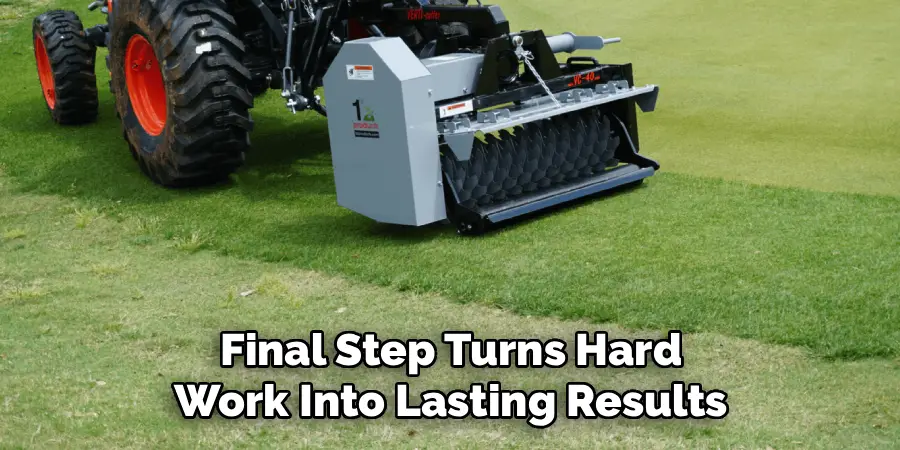
The final step turns hard work into lasting results. With the thatch gone, your lawn is primed to absorb everything you give it. Spread a balanced fertilizer to fuel fresh growth, and if you have thin or bare patches, overseed now while the soil is exposed and receptive.
Follow up with a gentle, thorough watering to settle the seed and activate the fertilizer. Keep the lawn consistently moist for the next couple of weeks as recovery begins. Within days you should notice your grass perking up, and over the following weeks it will fill in thicker and greener than before. Patience during this stage pays off beautifully.
Frequently Asked Questions
How Often Should I Verticut My Lawn?
For most lawns, once a year is plenty to keep thatch under control. If your grass grows aggressively or builds up thatch quickly, you might do it twice a year during the active growing seasons. Always check the thatch layer first rather than following a strict schedule. Over-verticutting can stress healthy turf, so let your lawn’s actual condition guide your timing.
Is Verticutting the Same as Dethatching?
They are closely related but not identical. Dethatching focuses mainly on pulling up the loose thatch layer sitting near the surface. Verticutting cuts slightly deeper with vertical blades, slicing into the soil to improve seed contact and stimulate growth. Many machines handle both tasks. For most home lawns, the difference is small, and either approach will leave your grass healthier and better able to breathe.
Will Verticutting Hurt My Grass?
When done correctly, verticutting helps far more than it harms. The process may look rough at first, since it lifts debris and exposes soil, but healthy grass bounces back quickly. Trouble only arises if you set blades too deep, work during drought, or skip the recovery care afterward. Stick to the right season, use a light touch, and give your lawn proper food and water to recover.
Can I Verticut a New Lawn?
It is best to wait before verticutting freshly established turf. Young grass needs time to develop strong roots, usually at least a full growing season or two. Working too soon can tear up tender seedlings and undo your hard work. Once your lawn is well rooted and mature enough to handle mowing without stress, it will be ready for its first verticutting treatment.
What Should I Do If My Lawn Looks Worse Afterward?
A rough, thin appearance right after verticutting is completely normal. Your lawn has just been through a deep cleanup, so give it time. Keep the soil moist, avoid heavy foot traffic, and let the fertilizer and any new seed do their job. Within two to three weeks you should see steady improvement. If bare spots linger, a light overseeding and continued watering will usually fill them in.
Conclusion
A thick layer of thatch can quietly hold your lawn back, but you now have everything you need to fix it. By checking for buildup, choosing the right season, prepping the soil, and working in careful overlapping passes, you give your grass the fresh start it deserves. The cleanup, feeding, and watering that follow turn a single afternoon of effort into weeks of lush, healthy growth. Each step builds on the last, and none of them require expert-level skill.
The real takeaway is that knowing how to verticut your lawn puts you in full control of your turf’s health. You do not have to settle for tired, patchy grass when a simple seasonal refresh can bring it roaring back. Grab your equipment, pick your weekend, and put this guide into action. Your greener, thicker, more resilient lawn is waiting, and the best time to start is now.

About
Outdoor Fixes is a distinguished figure in the world of Diy design, with a decade of expertise creating innovative and sustainable Diy solutions.
His professional focus lies in merging traditional craftsmanship with modern manufacturing techniques,
fostering designs that are both practical and environmentally conscious. As the author of diy,
outdoorfixes delves into the art and science of outdoorfixes-making, inspiring artisans and industry professionals alike.
Education RMIT University
(Melbourne, Australia) Associate Degree in Design (Outdoor Fixes) Focus on sustainable design, industry-driven projects,
and practical craftsmanship. Gained hands-on experience with traditional and digital manufacturing tools, such as CAD and CNC software.
Nottingham Trent University
(United Kingdom) Bachelor’s in outdoorfixes.com and Product Design (Honors) Specialized in product design with a focus on blending creativity with production
techniques. Participated in industry projects, working with companies like John Lewis and Vitsoe to gain real-world insights.
Publications and Impact
In diy, Outdoor Fixes his insights on indoor design processes, materials, and strategies for efficient production.
His writing bridges the gap between artisan knowledge and modern industry needs, making it a must-read for both budding designers and seasoned professionals.