
Adding a ramp to your porch instantly makes your home more welcoming and accessible for everyone. Whether you are accommodating a family member with mobility challenges, planning for your own future needs, or simply want an easier way to move heavy items in and out of the house, a well-constructed ramp provides a practical solution.

Building a porch ramp requires careful planning, basic carpentry skills, and a strict commitment to safety standards. If you feel comfortable handling power tools and measuring accurately, tackling this project yourself can save you a significant amount of money while giving you complete control over the final product.
This comprehensive guide on how to build a porch ramp will walk you through the entire process, from understanding the benefits to putting the final safety touches on your new ramp.
What are the Benefits?
Investing the time and effort into building a porch ramp yields numerous long-term advantages. The most obvious benefit is enhanced accessibility. A ramp allows individuals using wheelchairs, walkers, or scooters to enter and exit the home safely and independently. This independence drastically improves quality of life and restores a sense of freedom.
Beyond personal mobility, a porch ramp adds considerable convenience to daily tasks. Moving heavy furniture, rolling in large appliances, or simply bringing in a heavy load of groceries becomes much easier when you do not have to navigate stairs. Furthermore, a professionally built, aesthetically pleasing ramp can actually increase your property value. Many homebuyers view accessible features as a major premium, especially as the population ages and multi-generational living becomes more common. Finally, building the ramp yourself allows you to customize the materials and design to perfectly match your home’s exterior architecture.
What Will You Need?
Before you break ground, you must gather all the necessary tools and materials. Having everything on hand prevents frustrating delays and ensures your building process flows smoothly.
Materials:
- Treated lumber for posts (typically 4x4s)
- Treated lumber for joists and framing (2x6s or 2x8s)
- Decking material (treated plywood, traditional wood decking, or composite boards)
- Concrete mix for setting posts
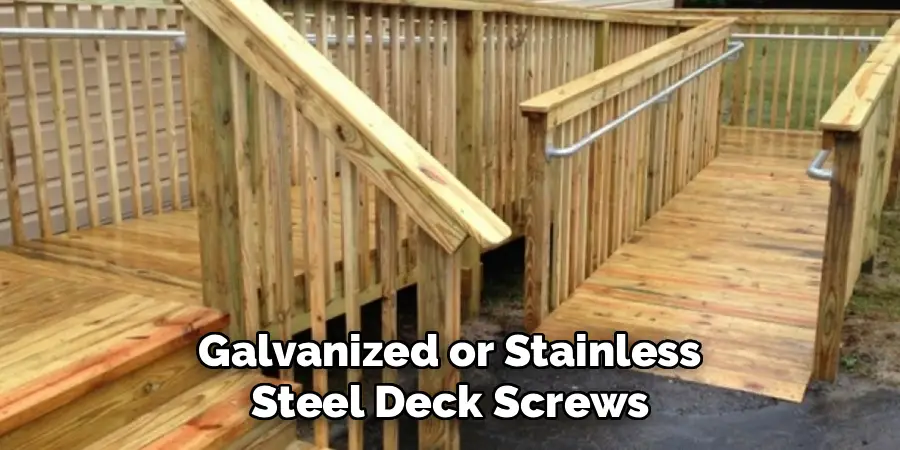
- Galvanized or stainless steel deck screws and framing nails
- Joist hangers and metal brackets
- Anti-slip paint, tape, or grip strips
Tools:
- Tape measure and chalk line
- A carpenter’s square and a reliable spirit level (preferably 4-foot)
- Post hole digger or auger
- Circular saw and miter saw
- Power drill and impact driver
- Hammer and wrench set
- Safety gear (gloves, safety glasses, and hearing protection)
10 Easy Steps on How to Build a Porch Ramp
Step 1: Measure and Determine the Slope
The most critical part of building a safe porch ramp is establishing the correct slope. The Americans with Disabilities Act (ADA) recommends a 1:12 slope ratio for maximum safety and ease of use. This means for every one inch of vertical rise, you need twelve inches (one foot) of ramp length. Measure the vertical distance from the ground to the top of your porch. If your porch is 24 inches off the ground, you will need exactly 24 feet of ramp length. Take your time measuring the surrounding yard space to ensure you actually have enough room to accommodate this length without running into property lines or obstacles. Accurate measurements at this stage prevent disastrous structural mistakes later on.
Step 2: Design the Layout and Landings
Once you know the required length, sketch a detailed layout of the ramp. A straight ramp is the easiest to build, but if your yard lacks the necessary straight-line space, you will need to design an L-shape or U-shape configuration. Whenever a ramp changes direction or if the total length exceeds 30 feet, you must include a level landing area. These landings give users a safe place to rest and safely maneuver their mobility devices. The ADA requires landings to be at least 60 inches by 60 inches. Map out the exact locations of the ramp sections and landings in your yard using wooden stakes and string to visualize the footprint.
Step 3: Secure Necessary Building Permits
Never skip checking with your local building authority before starting construction. Different municipalities have specific building codes regarding ramp widths, slopes, handrail heights, and property setbacks. Visit your local permit office with your layout sketch and material list. They will review your plan to ensure it meets both local safety standards and neighborhood zoning rules. Securing a permit protects you from fines and guarantees that your structure will be legally compliant, which is especially important if you plan to sell your home in the future.
Step 4: Dig the Post Holes
With your layout marked and permits in hand, it is time to break ground. Use a post hole digger or power auger to dig holes for your structural support posts. Space the posts no more than six feet apart to ensure maximum structural integrity. You must dig the holes deep enough to reach below the local frost line; otherwise, freezing and thawing ground will cause your ramp to heave and buckle over time. Generally, this means digging holes that are at least 24 to 36 inches deep, though your local building code will specify the exact depth required for your area.

Step 5: Set and Plumb the Support Posts
Place your 4×4 treated lumber posts into the freshly dug holes. Pour a few inches of gravel into the bottom of each hole first to promote drainage and prevent the wood from rotting. Next, mix your fast-setting concrete according to the manufacturer’s instructions and pour it around the posts. Before the concrete begins to harden, use a large carpenter’s level to ensure each post is perfectly plumb (straight up and down). Brace the posts with scrap wood and leave them undisturbed for at least 24 to 48 hours to allow the concrete to cure completely.
Step 6: Install the Outer Framing
After the concrete sets, you can begin framing. Measure and mark the posts at the proper slope height. Attach your outer 2×6 or 2×8 stringers to the posts using heavy-duty carriage bolts, rather than standard screws, for maximum load-bearing strength. This outer frame dictates the exact slope of your ramp, so check your angles frequently with a level and tape measure. Once the outer frame is securely bolted in place, you can use a circular saw to trim off the excess tops of the posts so they sit flush with, or at a designated height above, the frame.
Step 7: Attach the Inner Joists
The inner joists provide the necessary support for your decking surface. Install joist hangers along the inside of your frame at 16-inch intervals. Cut your inner joist boards to fit snugly between the outer stringers and drop them into the hangers. Secure them tightly using galvanized joist nails. Spacing the joists 16 inches apart ensures the ramp surface will not bow, sag, or bounce when subjected to heavy weight, such as a motorized wheelchair. Double-check that the tops of all joists sit perfectly flush with the outer frame to guarantee a smooth, level walking surface.
Step 8: Lay the Decking Surface
Now you can install the actual surface of the ramp. Begin laying your decking boards horizontally across the joists, starting from the porch and working your way down to the ground. Leave a small gap (about 1/8 inch) between each board to allow for water drainage and natural wood expansion. Fasten the boards using two deck screws at every point where the decking crosses a joist. If you are using plywood instead of planks, make sure to use thick, treated exterior-grade plywood and seal the edges properly to prevent moisture damage and warping.
Step 9: Build and Attach the Handrails
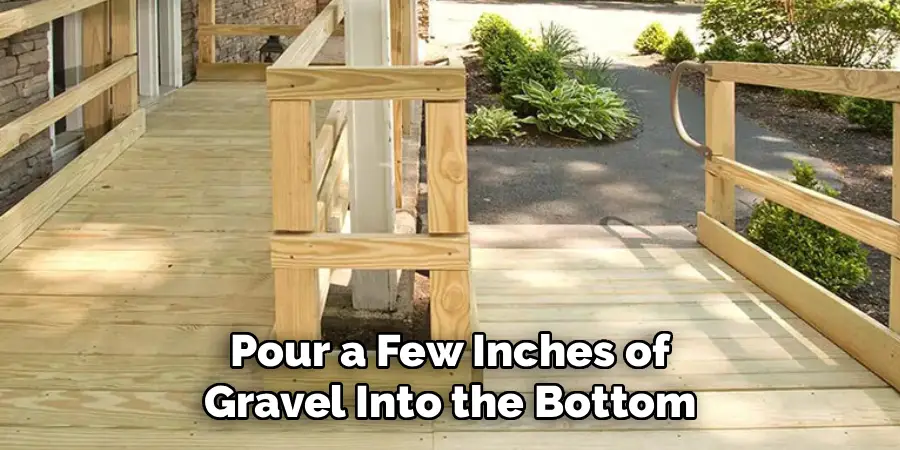
Handrails are a non-negotiable safety feature for any ramp. ADA guidelines dictate that handrails should sit between 34 and 38 inches above the ramp surface. Attach vertical railing posts to the outside frame, spacing them securely. Next, attach a smooth, continuous top rail that is easy to grip. Make sure the ends of the handrails extend slightly past the top and bottom of the ramp to provide support as users transition on and off the incline. Ensure the handrails are sturdy enough to support heavy pulling and leaning without wobbling.
Step 10: Apply Edge Protection and Non-Slip Finishes
The final step is to secure the ramp against slips and falls. Install a two-inch curb or edge barrier along the bottom edges of the ramp to prevent wheelchair wheels or walking canes from slipping off the sides. Because untreated wood and composite materials become incredibly slick when wet, you must apply a high-traction surface. You can use specialized non-slip textured paint, install heavy-duty grip tape, or screw down commercial rubber traction mats. Test the surface to ensure it provides excellent grip in all weather conditions.
5 Things You Should Avoid
- Ignoring the 1:12 Slope Rule: A ramp that is too steep is dangerous and physically exhausting to climb. Never try to squeeze a shorter ramp into a small space by increasing the slope angle.
- Skipping Building Permits: Bypassing local building codes can result in heavy fines, forced tear-downs, and major liability issues if someone gets hurt on your property.
- Using Indoor or Untreated Wood: Always use pressure-treated lumber and exterior-grade fasteners. Standard wood will quickly rot, warp, and collapse when exposed to rain and soil moisture.
- Omitting Edge Protection: Failing to install curbs or edge barriers along the bottom sides of the ramp creates a severe hazard, allowing wheels to easily roll off the edge.
- Neglecting a Non-Slip Surface: A perfectly built ramp is useless if it turns into a slide during the rain. Never leave a smooth wood surface without applying proper anti-slip materials.

Conclusion
How to build a porch ramp is a highly rewarding project that combines thoughtful planning with practical carpentry.
By taking the time to measure accurately, adhering to the 1:12 slope rule, and prioritizing safety features like sturdy handrails and non-slip surfaces, you can create a durable structure that serves your family for years. Always prioritize patience over speed, double-check your local building codes, and never compromise on the quality of your materials.
With the right tools and this step-by-step approach, you are well on your way to making your home a safer, more accessible space for everyone.

About
Outdoor Fixes is a distinguished figure in the world of Diy design, with a decade of expertise creating innovative and sustainable Diy solutions.
His professional focus lies in merging traditional craftsmanship with modern manufacturing techniques,
fostering designs that are both practical and environmentally conscious. As the author of diy,
outdoorfixes delves into the art and science of outdoorfixes-making, inspiring artisans and industry professionals alike.
Education RMIT University
(Melbourne, Australia) Associate Degree in Design (Outdoor Fixes) Focus on sustainable design, industry-driven projects,
and practical craftsmanship. Gained hands-on experience with traditional and digital manufacturing tools, such as CAD and CNC software.
Nottingham Trent University
(United Kingdom) Bachelor’s in outdoorfixes.com and Product Design (Honors) Specialized in product design with a focus on blending creativity with production
techniques. Participated in industry projects, working with companies like John Lewis and Vitsoe to gain real-world insights.
Publications and Impact
In diy, Outdoor Fixes his insights on indoor design processes, materials, and strategies for efficient production.
His writing bridges the gap between artisan knowledge and modern industry needs, making it a must-read for both budding designers and seasoned professionals.