
Building a gazebo roof is a rewarding project that transforms a simple outdoor structure into a stunning backyard centerpiece.
A well-constructed roof provides essential shelter, structural integrity, and architectural beauty. Whether you are upgrading an existing frame or building a brand-new outdoor oasis, understanding the mechanics of roof construction is critical. Structural integrity and safety must remain at the forefront of your planning and execution.

This comprehensive guide on how to gazebo roof will walk you through everything you need to know to build a sturdy, reliable, and beautiful gazebo roof that will withstand the elements for years to come.
Benefits of a Gazebo Roof
Adding a solid roof to your gazebo offers numerous advantages that go far beyond simple aesthetics. First and foremost, a permanent roof provides unparalleled protection from the weather. It blocks harmful ultraviolet rays during the peak of summer, keeping the space underneath cool and safe for your family. During rainy seasons, a well-pitched roof sheds water efficiently, allowing you to enjoy your outdoor space regardless of the forecast.
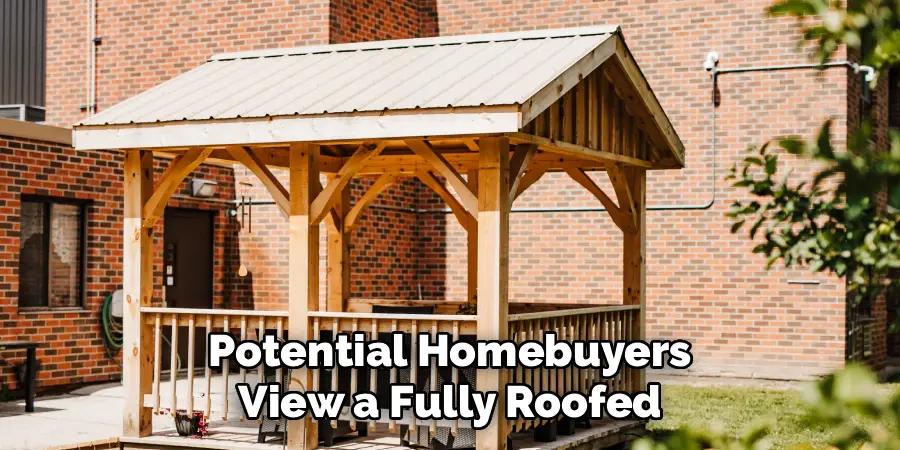
Beyond weather protection, a solid roof dramatically increases the structural integrity of the entire gazebo. The roof frame ties the vertical posts together, distributing weight evenly and preventing the structure from shifting during high winds. Additionally, a permanent roof increases your overall property value. Potential homebuyers view a fully roofed, permanent gazebo as a premium outdoor living space. Finally, a solid roof allows you to safely install outdoor lighting and ceiling fans, extending the usability of your structure well into the night.
What Will You Need?
Before you begin construction, gathering all the necessary tools and materials is essential for a smooth workflow. Always prioritize high-quality, weather-resistant materials to ensure long-term structural integrity.
Materials:
- Pressure-treated lumber for rafters and fascia (typically 2×4 or 2×6 boards)
- Plywood or oriented strand board (OSB) for roof decking (minimum 1/2-inch thickness)
- A central hub or king post (usually a solid 4×4 or 6×6 block)
- Galvanized deck screws and framing nails
- Hurricane ties and rafter clips
- Roofing underlayment (felt paper or synthetic)
- Drip edge flashing
- Asphalt shingles or metal roofing panels
- Roofing nails
- Exterior-grade wood glue or construction adhesive
Tools:
- Miter saw and circular saw
- Power drill and impact driver
- Framing square and speed square
- Measuring tape and chalk line
- Ladders and scaffolding
- Safety gear (hard hat, safety glasses, non-slip gloves, and fall protection harness)
- Pneumatic nail gun (optional but highly recommended)
10 Easy Steps on How to Gazebo Roof
Building the roof requires precision, patience, and a strict adherence to safety protocols. These ten steps will guide you through the process, ensuring your gazebo roof is structurally sound and visually appealing.
Step 1: Measure and Plan Your Pitch
Before cutting any wood, you must determine the pitch, or slope, of your roof. The pitch dictates how effectively your roof will shed water and snow. For most gazebos, a pitch of 4:12 (rising four inches for every twelve inches of horizontal run) is standard and provides excellent drainage. Use your framing square to measure the exact distance between your support posts. Double-check all measurements to ensure the gazebo frame is perfectly square. Accurate planning prevents structural imbalances later. Sketch out your rafter layout, noting the exact length of the main rafters and the overhang you desire for the eaves.
Step 2: Prepare the Central King Post
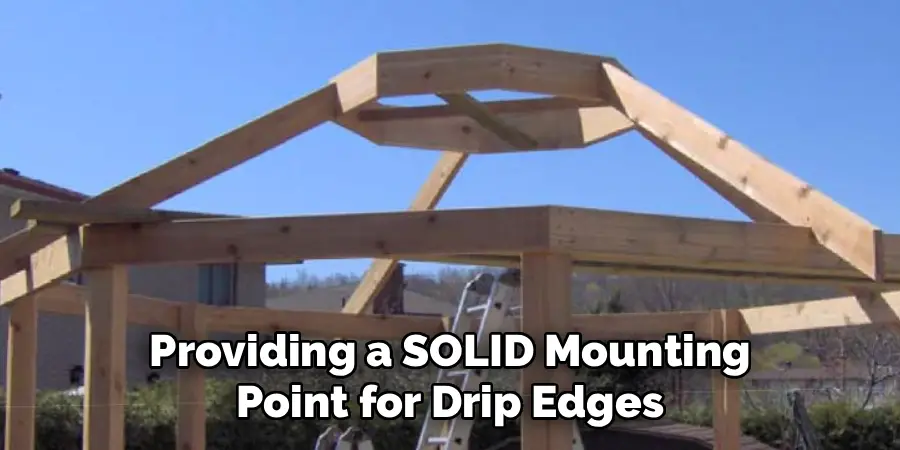
The central hub, also known as the king post or compression block, is the structural heart of your gazebo roof. All the main rafters will connect to this central point. Cut a sturdy block of wood, typically a 6×6 post, to serve as this hub. Depending on the shape of your gazebo (square, hexagonal, or octagonal), you will need to cut flat facets on the sides of the block so the rafters can sit flush against it. Measure and mark the angles carefully before cutting. A secure, perfectly shaped central hub guarantees that the tension and weight of the roof are distributed evenly across all the support posts.
Step 3: Cut the Main Rafters
With your measurements verified, begin cutting your main rafters. These are the primary structural beams that run from the corners of your gazebo up to the central king post. Using a miter saw, cut the top angle (the plumb cut) so it sits perfectly flush against the flat sides of your king post. Next, cut the birdsmouth joint near the bottom of the rafter. The birdsmouth is a triangular notch that allows the rafter to sit flat and securely on top of the horizontal top plate of your gazebo frame. Cut one rafter first and test its fit; if it is perfect, use it as a template for the remaining main rafters.

Step 4: Install the Main Rafters
This step requires at least two people for safety and accuracy. Position scaffolding inside the gazebo to safely support the central king post at the correct height. Lift the first main rafter into place, securing it to the top plate with galvanized screws and c. Immediately install the opposite main rafter to balance the weight and stabilize the central hub. Continue this process, working your way around the structure until all the primary corner rafters are securely fastened to both the outer top plate and the central king post.
Step 5: Secure with Hurricane Ties
Do not rely on screws and nails alone to hold your rafters to the top plate. High winds create massive upward pressure on outdoor structures, which can lift a poorly secured roof right off its frame. Install metal hurricane ties or rafter clips at every point where a rafter meets the top plate. Drive structural screws through the metal ties directly into the wood. This simple, inexpensive addition vastly improves the structural integrity of your gazebo, ensuring it remains safely anchored during severe storms and heavy wind events.
Step 6: Add the Jack Rafters
Once the main framework is secure, you need to fill in the spaces between the main rafters to provide adequate support for the roof decking. These intermediate supports are called jack rafters. Measure the distance from the top plate to the main rafter where the jack rafter will intersect. Cut the jack rafters with the appropriate compound angles so they fit snugly against the sides of the main rafters. Secure them using construction adhesive and framing nails. Space the jack rafters evenly, typically 16 or 24 inches apart, to ensure the roof decking will not sag under heavy snow loads.
Step 7: Secure the Fascia Boards
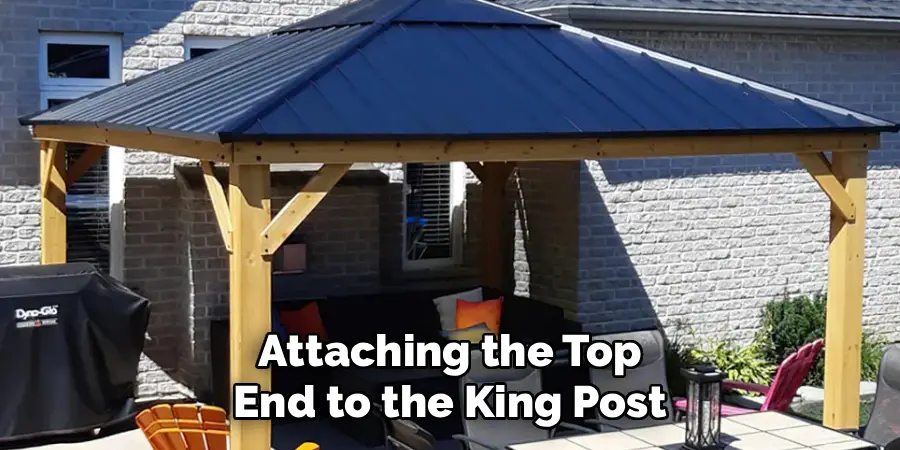
Fascia boards run horizontally along the bottom edges of the rafters, creating a finished look and providing a solid mounting point for drip edges and gutters. Measure the perimeter of your roof eaves. Cut 1×6 or 2×6 boards to length, mitering the corners for a seamless, professional appearance. Nail the fascia boards directly into the plumb-cut ends of your rafters. Ensure the fascia sits perfectly straight and level around the entire perimeter, as this will dictate how straight your final roofing materials will look from the ground.
Step 8: Install the Roof Decking
Roof decking provides the solid surface upon which your roofing materials will rest. Use exterior-grade plywood or OSB, measuring at least 1/2-inch thick, to prevent sagging. Start at the bottom edge (the eaves) and work your way up toward the central peak. Measure and cut the panels to fit the shape of your roof sections. Secure the decking to the rafters using galvanized nails or deck screws, spacing fasteners every six inches along the edges and every twelve inches in the center. Leave a tiny 1/8-inch gap between panels to allow for natural wood expansion due to humidity.
Step 9: Apply Roofing Underlayment and Drip Edge
Before laying shingles, you must protect the wood decking from moisture penetration. Start by nailing a metal drip edge along the bottom perimeter of the fascia board to direct water away from the wood. Next, roll out your roofing underlayment, starting at the bottom edge and overlapping each subsequent row by at least four inches as you work toward the peak. Use a staple gun or cap nails to secure the underlayment to the decking. Install additional drip edge over the underlayment along the raked edges if applicable.
Step 10: Install Shingles and Ridge Caps
The final step is applying the visible roofing material. Begin by installing a starter strip of shingles along the bottom edge to seal the first row. Lay your asphalt shingles starting from the bottom, working your way up to the peak. Follow the manufacturer’s specific instructions regarding nail placement and overlap to ensure maximum wind resistance. Once you reach the top, you must cover the exposed seams where the roof planes meet. Cut standard shingles into smaller pieces or use pre-made ridge caps to cover these joints, overlapping them neatly to create a watertight, visually appealing finish.
5 Things You Should Avoid
- Skipping Accurate Measurements: Never assume your structure is perfectly square. Failing to measure diagonal distances or measure individual rafter lengths will lead to a lopsided roof, uneven joints, and severe structural weaknesses. Always measure twice before cutting.
- Using Indoor Materials: Never use untreated lumber or standard drywall screws for an outdoor structure. The elements will quickly rust standard screws and rot untreated wood, causing your roof to collapse. Always use pressure-treated lumber, exterior-grade plywood, and galvanized fasteners.
- Ignoring Local Building Codes: Do not build without checking your local municipal regulations. Depending on the size of your gazebo, you may need a permit. Ignoring codes can result in steep fines and an order to tear down your hard work.
- Working Without Safety Gear: Never work at heights without taking precautions. Avoid working on wet, slippery surfaces, and always secure your ladders. Failing to use safety glasses when cutting wood or a safety harness on a steep pitch is a massive risk.
- Skimping on Structural Ties: Do not rely on gravity and a few nails to hold your roof down. Avoid the temptation to skip hurricane ties and rafter clips. High winds create uplift that easily destroys roofs that lack proper metal structural connections.
Conclusion
How to gazebo roof is a substantial project that demands careful planning, precise measurements, and an unwavering commitment to safety.
By following these structured steps, you can create a reliable, weather-resistant shelter that enhances the beauty and functionality of your yard. Remember to prioritize high-quality, exterior-grade materials and structural hardware to ensure your roof can withstand harsh weather conditions.
With patience and attention to detail, your new gazebo roof will provide a safe, shaded sanctuary for you and your guests to enjoy for decades.

About
Outdoor Fixes is a distinguished figure in the world of Diy design, with a decade of expertise creating innovative and sustainable Diy solutions.
His professional focus lies in merging traditional craftsmanship with modern manufacturing techniques,
fostering designs that are both practical and environmentally conscious. As the author of diy,
outdoorfixes delves into the art and science of outdoorfixes-making, inspiring artisans and industry professionals alike.
Education RMIT University
(Melbourne, Australia) Associate Degree in Design (Outdoor Fixes) Focus on sustainable design, industry-driven projects,
and practical craftsmanship. Gained hands-on experience with traditional and digital manufacturing tools, such as CAD and CNC software.
Nottingham Trent University
(United Kingdom) Bachelor’s in outdoorfixes.com and Product Design (Honors) Specialized in product design with a focus on blending creativity with production
techniques. Participated in industry projects, working with companies like John Lewis and Vitsoe to gain real-world insights.
Publications and Impact
In diy, Outdoor Fixes his insights on indoor design processes, materials, and strategies for efficient production.
His writing bridges the gap between artisan knowledge and modern industry needs, making it a must-read for both budding designers and seasoned professionals.