
Building a gazebo adds a beautiful and functional focal point to any outdoor living space. While constructing the deck and posts is relatively straightforward, figuring out how to frame a gazebo roof often feels like a complex puzzle. Proper roof framing is the key to a structure that not only looks stunning but can withstand high winds, heavy snow loads, and years of exposure to the elements.
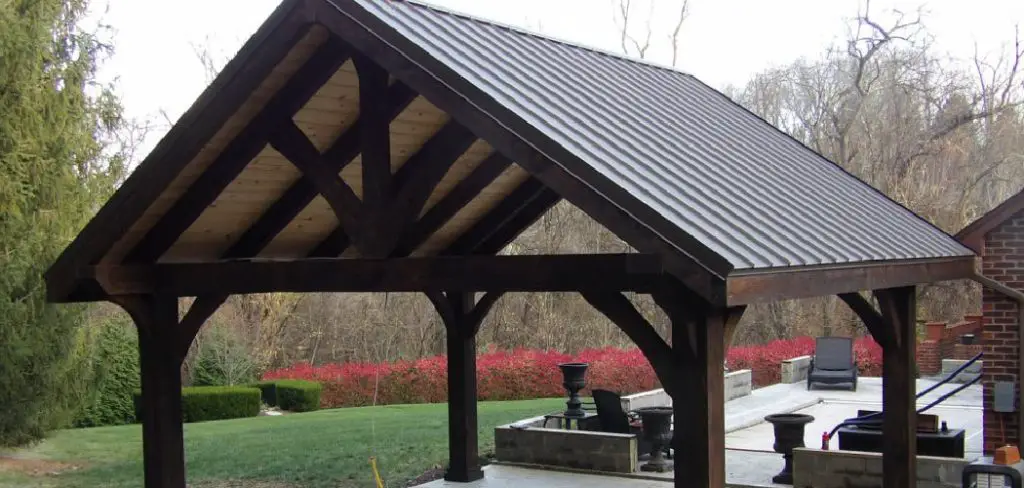
This comprehensive guide walks you through the entire process from start to finish. We will break down the complicated geometry of roof framing into manageable, easy-to-follow steps.
Whether you are an experienced DIY enthusiast or a confident homeowner looking to upgrade your backyard, mastering this process gives you the skills to crown your gazebo with a sturdy, professional-grade roof.
What Will You Need?
Before you begin measuring and cutting, gather all necessary tools and materials to ensure a smooth, uninterrupted workflow. Having the right equipment makes roof framing significantly safer and more accurate.
Tools:
- Circular saw or miter saw
- Power drill and impact driver
- Framing square and speed square
- Heavy-duty tape measure
- Chalk line and carpenter’s pencil
- Ladders or scaffolding (depending on height)
- Spirit level and laser level
- Hammer and pry bar
- Safety glasses, work gloves, and hard hat
Materials:
- Pressure-treated lumber for top plates and rafters (commonly 2×4 or 2×6, depending on span)
- A solid wood block (typically a 6×6 or 8×8) for the king post (center compression ring/hub)
- Galvanized or stainless steel framing nails and deck screws
- Metal hurricane ties and rafter brackets
- Plywood or OSB for roof sheathing
- Roofing felt (underlayment)
- Fascia boards
10 Easy Steps on How to Frame a Gazebo Roof
Step 1: Establish Your Pitch and Prepare the Plan
Before cutting any wood, you must determine the roof pitch. The pitch determines how steep the roof will be, which dictates the length of your rafters and the height of your center hub. A common pitch for gazebos is 4/12 or 6/12, providing good water runoff while remaining easy to work on. Sketch your gazebo’s footprint on graph paper. Calculate the distance from the outside edge of the top plate to the center of the gazebo. Use a rafter calculator or the Pythagorean theorem to find the exact length of your main hip rafters. Planning your angles and lengths precisely on paper prevents wasted lumber and ensures a structurally sound roof.

Step 2: Secure the Top Plates
The top plates connect your vertical support posts and provide the base for your roof framing. Measure the distance between each post carefully. Cut your pressure-treated lumber to form a continuous ring around the perimeter. Depending on your gazebo shape (square, hexagon, or octagon), you will need to cut the ends of these plates at specific angles to create tight joints. For an octagon, cut the ends at 22.5 degrees. Secure the top plates to the support posts using heavy-duty lag bolts and structural screws. Check the entire perimeter with a long level to ensure the top ring is perfectly horizontal before moving to the next step.
Step 3: Create the Center Hub (King Post)
The center hub, or king post, is the anchor point where all your main rafters meet at the peak of the roof. Cut a thick block of wood, typically a 6×6 or 8×8 post, to a length of about 12 to 18 inches. You need to shape the sides of this block to match the number of main rafters. For a square gazebo, you need four flat faces; for an octagon, you need eight. Draw the angles on the top of the block and use a circular saw to carefully shave off the edges until you have a perfect geometric shape. This creates flat surfaces for your main rafters to press against, ensuring a tight and sturdy connection.
Step 4: Cut the Main Rafters
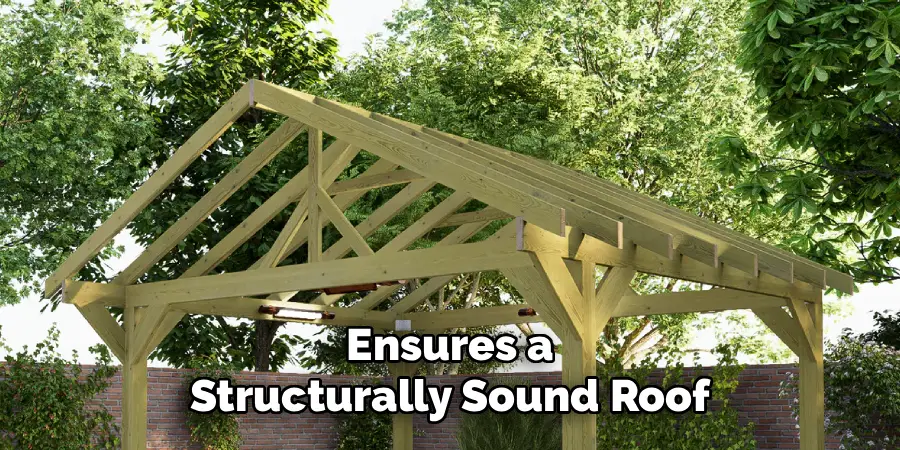
Your main rafters (hip rafters) run from the corners of the top plates up to the center hub. Measure the exact length determined in your planning phase, leaving a little extra for the overhang (eaves). Using your speed square, mark the plumb cut on the top end—this is the angle where the rafter meets the center hub. Next, mark the birdsmouth joint on the lower end. The birdsmouth is a small notch cut into the rafter that allows it to sit flat on top of the top plate. Cut these angles using a circular saw, finishing the birdsmouth corner with a handsaw to avoid overcutting and weakening the wood.
Step 5: Install the Temporary Center Support
Installing the first rafters is the trickiest part because the center hub hangs in mid-air. Build a temporary support structure in the center of the gazebo floor. Use straight 2x4s braced together to create a stand that holds the center hub at the exact final height of your roof peak. Make sure this temporary post is perfectly plumb (vertical) and solidly secured to the deck floor so it will not shift as you push heavy rafters against it. Place the center hub on top of this temporary post. This gives you a stable, hands-free target to attach your main rafters safely.
Step 6: Attach the Main Rafters
Take your first main rafter and lift it into place. Rest the birdsmouth notch on the corner of the top plate and press the plumb cut flat against one face of the center hub. Secure the bottom to the top plate using toenails or metal rafter ties. Secure the top to the hub using long structural screws. Do not tighten completely yet. Take the second main rafter and install it on the exact opposite side of the hub. This balances the weight and keeps the hub centered. Install the remaining main rafters on the other corners, ensuring they sit flush against the hub and the top plates.
Step 7: Measure and Cut the Jack Rafters
Jack rafters fill the spaces between your main hip rafters. They run from the top plates up to the side of the main rafters, rather than reaching all the way to the center hub. The length of the jack rafters decreases the closer they get to the corners. Measure the distance from the top plate to the main rafter at standard intervals (usually 16 or 24 inches on center). Mark and cut the top angle so it sits flush against the side of the main rafter, and cut a birdsmouth joint at the bottom so it sits on the plate. Label each jack rafter to avoid mixing them up.

Step 8: Install the Jack Rafters
Starting from the center of each gazebo side and working your way toward the corners, install the jack rafters. Place the birdsmouth notch on the top plate and press the angled top cut against the main hip rafter. Secure the bottom using metal hurricane ties or toenailing. Secure the top by driving nails or screws through the jack rafter into the main rafter. Keep an eye on your spacing, ensuring it remains consistent. Proper spacing provides essential support for the roof sheathing later. Once all rafters are installed, you can carefully remove the temporary center support post.
Step 9: Install the Fascia Boards
Fascia boards wrap around the outside edge of the rafters, creating a clean, finished look and tying all the rafter tails together. Measure the distance between the rafter tails on each side of the gazebo. Cut your fascia boards to length, matching the angle of the gazebo corners so they join seamlessly. Nail or screw the fascia boards into the ends of every main and jack rafter. Make sure the top edge of the fascia board is perfectly flush with the top edge of the rafters. This ensures that your roof sheathing will lie perfectly flat without bending down at the edges.
Step 10: Attach the Roof Sheathing
The final framing step is covering the skeletal structure with sheathing, typically half-inch exterior-grade plywood or OSB. Measure the triangular sections between the main rafters. Cut your sheathing panels to match these shapes, ensuring the edges meet exactly in the center of the main rafters. Start laying the panels at the bottom edge (the eaves) and work your way up to the peak. Secure the sheathing by driving nails into the rafters every 6 to 8 inches. Once the sheathing is fully installed, your roof framing is complete, highly structural, and ready for underlayment and your final roofing material.
5 Things You Should Avoid
- Skipping Local Building Codes: Never assume you can build without checking local regulations. Failing to secure the proper permits or ignoring snow and wind load requirements can result in fines or force you to tear the structure down.
- Using Untreated Lumber: Avoid using standard indoor lumber for your top plates or exposed eaves. Always use pressure-treated wood or naturally rot-resistant species like cedar for components exposed to moisture; otherwise, the frame will rot quickly.
- Eyeballing Measurements: Never guess angles or lengths. Roof framing relies on precise geometry. A mistake of just half an inch at the base can result in a massive gap at the center hub, completely throwing off the structural integrity.
- Neglecting Metal Fasteners: Do not rely solely on toenailing. Avoid skipping metal hardware like hurricane ties and rafter brackets. These inexpensive metal connectors significantly increase the roof’s uplift resistance against high winds.
- Rushing the Birdsmouth Cuts: Never overcut the birdsmouth notches with a circular saw. Cutting too deeply into the rafter weakens the wood precisely where it carries the most weight. Always finish the inside corner with a handsaw.

Conclusion
How to frame a gazebo roof might seem like a daunting task, but breaking it down into methodical, precise steps makes the project highly achievable.
By carefully planning your pitch, accurately cutting your rafters, and utilizing proper supports and hardware, you create a roof that is both visually striking and structurally sound. Take your time, double-check your measurements, and prioritize safety throughout the build.
The reward for your hard work will be a beautiful, enduring outdoor retreat that you and your guests will enjoy for years to come.

About
Outdoor Fixes is a distinguished figure in the world of Diy design, with a decade of expertise creating innovative and sustainable Diy solutions.
His professional focus lies in merging traditional craftsmanship with modern manufacturing techniques,
fostering designs that are both practical and environmentally conscious. As the author of diy,
outdoorfixes delves into the art and science of outdoorfixes-making, inspiring artisans and industry professionals alike.
Education RMIT University
(Melbourne, Australia) Associate Degree in Design (Outdoor Fixes) Focus on sustainable design, industry-driven projects,
and practical craftsmanship. Gained hands-on experience with traditional and digital manufacturing tools, such as CAD and CNC software.
Nottingham Trent University
(United Kingdom) Bachelor’s in outdoorfixes.com and Product Design (Honors) Specialized in product design with a focus on blending creativity with production
techniques. Participated in industry projects, working with companies like John Lewis and Vitsoe to gain real-world insights.
Publications and Impact
In diy, Outdoor Fixes his insights on indoor design processes, materials, and strategies for efficient production.
His writing bridges the gap between artisan knowledge and modern industry needs, making it a must-read for both budding designers and seasoned professionals.