
If your lawn has bare spots or thin patches, you might be wondering how to make st augustine grass plugs without spending a fortune at the garden center. The good news is that you can create your own plugs right at home using grass you already have growing in your yard. This simple, budget-friendly method lets you fill in empty areas and grow a thick, healthy lawn over time.

St. Augustine grass is a popular warm-season turf known for its broad blades and lush, carpet-like look. Because it spreads through runners rather than seed, plugging is one of the smartest ways to expand it. Whether you’re patching up a few thin spots or covering a larger area, learning this skill puts you in control of your lawn’s growth. In this guide, you’ll walk through everything step by step, from choosing healthy donor grass to caring for your new plugs after planting. It’s easier than you think, and you’ll save money along the way.
Why St Augustine Grass Plugs Matter
Growing your own plugs gives you a practical, low-cost way to thicken your lawn and repair damaged areas. Instead of buying expensive trays or rolls of sod, you simply use the healthy grass already thriving in your yard. This saves money while keeping your turf consistent in color and texture.
Plugs also help your lawn fill in naturally. St. Augustine grass sends out runners called stolons, and each plug becomes a new starting point for fresh growth. Over a few weeks, those plugs spread outward and knit together into a seamless green surface. Beyond cost savings, plugging gives you better control over where new grass goes. You can target bare patches, edge problem areas, and gradually expand coverage at your own pace, all with very little waste.
Step-by-Step Guide to How to Make St Augustine Grass Plugs
Step 1: Choose a Healthy Donor Area
Start by finding a section of your lawn where the grass is thick, green, and growing strongly. This patch becomes your donor area, the place you’ll harvest from to create new plugs. Look for grass that is free of weeds, pests, and disease, since any problems in the donor turf will travel along with your plugs. Pick a spot that can recover easily, like a dense corner or an edge where the grass grows aggressively. Healthy donor grass gives you stronger plugs with deeper roots, which means faster establishment once you replant them in their new home.

Step 2: Water the Ground a Day Before
Moist soil makes the whole process easier, so water your donor area thoroughly the day before you plan to harvest. Damp soil holds together better around the roots, which protects each plug during digging and transport. Dry, crumbly ground tends to fall apart and leave roots exposed, and that stress can slow down or even kill your new grass. Aim to soak the soil deeply rather than just wetting the surface. The goal is to soften the ground without turning it into mud, so the plugs lift out cleanly with plenty of soil clinging to their roots.
Step 3: Cut Uniform Plugs From the Turf
Now it’s time to actually make st augustine grass plugs by cutting them from the donor patch. Use a plugging tool, a bulb planter, or a sharp knife to slice squares roughly two to three inches across and a few inches deep. Try to keep each plug a similar size so they establish at the same rate later. Cut straight down, then gently lift each plug while keeping its soil and roots intact. Place your finished plugs in a shaded tray or bucket so they stay cool and moist. Working in small batches helps prevent the roots from drying out before planting.
Step 4: Prepare the Bare Spots for Planting
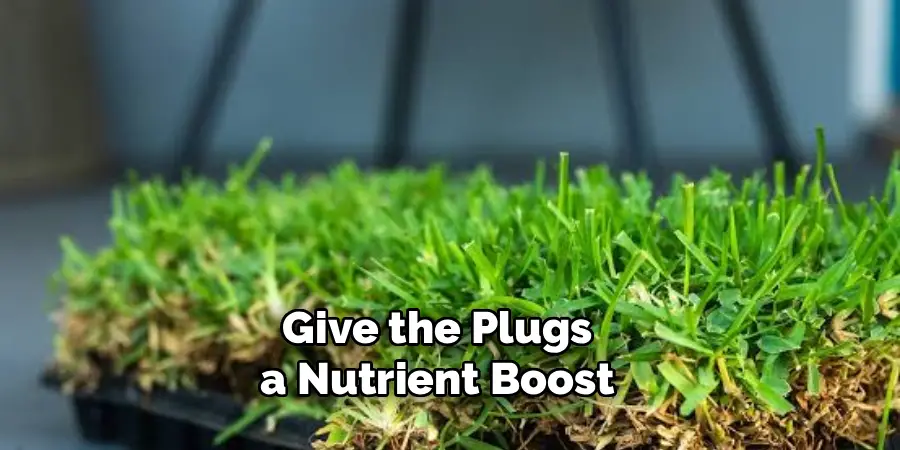
While your plugs rest in the shade, get the receiving areas ready. Clear away weeds, dead grass, rocks, and debris from each bare patch so your plugs make solid contact with the soil. Loosen the top two or three inches of dirt with a hand trowel or small rake, since compacted ground makes it hard for new roots to spread. If the soil looks poor or sandy, mix in a little compost to give the plugs a nutrient boost. Smooth the surface so it sits level with the surrounding lawn, which helps the new grass blend in naturally as it grows.
Step 5: Set Your Plugs Into Place
Dig small holes in the prepared spots, spacing them about twelve inches apart in a checkerboard pattern. Closer spacing fills in faster, while wider spacing covers more ground with fewer plugs, so choose what fits your timeline and budget. Place each plug into its hole so the top sits flush with the soil surface, never buried or sticking up. Press the soil firmly around the base to remove air pockets and lock the roots in place. Good soil contact is what helps your plugs settle quickly and begin sending out runners. Take your time here, since careful planting pays off later.
Step 6: Water Thoroughly Right After Planting
Once your plugs are in the ground, give them a deep, gentle watering right away. This first soak settles the soil around the roots and reduces transplant shock. For the next two weeks, keep the soil consistently moist but never soggy, watering lightly once or twice a day depending on your weather. Knowing how to make st augustine grass plugs is only half the job, because proper watering during this early window decides whether they thrive or struggle. As the roots take hold, slowly cut back to less frequent, deeper watering. This trains the grass to grow stronger, deeper roots over time.
Step 7: Care for Your New Plugs as They Spread
Patience is your best friend now. Over the following weeks, your plugs will begin sending out runners that creep across the bare soil and connect with one another. Hold off on mowing until the plugs feel firmly rooted, usually after two or three weeks, then mow on a high setting to avoid stress. Wait about a month before applying a light, balanced fertilizer to encourage steady growth. Keep weeds pulled so they don’t compete for water and nutrients. With consistent care, those small squares will gradually merge into a thick, even lawn you grew entirely on your own.

Frequently Asked Questions
How Long Does It Take for Plugs to Fill In?
Most plugs begin spreading within two to three weeks and fill in completely within two to four months, depending on spacing and weather. Warm temperatures, regular watering, and healthy soil speed up the process. Plugs placed closer together knit faster, while wider spacing takes longer but uses fewer plugs. Consistent care during the first month is the biggest factor in how quickly your lawn becomes thick and green.
What Is the Best Time of Year to Plant?
Late spring through early summer is the ideal window, since warm soil and longer days encourage rapid root growth and spreading. St. Augustine grass is a warm-season turf, so it struggles in cold weather and may go dormant. Planting during the active growing season gives your plugs the best chance to establish before any seasonal stress. Avoid planting in late fall, when cooler temperatures slow everything down.
Do I Need Special Tools to Get Started?
You don’t need anything fancy to begin. A bulb planter, a small plugging tool, or even a sharp knife and a hand trowel will do the job well. The most important thing is keeping your cuts uniform and your roots intact. Many beginners start with basic garden tools they already own, then upgrade later if they plug larger areas. Clean, sharp tools simply make the work faster and easier.
How Far Apart Should I Space Each Plug?
Spacing depends on how quickly you want full coverage. Placing plugs about twelve inches apart in a checkerboard pattern offers a good balance between speed and efficiency. Closer spacing, around six inches, fills in faster but requires more plugs. Wider spacing covers more ground with fewer plugs but takes longer to merge. Choose the option that fits your budget, your timeline, and the size of the area you want to cover.
Can I Plug a Lawn That Has Weeds?
It’s best to clear weeds before planting, since they compete with young plugs for water, light, and nutrients. Remove existing weeds by hand or treat the area ahead of time, then prepare clean soil for your new grass. After planting, keep pulling any weeds that pop up around the plugs. Once your St. Augustine grass thickens and forms a dense mat, it naturally crowds out most weeds on its own.

Conclusion
Building a lush, healthy lawn doesn’t have to be expensive or complicated. Once you understand how to make st augustine grass plugs, you have a reliable, low-cost way to repair bare spots and expand your turf using grass you already own. From choosing a strong donor area to spacing, planting, and watering, each step builds on the last to give your new grass the best possible start.
The real key is patience and consistent care during those first few weeks, when roots take hold and runners begin to spread. Stick with the watering routine, hold off on early mowing, and keep weeds in check, and you’ll watch small plugs grow into a thick, even carpet of green. So grab your tools, pick a healthy patch, and start plugging today. Your future lawn will thank you for the effort.

About
Outdoor Fixes is a distinguished figure in the world of Diy design, with a decade of expertise creating innovative and sustainable Diy solutions.
His professional focus lies in merging traditional craftsmanship with modern manufacturing techniques,
fostering designs that are both practical and environmentally conscious. As the author of diy,
outdoorfixes delves into the art and science of outdoorfixes-making, inspiring artisans and industry professionals alike.
Education RMIT University
(Melbourne, Australia) Associate Degree in Design (Outdoor Fixes) Focus on sustainable design, industry-driven projects,
and practical craftsmanship. Gained hands-on experience with traditional and digital manufacturing tools, such as CAD and CNC software.
Nottingham Trent University
(United Kingdom) Bachelor’s in outdoorfixes.com and Product Design (Honors) Specialized in product design with a focus on blending creativity with production
techniques. Participated in industry projects, working with companies like John Lewis and Vitsoe to gain real-world insights.
Publications and Impact
In diy, Outdoor Fixes his insights on indoor design processes, materials, and strategies for efficient production.
His writing bridges the gap between artisan knowledge and modern industry needs, making it a must-read for both budding designers and seasoned professionals.