
You finish mowing, step back to admire the work, and there they are already. Those tall, spindly green shoots poking up above the smooth turf, defiant within hours of being cut.
Then you catch it. That faint oniony whiff drifting up where the mower sliced through them.
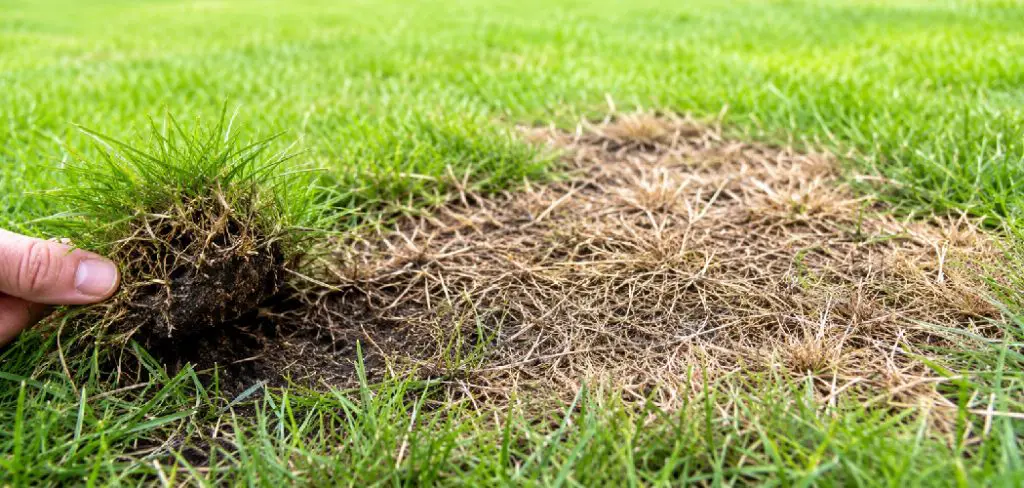
Here’s the reassuring part, though. This pesky weed is beatable with the right plan, even though it loves to come back. Learning how to get rid of onion grass in your lawn takes a little patience and the right approach, but it’s well within reach.
This guide walks you through the whole thing. We’ll cover what onion grass actually is, how to spot it, the removal methods that work, a clear step-by-step process, and how to keep it from returning.
What Is Onion Grass and Why It Keeps Coming Back
Before you grab a trowel, it helps to understand the weed you’re up against. Onion grass doesn’t behave like an ordinary lawn invader, and that’s exactly why it’s so persistent.
A Bulb-Based Perennial Weed
Onion grass grows from small underground bulbs, not just from roots near the surface. Those bulbs sit quietly below the soil, surviving long after you’ve cut the visible blades away.
That’s the heart of the problem. The green tops are just the part you can see, while the real plant hides safely underground.
How It Spreads Through Your Lawn
This weed multiplies in a few different ways at once. It produces seeds, yes, but it also forms tiny offset bulbs called bulblets that quietly expand the patch.
So it fights on multiple fronts. Pull a clump, and stray bulblets may already be tucked into the soil nearby, waiting for their turn.
Why Lawns Make the Perfect Home
Onion grass loves cool, moist conditions. Give it those alongside thin or neglected turf, and you’ve handed it a comfortable place to settle in.
Weak lawns practically invite it. Where your grass is sparse, onion grass moves into the open ground without much resistance.
How to Identify Onion Grass Correctly
Before you wage war, make sure you’re targeting the right plant. Onion grass has a close cousin that fools plenty of homeowners.
Telltale Hollow, Slender Blades
The blades are thin and tube-like, almost hollow to the touch. They shoot up taller than the surrounding grass and tend to bend and sway in the slightest breeze.
That height is often the first clue. A day after mowing, those slender shoots are back up while your turf stays neatly trimmed.
The Unmistakable Onion Smell
Here’s the test that settles it. Crush a blade between your fingers, and a strong oniony scent rises up almost instantly.
No other lawn grass does this. That smell is the plant announcing itself, and it’s the surest way to confirm what you’re dealing with.
Onion Grass vs. Wild Garlic
The two look remarkably alike, which trips people up. Wild garlic tends to carry a sharper, more garlicky odor, while onion grass smells, well, more like onion.
The differences are subtle, honestly. For removal purposes, though, the good news is that both respond to much the same treatment, so a confident guess rarely costs you.
Why Onion Grass Is So Stubborn to Remove
A little honesty here saves you frustration down the line. Onion grass earns its reputation, and understanding why keeps you patient.
Hidden Bulbs Below the Surface
Those underground bulbs are the real challenge. They survive mowing, shallow pulling, and most casual attempts at removal.
Snap off the blades, and the bulb barely notices. As long as it stays buried, the plant simply sends up fresh shoots.
Quick Multiplication of Bulblets
Each plant produces tiny offset bulbs that cling on and spread. These bulblets quietly enlarge the patch, often without you noticing until it’s widespread.
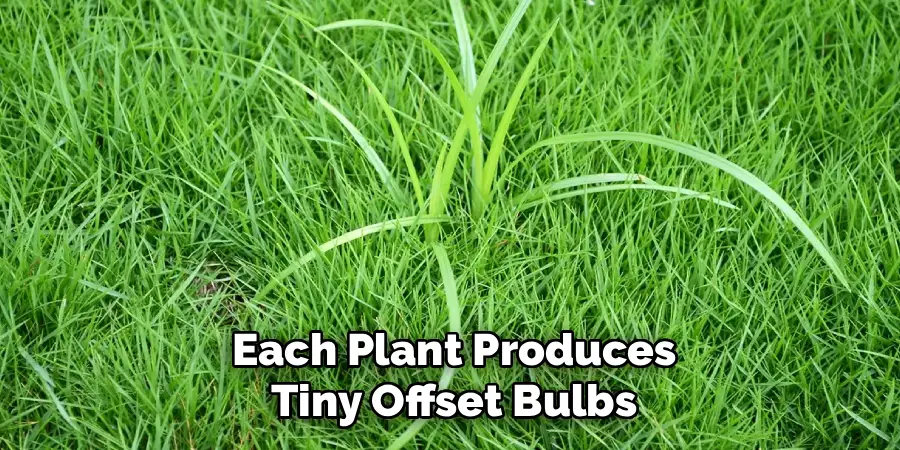
That’s why a small problem grows into a big one. Ignore it for a season, and a few shoots can become a scattered invasion.
Why Mowing Alone Never Works
Mowing feels productive, but it accomplishes almost nothing against onion grass. You cut the tops, the bulbs remain, and the shoots regrow within days.
It may suggest progress, yet it only hides the problem temporarily. Real removal has to reach below the surface.
Choosing the Right Removal Method for Your Lawn
There’s no single correct approach. The best method depends on how far the onion grass has spread and what you’re comfortable doing.
Hand Digging for Small Patches
When only a few clumps have appeared, digging is your friend. Hand removal works well for light infestations, and it skips the chemicals entirely.
It takes a bit of effort, sure. But for a handful of clumps, careful digging is often the cleanest solution available.
Herbicide Treatment for Wider Spread
Once onion grass has spread across larger areas, digging every clump becomes impractical. That’s when targeted herbicides become the smarter option.
Selective products spare your turf while attacking the weed. The right choice depends on your grass type and the size of the problem, which we’ll come back to shortly.
Weighing Effort, Time, and Lawn Health
A few factors should guide your decision. The scale of the infestation, the time you can spare, and the kind of grass you’re working with all matter.
Take a moment to match the method to your situation. Reaching for whatever’s nearest rarely gives the best result.
Tools and Materials You Will Need
You won’t need a shed full of equipment for this. A modest kit handles most onion grass jobs, and you may already own part of it.
For hand removal, a narrow trowel or a weeding fork does the digging, paired with a sturdy pair of gloves. These let you reach deep enough to lift the bulbs rather than just the blades.
If you’re treating a wider area, you’ll want a suitable herbicide, a small sprayer for even application, and protective gear. And for the cleanup stage, keep grass seed, a little topsoil, and some fertilizer ready to repair the gaps you leave behind.
How to Get Rid of Onion Grass in Your Lawn: Step-by-Step Guide
This is the part you came for. Work through each step in order, take your time, and stay patient with regrowth. I’ve laid it out as though I were kneeling beside you in the yard.
Step 1: Confirm You Are Dealing with Onion Grass
Start by taking a close look. Check the slender, hollow blades, then crush one to catch that telltale onion smell.
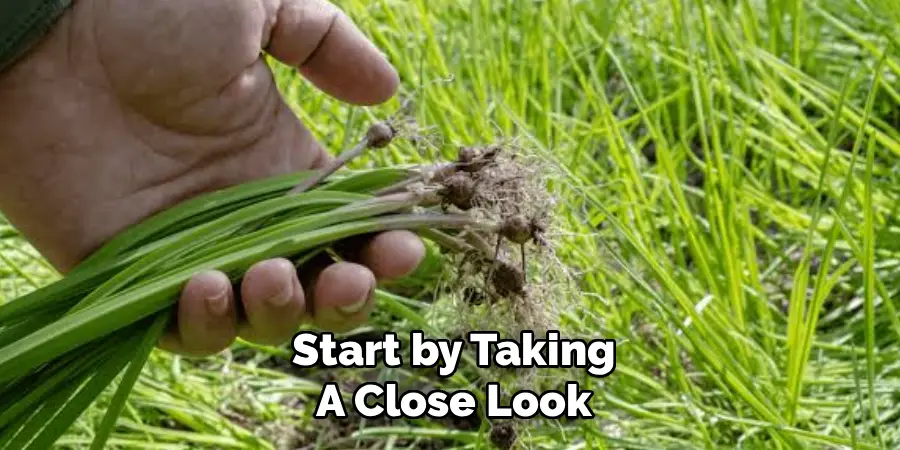
This matters more than it seems. Confirming the right weed from the start spares you wasted effort, and the smell test settles it in seconds.
Step 2: Choose Your Removal Approach
Now decide how you’ll tackle it. For a few scattered clumps, hand digging is enough; for widespread patches, lean toward herbicide.
Base this on how far the weed has spread. A realistic look at the infestation now shapes everything that follows.
Step 3: Water the Area Before Digging
If you’re digging, moisten the soil a day beforehand. Damp ground loosens its grip on the bulbs, letting them lift out more completely.
This small step makes a real difference. Dry, compacted soil clings to the bulbs, while softened soil releases them with far less fight.
Step 4: Dig Out the Bulbs Completely
Work your trowel or weeding fork deep around each clump. The goal is to lift the whole plant along with its bulbs, rather than snapping off the blades.
Go deeper than feels necessary. Leaving even a single bulb behind almost guarantees the weed returns, so reach beneath the entire clump.
Step 5: Apply Herbicide to Stubborn Growth
For larger patches or bulbs you can’t fully dig out, herbicide steps in. Treat the onion grass with an appropriate product, following the label closely for timing and dosage.
Don’t improvise here. The instructions exist for a reason, and respecting them protects both your lawn and your safety.
Step 6: Remove and Bag the Debris
Once the plants are out or dying, gather everything carefully. Collect every blade, bulb, and stray bulblet, then seal it all in a bag.
This step is easy to skip and costly to ignore. A loose bulb left in the soil can quietly restart the very problem you just cleared.
Step 7: Repair the Bare Spots
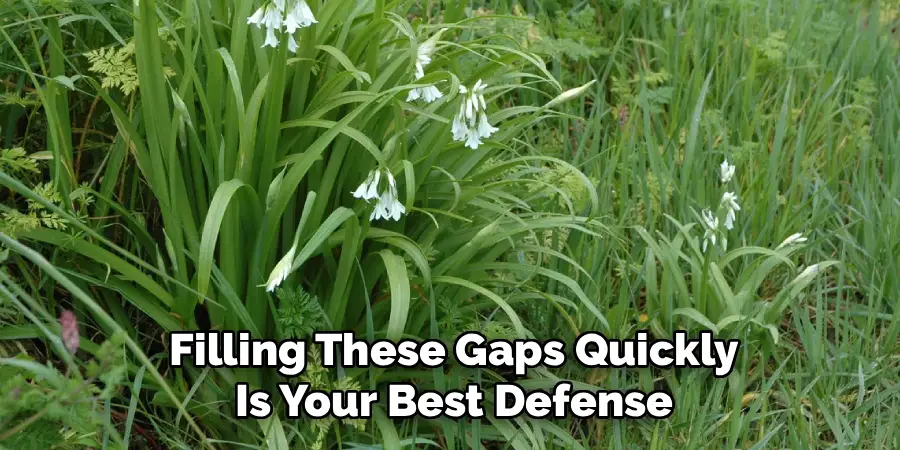
Digging leaves holes, and bare soil invites new weeds. Loosen the ground, add fresh seed or a patch of sod, and water gently to encourage healthy turf.
Filling these gaps quickly is your best defense. Thick grass crowds out onion grass before it gets another foothold.
Step 8: Monitor and Retreat as Needed
The job isn’t quite finished once the clumps are gone. Check the area over the following weeks and tackle any regrowth the moment you spot it.
Persistence wins this fight. Catching new shoots early, before they mature and spread, keeps a small return from becoming a full comeback.
Using Herbicides Safely and Effectively
Herbicides do real work against onion grass, but they call for care. A little knowledge keeps your lawn and yourself out of harm’s way.
Selective vs. Non-Selective Options
The difference matters enormously. Selective herbicides target specific weeds while sparing your turf, which makes them ideal within a healthy lawn.
Non-selective products kill nearly everything they touch. Save those for isolated spots where you don’t mind losing the surrounding grass too.
Timing Treatments for the Best Results
Timing shapes how well a treatment performs. Applying during active growth, when the plant is taking in nutrients, gives the herbicide its strongest effect.
A dormant or stressed plant absorbs less. So aim for a period of healthy, active growth rather than the dead of winter or a punishing dry spell.
Following Safety and Label Guidelines
This part isn’t optional. Wear protective gear, measure doses correctly, and keep children and pets clear of treated areas until it’s safe.
The label tells you everything you need to know. Reading it carefully appears far wiser than guessing, both for results and for safety.
Natural and Chemical-Free Removal Methods
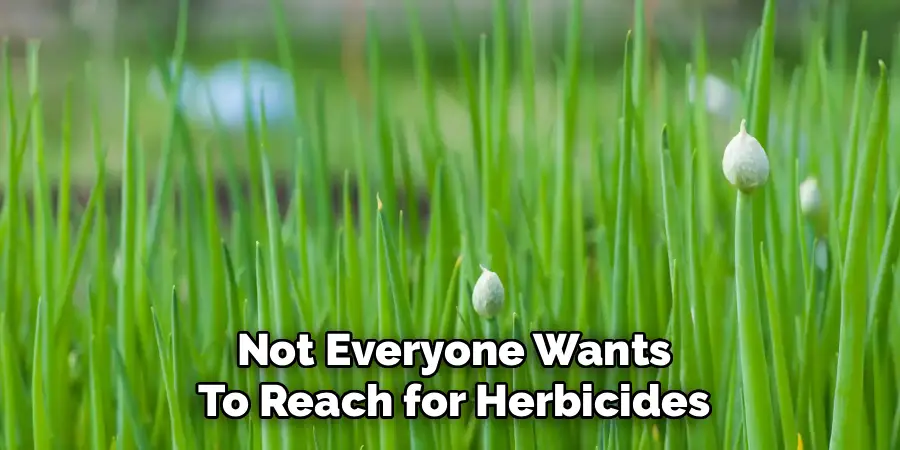
Not everyone wants to reach for herbicides, and that’s perfectly fine. A few gentler approaches can wear onion grass down over time.
Consistent Hand Digging
Repeated, thorough digging slowly exhausts the bulb supply. Every time you lift a clump and its bulbs, you weaken the plant’s ability to bounce back.
It demands patience across several sessions. But for someone willing to keep at it, this chemical-free route genuinely works.
Smothering and Mulching Patches
In heavily affected spots, blocking the light can starve the weed. A thick layer of mulch or a cover over the patch denies it the sunlight it needs.
This suits areas you’re willing to take out of play for a while. It’s slow, yet it spares you both digging and chemicals.
Boosting Soil and Turf Health
Sometimes the best defense is a stronger lawn. Richer soil and thicker grass naturally squeeze onion grass out by leaving it no room.
Healthy turf does quiet, ongoing work. The denser your grass, the harder it is for any weed to find an opening.
Repairing Your Lawn After Removal
Removing the weed is only half the work. Restoring smooth, green turf is the rewarding part, and it also helps keep onion grass from returning.
Preparing the Bare Soil
Start by loosening and leveling the exposed soil. Breaking up compacted ground gives new grass roots room to settle and spread.
A little prep goes a long way. Smooth, workable soil welcomes fresh seed far better than a hard, uneven patch.
Seeding or Sodding the Gaps
Now fill the gaps with grass. Match your new seed or sod to the existing turf so the repair blends in rather than standing out.
A mismatched patch looks almost as obvious as the weed did. Choosing the right grass type keeps your lawn seamless once it fills in.
Watering for Strong Establishment
Fresh grass needs steady moisture to take root. Water gently and consistently, keeping the soil damp without drowning the new growth.
This patience pays off. Well-established grass grows thick and strong, and that density is exactly what crowds onion grass out.
Common Mistakes to Avoid
A few errors let onion grass win even when you’re trying hard. Knowing them ahead of time keeps you from learning the lesson the hard way.
Pulling Blades Without the Bulbs
The classic blunder is yanking the green tops and leaving the bulbs. Onion grass shrugs that off and regrows almost immediately.
Always dig deep enough to capture the bulbs. A quick surface pull feels productive but accomplishes very little.
Relying on Mowing Alone
Mowing trims the shoots and nothing more. The bulbs stay put, ready to send up fresh blades within days.
So treat mowing as upkeep, not removal. Hiding the problem isn’t the same as solving it.
Ignoring a Thin, Weak Lawn
A patchy lawn is an open door. Neglect your turf’s overall health, and onion grass simply moves back into the bare spots.
Healthy grass is your long-term defense. Tending the whole lawn, not just the weeds, keeps that door closed.
How to Prevent Onion Grass from Returning
The best removal is the one you never have to repeat. A few proactive habits keep onion grass from regaining its footing.
Building a Thick, Healthy Lawn
Dense, well-fed turf is your strongest weapon. When grass grows thick, it crowds out weeds before they can settle in.
Regular feeding and good care pay real dividends here. A robust lawn simply leaves no room for onion grass to take hold.
Smart Mowing and Watering Habits
How you mow and water tips the balance. Keeping grass at a proper height and watering deeply but infrequently favors your turf over the weeds.
Shallow, frequent watering encourages weak roots and invaders. Deep watering, by contrast, builds the strong grass that resists them.
Catching New Sprouts Early
A quick response to fresh shoots makes all the difference. The moment you spot new growth, deal with it before it can spread.
Early action keeps a small patch from taking over. A minute of attention now saves an afternoon of digging later.
Final Thoughts
Learning how to get rid of onion grass in your lawn is a practical, satisfying skill that brings a patchy, weed-dotted yard back to smooth, even green. It takes patience, but the payoff is genuine.
You confirmed the weed with that telltale smell. You dug out the bulbs, treated the stubborn patches, bagged the debris, and filled the bare spots with healthy turf.
That quiet victory, watching grass reclaim the space those slender shoots once held, is worth every bit of the effort. Keep up with smart mowing, deep watering, and quick action on any regrowth.
So trust the confidence you’re building. The next time you spot an oniony shoot trying to crowd out your lawn, you’ll meet it with a plan instead of a sigh.

About
Outdoor Fixes is a distinguished figure in the world of Diy design, with a decade of expertise creating innovative and sustainable Diy solutions.
His professional focus lies in merging traditional craftsmanship with modern manufacturing techniques,
fostering designs that are both practical and environmentally conscious. As the author of diy,
outdoorfixes delves into the art and science of outdoorfixes-making, inspiring artisans and industry professionals alike.
Education RMIT University
(Melbourne, Australia) Associate Degree in Design (Outdoor Fixes) Focus on sustainable design, industry-driven projects,
and practical craftsmanship. Gained hands-on experience with traditional and digital manufacturing tools, such as CAD and CNC software.
Nottingham Trent University
(United Kingdom) Bachelor’s in outdoorfixes.com and Product Design (Honors) Specialized in product design with a focus on blending creativity with production
techniques. Participated in industry projects, working with companies like John Lewis and Vitsoe to gain real-world insights.
Publications and Impact
In diy, Outdoor Fixes his insights on indoor design processes, materials, and strategies for efficient production.
His writing bridges the gap between artisan knowledge and modern industry needs, making it a must-read for both budding designers and seasoned professionals.