
There’s a particular kind of weariness that comes with a thirsty lawn. You mow it, water it, feed it, and still it never quite looks alive. Just green, and demanding.

Now picture a different yard. One humming with bees, fluttering with butterflies, blooming through the seasons without all that fuss.
That’s the trade you’re considering, and it’s a good one. Learning how to convert lawn to native plants is a rewarding project, even for someone who’s never planted much of anything.
This guide walks you through the whole thing. We’ll cover what native plants are, the real benefits, how to read your yard, planning the layout, removing the turf, and a clear step-by-step process from bare soil to a living landscape.
What Native Plants Actually Are
Before any digging starts, it helps to know what you’re working with. A native plant isn’t just any pretty flower from the garden center.
Plants That Belong to Your Region
Native plants evolved naturally in a local area over thousands of years. They adapted to its rainfall, its soil, its swings of heat and cold.
That long history matters. A plant native to your region already knows how to live there, which is exactly why it asks so little of you once it’s settled.
Native vs. Non-Native and Invasive Species
Not every plant sold as “easy” belongs in your yard. Non-native species come from elsewhere, and some turn invasive, spreading aggressively and crowding out everything around them.
Invasives can do real harm. They outcompete the local plants that wildlife depends on, so spotting the difference protects more than just your garden.
Why “Local” Matters So Much
Here’s the part people overlook. A plant native to one region may struggle, or even cause trouble, in another.
So “native” is always relative to a place. Sourcing plants suited to your specific area, not just your country, is what makes the whole effort work.
The Benefits of Converting Your Lawn to Native Plants
The payoff here is bigger than a nicer view, though that comes too. Once you see the full picture, the project tends to sell itself.
Saving Water and Lowering Bills
Native plants come with deep roots, built for the local climate. They thrive on natural rainfall and need far less irrigation than a traditional lawn.
Your water bill notices the difference. An established native garden may go weeks without a drink, while turf wilts the moment the sprinklers stop.

Supporting Pollinators and Wildlife
A lawn is a green desert, ecologically speaking. Native blooms, on the other hand, feed the bees, butterflies, and birds that grew up alongside them.
You’ll see the change quickly. Within a season or two, a converted yard starts buzzing and fluttering in a way that mown grass never could.
Less Mowing, Feeding, and Upkeep
Here’s the benefit most homeowners fall for. Once native plants take hold, the weekly grind largely disappears.
No more Saturday mowing marathons. No constant feeding or fussing. An established native landscape mostly looks after itself, freeing your weekends.
Healthier Soil and a Greener Footprint
There’s quieter good happening underground, too. Native plants build living soil with their deep roots, and they don’t need the chemicals a lawn demands.
Less fuel, fewer fertilizers, no weekly mower exhaust. The whole setup treads lighter on the world around it.
Understanding Your Yard Before You Start
Smart conversion begins with observation, not shopping. The better you know your space, the happier your plants will be.
Reading Sunlight and Shade Patterns
Spend a few days watching how the sun crosses your yard. Note which spots bake all afternoon and which stay shaded most of the day.
This tells you a lot. Sun-loving plants and shade-tolerant ones have very different needs, and matching them to the right spot prevents a slow, frustrating decline.
Testing Your Soil Type and Drainage
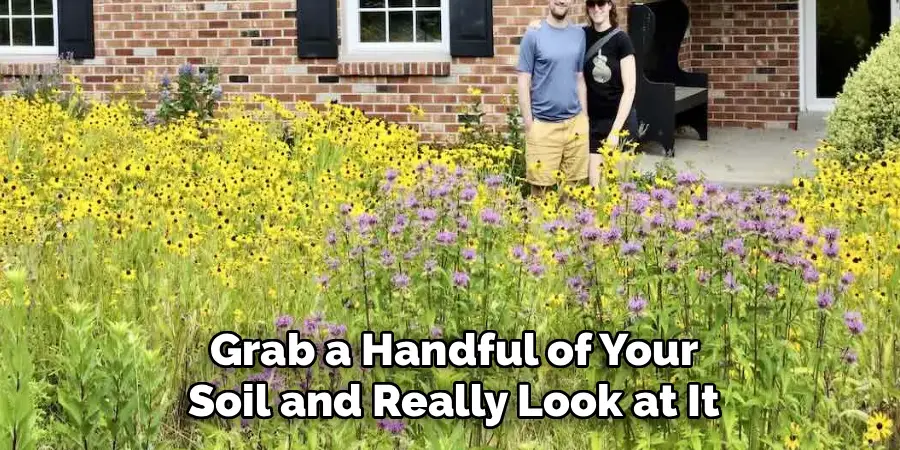
Grab a handful of your soil and really look at it. Is it sandy and loose, or heavy and claylike? Does water drain away or pool after rain?
A simple soil test answers the rest. Knowing what you’ve got guides you toward natives that suit the ground you already have, rather than fighting it.
Noting Slopes, Moisture, and Microclimates
Your yard isn’t uniform, and that’s worth mapping. A low, damp corner, a dry bank, a sheltered nook beside the house- each behaves differently.
These little pockets are microclimates. Plant a moisture-lover in the soggy spot and a tough, drought-hardy native on the dry slope, and both reward you.
Planning Your Native Plant Landscape
A little planning saves a lot of wasted money and effort. This is where the project starts to feel real.
Choosing the Right Native Plants for Your Region
Don’t guess at this part. Local extension offices and native plant nurseries know exactly which species thrive in your area.
Lean on that knowledge. A quick conversation with people who garden locally will steer you toward proven choices and away from costly mistakes.
Designing for Bloom Times and Layers
A flat patch of one plant looks dull and feeds wildlife for only a few weeks. Mix heights and stagger the flowering instead.
Aim for something blooming in spring, summer, and fall. Layering tall, medium, and low plants keeps the space alive and interesting across the whole year.
Starting Small With a Pilot Area
You don’t have to tear up the entire yard at once. Honestly, you shouldn’t.
Convert one section first. A small pilot area lets you learn the process, build confidence, and adjust before you commit to the rest.
Setting a Realistic Budget and Timeline
This can unfold in phases, which is kinder to your wallet. No rule says it all happens in a single weekend.
Spread the cost and the labor over months, even years. A patient, staged approach tends to produce a better landscape than a rushed one anyway.
Tools and Materials You Will Need
You won’t need a contractor’s shed for this. A modest kit covers most of the work, and you may already own a fair bit of it.
For clearing the lawn and digging, a sharp spade, a garden fork, and a wheelbarrow do the heavy lifting. These handle everything from lifting turf to moving soil and mulch around the yard.
You’ll also want compost and a load of organic mulch, plus any soil amendments your test suggested. And for the planting itself, keep trowels, sturdy gloves, a watering can, and a hose with a gentle nozzle close at hand.
How to Remove Your Lawn and Prepare the Soil
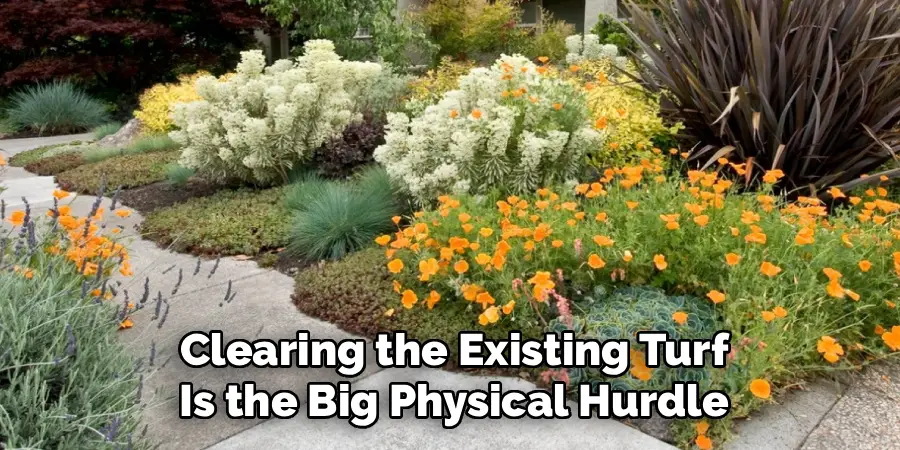
Clearing the existing turf is the big physical hurdle. A few different methods suit different timelines and temperaments.
Sheet Mulching to Smother Grass
Sheet mulching is the gentle, low-effort route. You lay cardboard over the grass, then pile mulch on top, and let it slowly smother the turf beneath.
It feeds the soil as it works. The downside is patience, since this method takes weeks or months to fully kill the lawn.
Solarizing With Plastic Sheeting
Solarizing harnesses the sun. Clear plastic sheeting stretched tightly over the lawn traps heat, baking out grass and weed seeds over several weeks.
It works best in hot, sunny stretches. Give it the right weather and time, and you’re left with cleared ground ready for planting.
Manual and Mechanical Removal
For a faster result, there’s the hands-on approach. Digging out the turf or renting a sod cutter clears the ground quickly, especially over smaller areas.
It’s more work upfront, no question. But you skip the long wait, which appeals when you’d rather not stare at a tarp for two months.
Loosening and Enriching the Soil
However you clear it, finish by tending the soil. Work in compost to loosen compacted ground and feed the new roots heading in.
This step sets the stage. Welcoming, well-prepared soil gives your natives a far stronger start than hard, tired dirt ever could.
How to Convert Lawn to Native Plants: Step-by-Step Guide
This is the part you came for. Work through each step in order, take your time, and let the project unfold. I’ve laid it out as though I were working right beside you in the yard.
Step 1: Map Out and Mark Your Planting Area
Start by outlining the section you’re converting. Lay a hose along the ground or push in a few stakes to sketch the shape.
Seeing it laid out changes things. You can picture the finished bed and plan where everything goes before a single shovel hits the dirt.
Step 2: Remove the Existing Lawn
Now clear the turf using whichever method fits your timeline. Sheet mulching, solarizing, or digging it out, depending on how soon you want to plant.
Match the method to your patience. A slow approach feeds the soil; a fast one gets you planting sooner.
Step 3: Prepare and Amend the Soil
With the grass gone, turn your attention to the ground. Loosen the cleared soil, mix in compost where it’s needed, and rake the bed smooth.
Don’t skimp here. Roots settle in easily when the soil welcomes them, and that early ease shows up later in healthier plants.
Step 4: Arrange Your Plants Before Digging
Before you dig anything, set the potted natives out on the soil in their planned spots. Then step back and study the arrangement.
Shift them around freely. Adjust the spacing and the groupings until the layout genuinely pleases you, because nothing’s committed yet.

Step 5: Dig Holes and Plant Carefully
Now the real planting begins. Dig each hole a little wider than the root ball, ease the plant in at the right depth, and firm the soil gently around it.
Take care not to bury the crown. Planting too deep is a common way to stress a young native, so let it sit at the level it grew in its pot.
Step 6: Water Each Plant Thoroughly
Right after planting, give every native a deep drink. This settles the soil, closes any hidden air pockets, and gets the roots off to a strong start.
Don’t wait on this. Even drought-tolerant plants need generous water in those first crucial moments.
Step 7: Apply Mulch Around the Plants
Spread a layer of organic mulch across the bed, working it around the plants. This holds in moisture, suppresses weeds, and shields young roots.
Keep it slightly clear of the stems, though. Mulch piled against a plant’s base can trap rot, so leave a little breathing room.
Step 8: Set Up a Watering and Monitoring Plan
Finally, plan for the season ahead. Schedule regular watering for these first months, and resolve to check in on the bed often.
Steady attention now pays off enormously. The care you give during establishment is what carries the landscape into its self-sufficient future.
Watering and Helping Your Plants Establish
The first season is everything. Get this stretch right, and your natives will reward you for years with almost no help at all.
Watering Deeply in the First Season
Water slowly and deeply rather than with quick, shallow sprinkles. Deep watering trains roots to reach down into the soil, building resilience.
Those deep roots are the goal. They’re what eventually let the plant shrug off dry spells without your hose.
Easing Off as Roots Take Hold
As the plants show steady new growth, start pulling back. Gradually reduce how often you water, letting the natives lean more on rainfall.
This weaning takes a season or so. Done patiently, it nudges your garden toward the low-maintenance independence you signed up for.
Spotting Signs of Healthy Establishment
Watch for the good signs. Fresh leaves, new shoots, and sturdy stems all tell you the roots have taken hold below.
A thriving plant looks settled and confident. Once you see that vigor, you’ll know the hardest part is behind you.
Maintaining Your Native Plant Landscape
The upkeep here is light, especially compared to a lawn. A few seasonal habits keep everything healthy and full.
Seasonal Cleanup and Trimming
A little pruning now and then keeps plants tidy and encourages fresh growth. Light trimming in the right season does most of the work.
Consider leaving some stems standing through winter, though. They shelter insects and offer seeds to birds, which is part of the point.
Refreshing Mulch and Managing Weeds
Top up the mulch as it breaks down over time. A renewed layer keeps holding moisture and blocking weeds with very little effort from you.
Pull the occasional stray weed while you’re at it. Catching them early spares you a bigger battle later.
Dividing and Filling Gaps Over Time
As plants mature, some will outgrow their space. Dividing them gives you free new plants to fill bare patches or expand the bed.
The landscape evolves this way. A little dividing and replanting keeps it lush and full, year after year.
Common Mistakes to Avoid
A few missteps trip up plenty of first-time converters. Knowing them ahead of time keeps you out of trouble.
Choosing Plants That Are Not Truly Native
The classic error is grabbing look-alikes or regionally wrong plants. They undermine the whole goal, offering little to local wildlife and often struggling to thrive.
Verify before you buy. A plant that’s native somewhere isn’t necessarily native here, and that distinction is the heart of the project.
Skipping Proper Lawn and Soil Prep
Rushing the clearing and prep tends to backfire fast. Leftover turf creeps back, and poor soil sabotages new plantings before they settle.
Give this stage its due. The unglamorous prep work is exactly what determines how well everything grows afterward.
Neglecting Water During Establishment
Walking away too soon is heartbreaking and avoidable. Young natives need consistent water that first season, even the drought-tough ones.
Don’t let their reputation fool you. “Low water” describes an established plant, not a freshly planted one still finding its feet.
Prevention Tips for a Thriving Native Yard
A little vigilance keeps small problems from becoming big ones. These habits protect the work you’ve put in.
Watching for Invasive Plant Intruders
Keep an eye out for invasive seedlings sneaking in. Caught early, they pull easily and cause no harm.
Left alone, they’re a different story. A few minutes of patrolling now and then stops invaders from crowding out your natives.
Building Soil Health Year After Year
Healthy soil is the foundation of the whole thing. Steady mulching and the occasional addition of compost keep the ground rich and resilient.
This compounds over time. Each year of good soil care makes your landscape a little stronger and more self-sufficient.
Letting Nature Do More of the Work
Here’s the lovely part. As the garden matures and finds its balance, it increasingly takes care of itself.
Resist the urge to over-tend. A settled native landscape often does best when you simply step back and let it be.
Final Thoughts
Learning how to convert lawn to native plants is a lasting project that turns a high-maintenance patch of grass into something genuinely alive. Water savings, returning pollinators, and freed-up weekends all follow.
You read your yard. You planned a layout, cleared the turf, prepped the soil, and planted natives suited to where you live.
That progression, from thirsty lawn to a buzzing, blooming landscape, is deeply satisfying to watch unfold. The first time a butterfly settles on a flower you planted, the effort makes complete sense.
So trust your planning, be patient through establishment, and keep up the gentle care. Replace a little more turf each season, and watch your native garden flourish year after year.

About
Outdoor Fixes is a distinguished figure in the world of Diy design, with a decade of expertise creating innovative and sustainable Diy solutions.
His professional focus lies in merging traditional craftsmanship with modern manufacturing techniques,
fostering designs that are both practical and environmentally conscious. As the author of diy,
outdoorfixes delves into the art and science of outdoorfixes-making, inspiring artisans and industry professionals alike.
Education RMIT University
(Melbourne, Australia) Associate Degree in Design (Outdoor Fixes) Focus on sustainable design, industry-driven projects,
and practical craftsmanship. Gained hands-on experience with traditional and digital manufacturing tools, such as CAD and CNC software.
Nottingham Trent University
(United Kingdom) Bachelor’s in outdoorfixes.com and Product Design (Honors) Specialized in product design with a focus on blending creativity with production
techniques. Participated in industry projects, working with companies like John Lewis and Vitsoe to gain real-world insights.
Publications and Impact
In diy, Outdoor Fixes his insights on indoor design processes, materials, and strategies for efficient production.
His writing bridges the gap between artisan knowledge and modern industry needs, making it a must-read for both budding designers and seasoned professionals.