Adding a waterfall to your pool can transform your backyard from a simple swimming area into a luxurious oasis. The sound of cascading water creates a tranquil atmosphere, while the visual appeal of a rock feature adds natural beauty and sophistication. It’s a project that elevates your outdoor living space, making it a more enjoyable place for relaxation and entertainment.
This guide on how to build a pool waterfall will walk you through the process of building your own pool waterfall. While it may seem like a complex undertaking, breaking it down into manageable steps makes it an achievable DIY project for a handy homeowner. With careful planning and the right materials, you can create a stunning water feature that you and your family will enjoy for years to come.

Safety First
Before starting any construction, safety must be your top priority. This project involves working with heavy materials, water, and potentially electricity, all of which present unique risks. Always wear appropriate personal protective equipment (PPE), including steel-toed boots, safety glasses, and heavy-duty gloves, especially when handling rocks and concrete.
When working with electrical components for the pump, ensure the power is completely shut off at the circuit breaker. If you are not experienced with electrical wiring, it is highly recommended to hire a licensed electrician to handle this part of the installation. Be mindful of your surroundings and make sure the construction area is clear of trip hazards.
Tools and Materials You’ll Need
Gathering all your tools and materials before you begin will make the process much smoother. Here’s a comprehensive list of what you’ll likely need:
Tools:
- Shovel and wheelbarrow
- Level
- Tape measure
- Trowel and concrete float
- Caulking gun
- Safety glasses, gloves, and steel-toed boots
- Utility knife
- Hacksaw or PVC pipe cutter
- Drill with masonry bits (if needed)
Materials:
- Waterfall weir or spillway
- Submersible pump (sized for your desired flow rate)
- Flexible PVC pipe and fittings
- PVC primer and cement
- Pond liner or waterproof membrane
- Mortar mix or concrete
- Rebar or wire mesh for reinforcement
- A variety of natural or faux rocks (boulders, medium rocks, and flagstone)
- Silicone sealant (for underwater use)
- Sand or gravel for the base
7 Simple Step-By-Step Guidelines on How to Build a Pool Waterfall
Step 1: Design, Plan, and Position Your Waterfall
The first step is to visualize and plan your waterfall’s design. Consider the size, shape, and location that will best complement your pool and yard. Sketch out your ideas, thinking about the height and width of the feature and how many tiers you want. The location is critical; it should be on a stable, level section of your pool deck or an adjacent reinforced area. Measure the available space to ensure your design is feasible. A good design not only looks great but also functions correctly, ensuring water flows back into the pool without excessive splashing or loss.
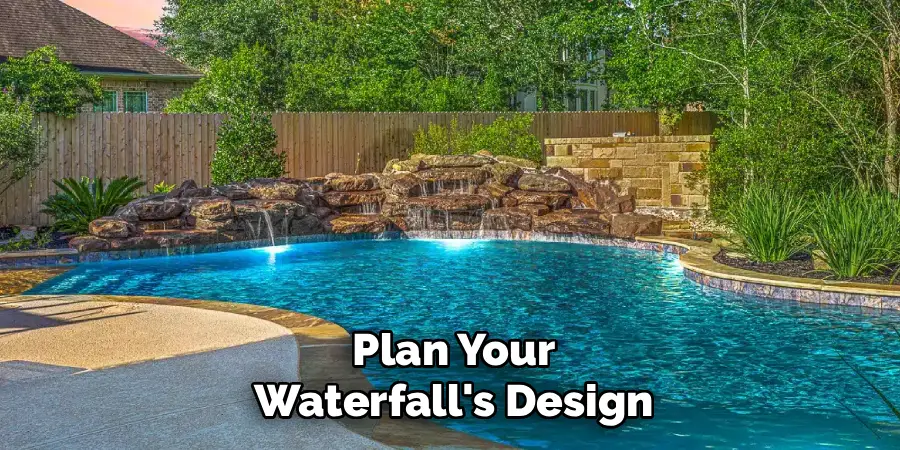
Once you have a design in mind, mark the outline of the waterfall’s base on the ground. This will serve as your guide for excavation and construction. You also need to plan the plumbing route from the pump to the waterfall weir. Think about the most direct and discreet path for the flexible PVC pipe. Planning the pump’s location is equally important. It can be a submersible pump placed directly in the pool or an external pump housed nearby. Thorough planning at this stage prevents major headaches and costly changes later on.
Step 2: Prepare the Foundation
A strong and level foundation is the key to a stable and long-lasting waterfall. Begin by clearing the designated area of any grass, plants, or debris. Excavate the soil within your marked outline to a depth of about 6 to 8 inches. It is crucial to compact the soil at the bottom of the excavation to create a solid base. Use a hand tamper or a heavy plate compactor to ensure the ground is firm and will not settle over time, which could cause your rock structure to shift or crack.
Next, fill the excavated area with a 4-inch layer of gravel or crushed stone and compact it firmly. This layer provides excellent drainage and further stabilizes the base. On top of the gravel, you will pour a concrete footing. Mix your concrete according to the manufacturer’s instructions and pour it into the foundation area, making sure it’s at least 4 inches thick. Use a level and a float to ensure the concrete pad is perfectly flat and smooth. Allow the concrete to cure completely, which can take several days depending on weather conditions.
Step 3: Install the Pump and Plumbing
With the foundation ready, it’s time to set up the heart of your waterfall: the pump and plumbing. Your pump’s GPH (gallons per hour) rating will determine the flow rate of your waterfall. A common rule of thumb is to have at least 100 GPH for every inch of your waterfall weir’s width. For example, a 24-inch weir would need a pump with a rating of at least 2400 GPH. Place your submersible pump in the pool near the waterfall location, ensuring it’s in a spot where it can be easily accessed for maintenance but is not in the way of swimmers.
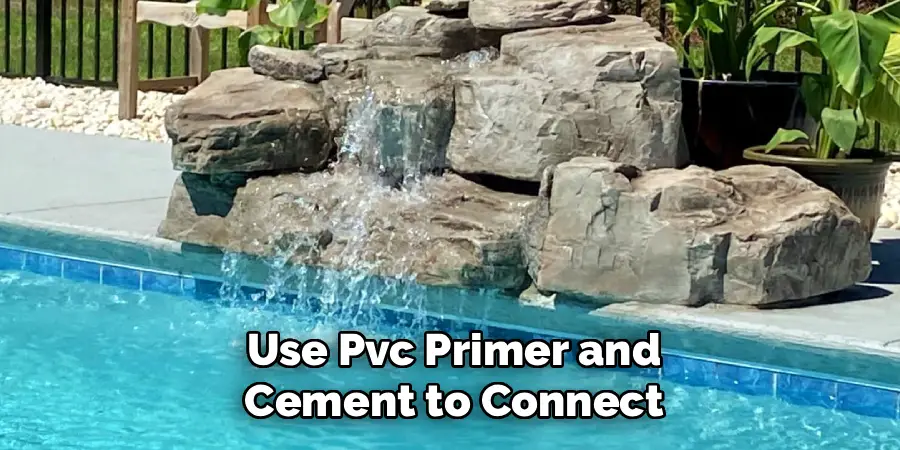
Run the flexible PVC pipe from the pump’s outlet up to where the waterfall weir will be positioned at the top of your structure. Secure the pipe so it won’t move during the rock-setting process. It’s a good idea to temporarily conceal it along the edge of the pool deck or run it behind the planned rock structure. Use PVC primer and cement to connect any fittings, ensuring a watertight seal. Attach the pipe to the inlet on your waterfall weir, again using the appropriate fittings and sealant to prevent leaks.
Step 4: Install the Pond Liner and First Layer of Rocks
To ensure all water is directed back into the pool, you must install a waterproof barrier. Drape a pond liner or another durable waterproof membrane over the concrete foundation, extending it up the back of where your waterfall will be built. The liner should overlap the edge of the pool by several inches. Use a strong, waterproof adhesive or silicone sealant to secure the edge of the liner under the pool coping. This critical step prevents water from seeping behind the structure and eroding the foundation.
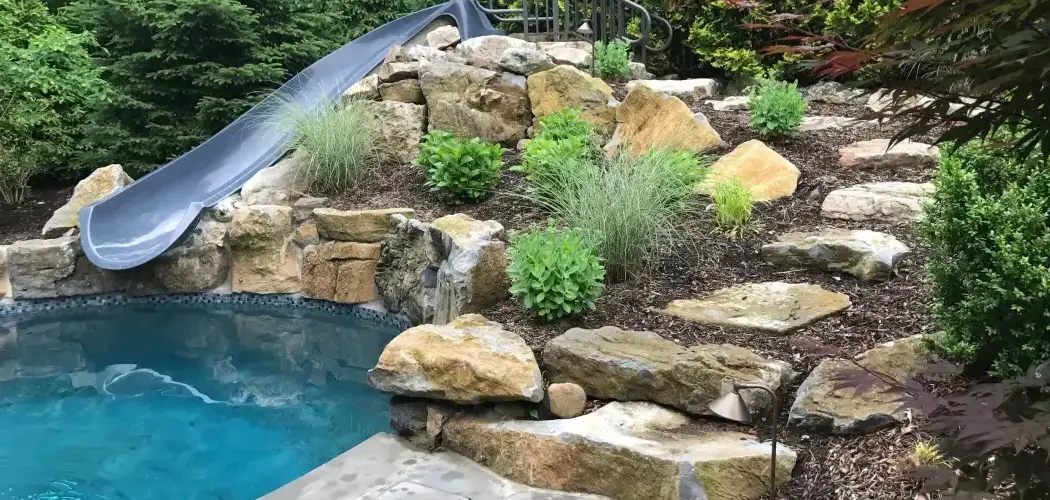
Now you can start building the structure. Begin by setting the largest boulders in place to form the base and outline of your waterfall. Arrange these anchor stones on the liner-covered foundation, creating the rough shape of your feature. As you place them, think about creating a stable and visually appealing formation. Mix your mortar and apply a generous amount to the base of each boulder to lock it into the foundation. This first course of rocks establishes the footprint and provides the structural integrity for the entire waterfall.
Step 5: Build the Rock Structure and Set the Weir
Continue building your waterfall by adding layers of medium-sized rocks on top of the base boulders. Use mortar between each rock to bond them together, creating a solid, interconnected structure. As you build upwards, vary the size, shape, and orientation of the rocks to create a natural, organic look. Think of it as a puzzle, fitting pieces together to form a cohesive whole. Remember to leave a space at the top of the structure to house the waterfall weir. The weir should be set perfectly level to ensure water flows evenly across its entire width.
Once you reach the desired height, create a level shelf for the waterfall weir. Place a thick bed of mortar on the shelf and carefully set the weir in place. Use a level to check it from front to back and side to side. An unlevel weir will result in an uneven cascade of water, detracting from the desired effect. Once the weir is perfectly positioned, use more mortar to secure it firmly. Build up rocks around and over the weir to camouflage it, leaving only the spillway exposed for a more natural appearance.
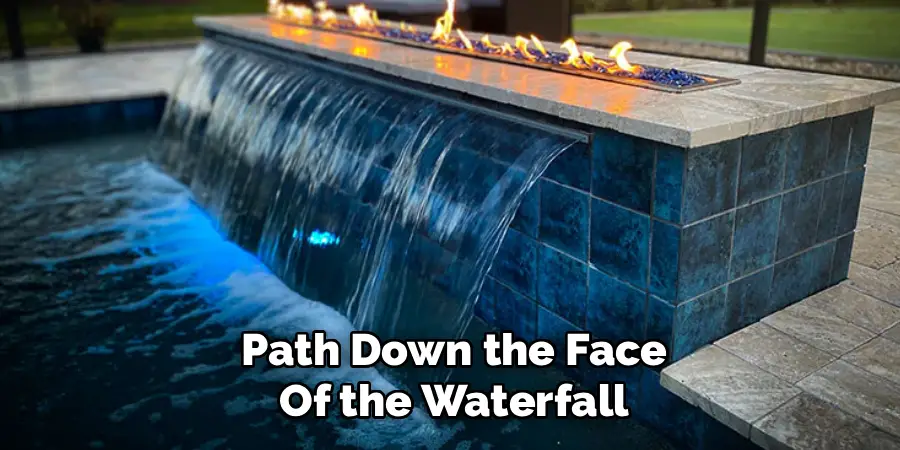
Step 6: Create the Water Channel and Add Finishing Touches
With the main structure and weir in place, the next step is to guide the water’s path down the face of the waterfall. Use smaller, flatter stones like flagstone to create a series of small ledges and channels. These stones will direct the flow of water, creating the cascading effect. Position them to create multiple drops and pools, which will enhance the sound and visual appeal of your waterfall. Secure these smaller stones with mortar, ensuring all gaps are filled to prevent water from seeping into the structure’s interior.
To add the finishing touches, you can use smaller river rocks and pebbles to fill in any visible gaps between the larger rocks. This not only improves the waterfall’s appearance but also helps to further direct the water flow. You can also strategically place rocks to create specific splash patterns or sounds. Take your time during this creative phase to get the look just right. You may also consider incorporating spaces for small, water-loving plants to further integrate the feature into your landscape. Allow all the mortar to cure for at least 24-48 hours.
Step 7: Test the Waterfall and Seal for Leaks
Before the mortar has fully hardened, it’s time for the first test run. Turn on the pump and watch how the water flows down the structure. Look for any areas where water is escaping or not following the intended path. This is your chance to make adjustments. You can add small stones or a bit of fresh mortar to redirect the flow. Pay close attention to the edges of the waterfall to ensure no water is splashing outside the pond liner and onto the surrounding ground.
Once you are satisfied with the water flow, turn off the pump and let the entire structure cure completely for several days as recommended by the mortar manufacturer. After it has cured, perform another water test. This time, carefully inspect every seam and joint for leaks. If you find any drips or seeping water, turn off the pump, dry the area thoroughly, and apply a bead of clear, underwater-grade silicone sealant. Once the sealant has cured, your waterfall is complete and ready to be enjoyed.
Following these steps on how to build a pool waterfall can also be applied to other water features such as a pond or fountain. The key is to make sure that the structure is sturdy and waterproof before filling it with water.
Common Mistakes to Avoid
Building a pool waterfall can be a rewarding project, but a few common mistakes can lead to problems. Avoid making the foundation too small or unstable, as this can cause the structure to shift or collapse over time.
Another frequent error is selecting a pump that is either too weak, resulting in a disappointing trickle, or too powerful, causing excessive splashing and water loss. Always ensure the waterfall weir is perfectly level to achieve an even sheet of water. Finally, don’t skip the waterproof liner, as this is essential for preventing water damage to the surrounding area.
How Much Will It Cost?
The cost of building a pool waterfall can vary dramatically based on its size, complexity, and the materials you choose. A small, simple DIY kit with faux rocks might cost a few hundred dollars. However, a larger, more elaborate custom-built waterfall using natural boulders and a high-capacity pump can easily run into several thousand dollars. The main cost drivers are the rocks, the pump, and whether you hire professional help for any part of the project, like the electrical work or heavy lifting. Creating a detailed budget before you start will help you manage expenses and avoid unexpected costs.

Frequently Asked Questions
Q1: How Long Does It Take to Build a Pool Waterfall?
A1: The timeline for building a pool waterfall depends on its complexity and your experience level. A straightforward DIY project can typically be completed over two or three weekends. This includes time for the concrete foundation and mortar to cure properly. A more intricate design or one requiring professional assistance may take a week or longer from start to finish.
Q2: What Kind of Rocks Are Best for a Pool Waterfall?
A2: You can use either natural or artificial rocks. Natural stone, such as granite, sandstone, or fieldstone, offers authentic beauty and durability but is heavy and can be expensive. Artificial or faux rocks are lightweight, easier to work with, and often more affordable. They are molded from concrete or synthetic polymers to look like real stone. The best choice depends on your budget, design preference, and how much heavy lifting you are willing to do.
Q3: Can I Add a Waterfall to an Existing Pool?
A3: Yes, you can absolutely add a waterfall to an existing pool. Most poolside waterfalls are designed as standalone structures built on the pool deck or an adjacent reinforced slab. The plumbing typically involves a submersible pump placed in the pool that feeds water through a hose to the top of the waterfall, with the water then spilling back into the pool. This makes retrofitting a waterfall a very feasible and popular upgrade.
Conclusion
Building a pool waterfall is a fantastic way to enhance the beauty and ambiance of your backyard. By following these steps on how to build a pool waterfall, you can create a stunning and durable water feature that provides endless hours of visual and auditory delight.
While it requires careful planning and physical effort, the result is a personalized resort-like retreat right outside your door. The sound of flowing water will become the perfect backdrop for relaxing, swimming, and entertaining.
About
Outdoor Fixes is a distinguished figure in the world of Diy design, with a decade of expertise creating innovative and sustainable Diy solutions.
His professional focus lies in merging traditional craftsmanship with modern manufacturing techniques,
fostering designs that are both practical and environmentally conscious. As the author of diy,
outdoorfixes delves into the art and science of outdoorfixes-making, inspiring artisans and industry professionals alike.
Education RMIT University
(Melbourne, Australia) Associate Degree in Design (Outdoor Fixes) Focus on sustainable design, industry-driven projects,
and practical craftsmanship. Gained hands-on experience with traditional and digital manufacturing tools, such as CAD and CNC software.
Nottingham Trent University
(United Kingdom) Bachelor’s in outdoorfixes.com and Product Design (Honors) Specialized in product design with a focus on blending creativity with production
techniques. Participated in industry projects, working with companies like John Lewis and Vitsoe to gain real-world insights.
Publications and Impact
In diy, Outdoor Fixes his insights on indoor design processes, materials, and strategies for efficient production.
His writing bridges the gap between artisan knowledge and modern industry needs, making it a must-read for both budding designers and seasoned professionals.