
There is nothing more frustrating than pulling the starter cord on your lawn mower only to be met with a sputtering engine that refuses to run smoothly. When your mower starts to bog down, stall, or won’t start at all, it is easy to assume a major mechanical failure.
However, the problem is often much smaller and simpler to fix than you might think. One of the most common culprits is a clogged fuel filter. This tiny but essential component acts as the gatekeeper for your engine, preventing dirt, rust, and debris from contaminating the carburetor.
Over time, it can become saturated with grime, starving the engine of the clean fuel it needs to operate. Regular maintenance of this part is key to your mower’s longevity and performance. This guide will show you exactly how to clean a lawn mower fuel filter, a simple task that can save you a costly trip to the repair shop.
A well-maintained lawn mower ensures a pristine yard and a smoother mowing experience. However, even the best equipment can struggle if basic components aren’t cared for properly. One of the most overlooked yet crucial parts of a lawn mower is the fuel filter.
Neglecting this small component can lead to decreased efficiency, engine issues, or even complete equipment failure. By dedicating a few minutes to proper cleaning and maintenance, you can extend the life of your lawn mower and avoid unnecessary frustration.

Why is the Fuel Filter Important?
The fuel filter plays a critical role in protecting your lawn mower’s engine by preventing dirt, debris, and impurities from entering the fuel system. Without a properly functioning fuel filter, these contaminants can clog the carburetor, reduce fuel efficiency, and cause significant wear and tear on the engine components. Over time, this can lead to poor performance, costly repairs, or even permanent damage to the lawn mower.
Ensuring the fuel filter remains clean and in good condition is essential for maintaining optimal functionality and prolonging the life of your equipment.
A well-maintained lawn mower is crucial for keeping your yard in pristine condition. Regular care and attention not only extend the lifespan of the equipment but also ensure it operates efficiently.
By understanding the key components and their maintenance needs, you can avoid common issues and keep your lawn mower running smoothly year after year.
Tools and Materials
To properly maintain or replace the fuel filter on your lawn mower, you will need the following tools and materials:
- Replacement fuel filter (ensure it matches your mower’s specifications)
- Screwdriver (flathead or Phillips, depending on your mower model)
- Pliers (preferably needle-nose for better grip)
- Wrench set (if required to access the filter housing)
- Fuel-safe container (to catch any spilled fuel)
- Clean cloth or rags (for wiping away debris or fuel residue)
- Safety gloves (to protect your hands while working with fuel)
- Safety goggles (to shield your eyes from potential splashes)
Having these tools and materials ready will make the process more efficient and reduce the risk of errors or fuel spills during maintenance.
Step-by-Step Guide on How to Clean a Lawn Mower Fuel Filter
Step 1: Gather Your Tools and Prepare a Safe Workspace
Before you begin any work on your mower’s fuel system, safety and preparation are paramount. You will be working with gasoline, which is highly flammable. Find a well-ventilated area, preferably outdoors or in an open garage, away from any open flames, sparks, or heat sources.
Gather your necessary tools, which will typically include a pair of needle-nose pliers, a clean rag, a catch pan or container for draining fuel, and a small can of carburetor cleaner or fresh gasoline for cleaning.
It is also wise to wear safety glasses and nitrile gloves to protect your eyes and skin. Ensuring you have everything you need within arm’s reach will make the process smoother and prevent you from having to step away from an open fuel line.
Step 2: Locate the Fuel Filter
The fuel filter is a small, often translucent plastic or metal canister inserted in the fuel line between the gas tank and the carburetor. To find it, first locate your mower’s gas tank. Then, trace the black rubber fuel line as it travels from the bottom of the tank toward the engine.
The filter will be a small, inline component connected at both ends to this hose. On some riding mowers, it might be more exposed, while on push mowers, you may need to look more closely around the engine housing.
Its purpose is to be accessible, so it is rarely hidden behind complex parts. Identifying the filter’s location is the first hands-on step in this essential maintenance task.
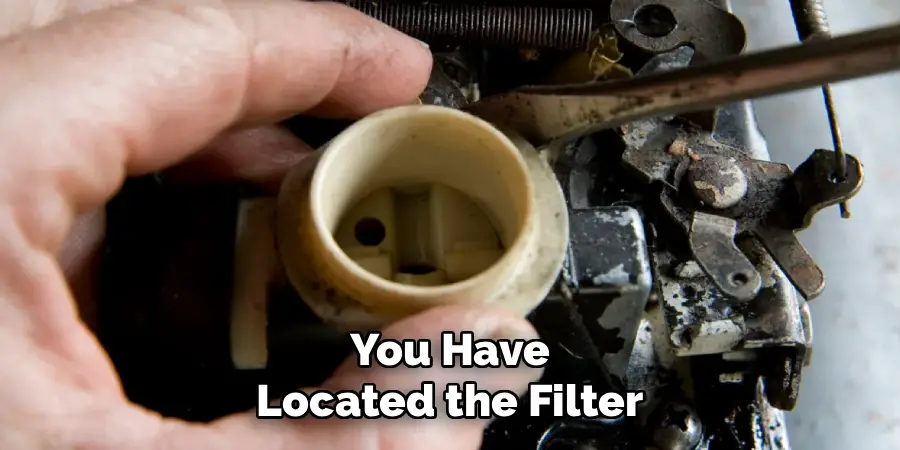
Step 3: Clamp the Fuel Line
Once you have located the filter, you must stop the flow of gasoline from the tank before you disconnect anything. If you do not, fuel will pour out of the line, creating a dangerous and messy situation.
Use a pair of fuel line clamps or, if you do not have those, a small pair of locking pliers with the jaws wrapped in tape to prevent damage. Place the clamp on the fuel hose between the gas tank and the fuel filter.
Squeeze the clamp shut to pinch the hose completely, cutting off the fuel supply.
This simple action ensures that you can work on the filter without contending with a continuous stream of gasoline, making the entire process much safer and cleaner.
Step 4: Disconnect the Fuel Filter
With the fuel line securely clamped, you can now safely remove the filter. The filter is held in place by small spring clips or hose clamps on either side where it connects to the rubber fuel line. Using your needle-nose pliers, squeeze the tabs of these clips and slide them down the hose, away from the filter’s connection points.
Have your catch pan ready underneath to collect any small amount of fuel that will be trapped in the filter and the line leading to the carburetor. Gently but firmly twist and pull the rubber hoses off both ends of the fuel filter. Be careful not to use excessive force that could tear or damage the aging rubber fuel lines.
Step 5: Inspect and Clean the Filter
Now that the filter is removed, you can assess its condition. Hold the filter up to a light source. If you have a translucent plastic filter, you should be able to see sediment and debris collected inside. Gently tap the filter on a hard surface to dislodge some of the dirt.
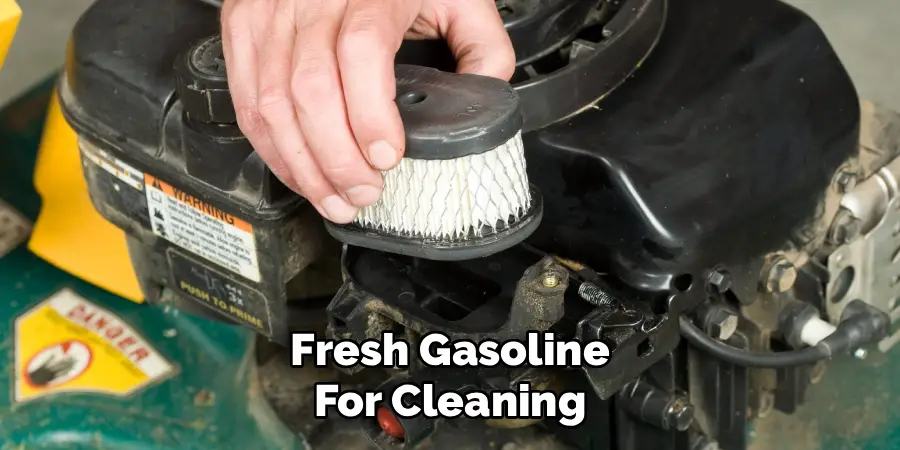
For a more thorough cleaning, take your can of carburetor cleaner and spray it through the filter from the outlet side (the end closest to the engine) back toward the inlet side. This back-flushing action will push the collected debris out the way it came in.
If you do not have carburetor cleaner, you can submerge the filter in a small container of fresh gasoline and agitate it to wash out the grime.
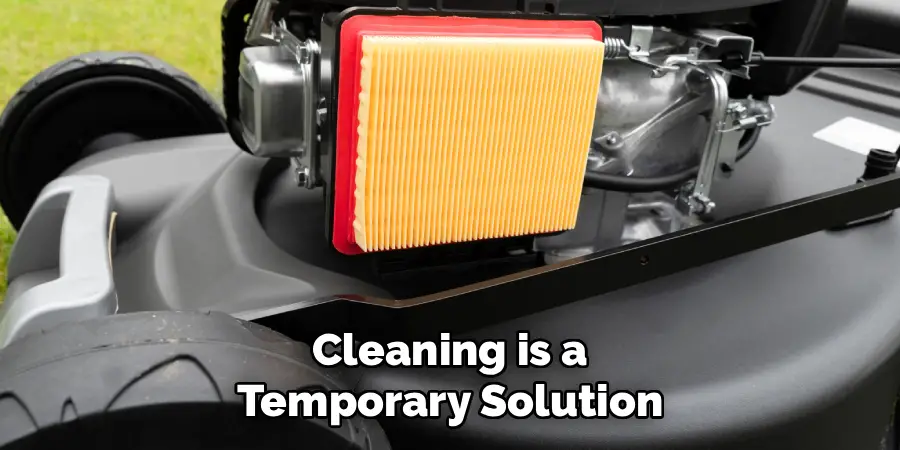
Step 6: Determine if Replacement Is Necessary
Cleaning is a temporary solution, and it is important to know when a filter is beyond saving. This part of learning how to clean a lawn mower fuel filter involves making a judgment call.
After cleaning, try to blow through the filter from the inlet to the outlet side. If you feel significant resistance, it means the internal mesh is still clogged, and the filter should be replaced. Paper-element filters, in particular, are difficult to clean thoroughly and are designed to be disposable.
Given that fuel filters are very inexpensive, typically costing only a few dollars, replacement is often the best and most reliable course of action. A new filter guarantees optimal fuel flow and engine protection.
Step 7: Reinstall the Filter and Test the Mower
To finish the job, simply reverse the removal process. Reconnect the fuel lines to the correct ends of the clean or new filter, ensuring the arrow on the filter housing points in the direction of fuel flow—away from the tank and toward the carburetor.
Slide the hose clamps back into position over the connection points to secure the hoses. Once everything is reconnected, remove the fuel line clamp you installed in Step 3 to allow gasoline to flow again. Prime the engine if your mower has a primer bulb, and start it up.
Let it run for a minute to ensure there are no leaks and that the engine is running smoothly. A steady, powerful hum is the sound of a job well done.
Change the Oil in Your Lawn Mower
Changing the oil in your lawn mower is an essential part of its routine maintenance to ensure optimal performance and longevity. Start by referencing your owner’s manual to determine the type and quantity of oil your mower requires.
Then, run the engine for a few minutes to warm the oil, as this helps it drain more easily. Turn off the engine and disconnect the spark plug wire for safety.
Locate the oil drain plug, typically found beneath the mower deck, and position an oil pan underneath it. Remove the drain plug and allow the old oil to fully drain into the pan.
If your mower does not have a drain plug, you may need to tilt it carefully to drain the oil through the fill tube. Once the oil has completely drained, replace the drain plug securely.
Next, refill the engine with fresh oil, checking the fill level with the dipstick to avoid overfilling. Be sure to clean up any spills and properly dispose of the used oil at a recycling center.
Reconnect the spark plug wire, and start the engine to ensure everything runs smoothly. Regular oil changes will keep your mower performing at its best, season after season.
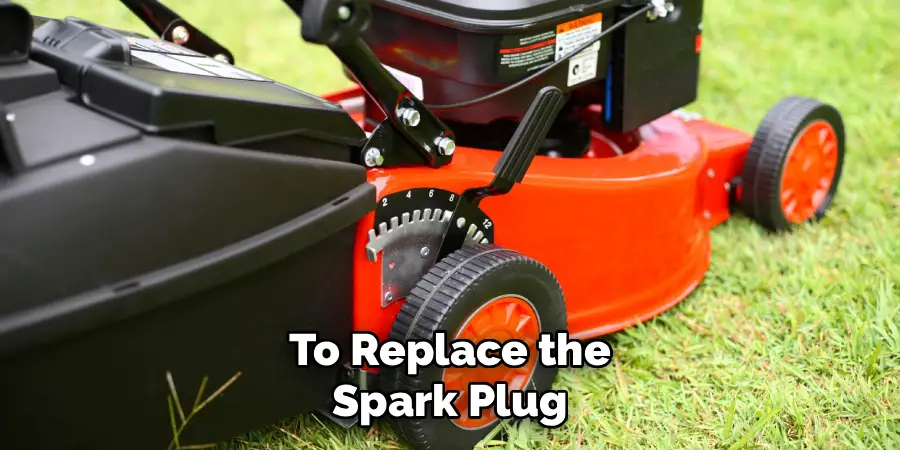
Spark Plug Replacement
Over time, spark plugs can wear out, leading to reduced engine performance or difficulty starting your mower. To replace the spark plug, first, disconnect the spark plug wire to ensure safety.
Use a spark plug socket and wrench to carefully unscrew and remove the old spark plug. Check the gap on the replacement spark plug with a gap gauge to ensure it meets the manufacturer’s specifications.
Once confirmed, thread the new spark plug into place by hand to avoid cross-threading, then tighten it with the wrench until snug. Finally, reconnect the spark plug wire and test your mower to ensure it starts and runs smoothly.
Regularly replacing the spark plug is a simple and effective way to maintain engine reliability.
Importance of maintenance for lawn mower engines
Proper maintenance is crucial for the longevity and performance of any machine, including lawn mowers. This is especially true for the engine, which is the heart of the mower.
Neglecting regular maintenance can lead to expensive repairs or even replacement of the entire engine.
One key aspect of engine maintenance is checking and replacing spark plugs regularly. As mentioned earlier, spark plugs play a vital role in igniting the fuel-air mixture in the combustion chamber.
Over time, they can become fouled with carbon deposits from fuel and oil, reducing their effectiveness.
Frequently Asked Questions
How Often Should I Clean or Replace My Lawn Mower Fuel Filter?
As a general rule, it is a good idea to inspect your fuel filter at the beginning of every mowing season. For most homeowners, replacing the fuel filter once a year is a simple and effective piece of preventative maintenance. If you use your mower frequently or in very dusty conditions, you may need to check it more often. If you ever notice symptoms like a sputtering engine or difficulty starting, the fuel filter should be one of the first things you check, regardless of when it was last changed.
What Are the Symptoms of a Clogged Fuel Filter?
A clogged fuel filter starves the engine of gasoline, leading to several common symptoms. You might experience:
- The engine struggling to start or not starting at all.
- The engine sputtering, surging, or running rough, especially under load.
- The mower stalling unexpectedly in the middle of a job.
- A noticeable loss of power, preventing you from cutting through thick grass.
Can I Run a Lawn Mower Without a Fuel Filter?
While the mower might run for a short time without a filter, it is an extremely bad idea. The fuel filter’s only job is to protect the delicate internal components of your carburetor from dirt, rust, and debris.
Running without one allows this contamination to flow directly into the carburetor’s tiny jets and passages. This will inevitably lead to a clog, which is a much more difficult and expensive problem to fix than simply replacing a fuel filter.
Is It Better to Clean or Replace a Fuel Filter?
While cleaning can work as a temporary fix in a pinch, replacement is almost always the better option. Fuel filters are inexpensive consumable parts. A brand-new filter guarantees that all contaminants are removed and that fuel flow is restored to 100% of its designed capacity.
Paper-based filters, which are very common, cannot be effectively cleaned and should always be replaced. For the small cost, the peace of mind that comes with a new part is well worth it.
What Type of Fuel Filter Does My Mower Need?
Lawn mower fuel filters are not one-size-fits-all. They come in different sizes, shapes, and micron ratings. The easiest way to ensure you get the right one is to take your old filter with you to the hardware or auto parts store to find an exact match.
Alternatively, you can consult your lawn mower’s owner’s manual or look up the model number online to find the specific part number required for your machine. Using the correct filter is crucial for proper fit and function.
Conclusion
Performing basic maintenance on your lawn mower is one of the most rewarding skills a homeowner can learn. It not only saves you money but also empowers you with a deeper understanding of how your equipment works.
The fuel filter, though small, plays a critical role in the health and performance of your engine. By learning to check and service it regularly, you can prevent frustrating breakdowns and extend the life of your mower significantly. Do not wait for your engine to start sputtering.
Take a proactive approach to your equipment care. Now that you have a clear roadmap on how to clean a lawn mower fuel filter, you have the knowledge to tackle this simple task with confidence and keep your mower running strong all season long.
About
Outdoor Fixes is a distinguished figure in the world of Diy design, with a decade of expertise creating innovative and sustainable Diy solutions.
His professional focus lies in merging traditional craftsmanship with modern manufacturing techniques,
fostering designs that are both practical and environmentally conscious. As the author of diy,
outdoorfixes delves into the art and science of outdoorfixes-making, inspiring artisans and industry professionals alike.
Education RMIT University
(Melbourne, Australia) Associate Degree in Design (Outdoor Fixes) Focus on sustainable design, industry-driven projects,
and practical craftsmanship. Gained hands-on experience with traditional and digital manufacturing tools, such as CAD and CNC software.
Nottingham Trent University
(United Kingdom) Bachelor’s in outdoorfixes.com and Product Design (Honors) Specialized in product design with a focus on blending creativity with production
techniques. Participated in industry projects, working with companies like John Lewis and Vitsoe to gain real-world insights.
Publications and Impact
In diy, Outdoor Fixes his insights on indoor design processes, materials, and strategies for efficient production.
His writing bridges the gap between artisan knowledge and modern industry needs, making it a must-read for both budding designers and seasoned professionals.