
There is a stretch of summer afternoon, usually right after lunch, when the deck turns into a frying pan. You step out barefoot, hiss, and retreat. For two summers, I let that win. Then I finally built some shade, and the whole back of the house changed character.
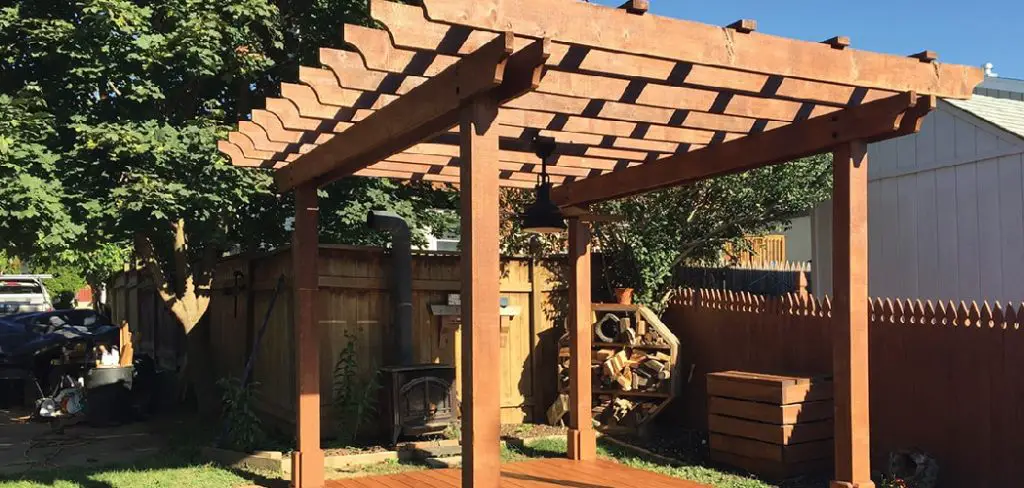
The deck went from a place I avoided to the spot where everyone ended up.
If you have been wondering how to build a deck canopy without hiring a contractor or remortgaging anything, settle in. The project is more forgiving than the polished photos online suggest.
This guide walks you through the whole thing. What a canopy actually is, how to plan it, what to gather, and the steady, step-by-step way to raise one yourself.
What Is a Deck Canopy and Why Build One?
A deck canopy is simply an overhead cover that shields part or all of your deck from sun, rain, and the occasional surprise drizzle. It can be a snug patch of shade over a single chair or a full roof spanning the whole platform.
Picture it however suits your life. Some people want a shaded reading nook; others want to host fifteen people without anyone squinting.
The point is flexibility. A canopy is less a fixed structure and more a way of claiming outdoor space back from the weather.
The Benefits of Adding Shade and Shelter
The obvious win is comfort. Shade drops the temperature noticeably, and a cover means a light rain no longer scatters everyone indoors mid-conversation.
There is a quieter benefit, too. The sun is hard on deck boards and outdoor furniture, fading and drying them over the years. A canopy slows that wear considerably.
So you gain longer, more pleasant hours outside, and your deck ages a little more gracefully. That feels like a fair trade for a weekend of work.
Boosting Comfort and Home Value
A well-built canopy makes the deck feel like a genuine extension of the house rather than an afterthought tacked on the back. That shift in feel matters more than people expect.
It also tends to catch a buyer’s eye, should you ever sell. Attractive outdoor living space reads as usable square footage, even if it technically is not.
I would not build one purely for resale, mind you. But the value bump is a pleasant bonus on top of the daily comfort.
Choosing the Right Type of Canopy
Before you buy a single board, decide what kind of canopy fits your space and your skills. There is no single correct answer here, only the one that suits your deck and how much effort you want to spend.
Take a little time with this. The choice shapes everything that follows.
Attached Versus Freestanding Canopies
An attached canopy connects to the house wall, which gives it a seamless, built-in look and one less set of posts to manage. It leans on your home for support.
A freestanding canopy, by contrast, stands on its own posts and can sit anywhere on the deck. It is more flexible, though usually a touch more complex to build and stabilize.
Think about your layout. If your deck hugs the house, being attached often makes sense. If it juts out into the yard, freestanding may serve you better.
Fixed, Retractable, and Pergola-Style Options

A fixed canopy is a permanent roof, simple and dependable, ideal if you want consistent coverage you never have to fuss with. A retractable fabric cover, on the other hand, lets you adjust shade as the weather shifts.
Then there is the pergola-style frame, an open structure topped with shade cloth or slats. It allows airflow and dappled light rather than full cover.
For a first build, I would lean toward a fixed roof or a simple fabric canopy. Both deliver lovely results without demanding advanced carpentry.
Planning and Measuring Your Deck Canopy
This is the unglamorous stage that quietly decides whether your project goes smoothly. Skip it, and you will pay for it later in awkward cuts and crooked posts.
Stand on your deck with a tape measure and actually picture where the shade will fall at three in the afternoon. That mental image is worth a lot.
Measuring Your Space and Choosing Dimensions
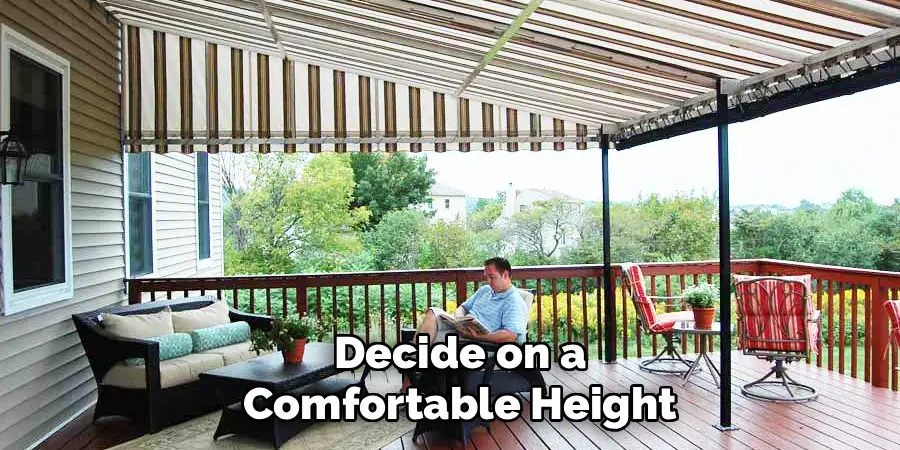
Measure the width and length of your deck, then mark the area you want covered. Decide on a comfortable height, too, high enough to stand under easily but low enough to feel sheltered.
Account for furniture and walking paths as you go. You do not want a post landing exactly where the grill needs to live.
Careful measuring now gives you a frame that fits as it belongs. Rushed measuring gives you a frame that fights you at every turn.
Checking Permits, Codes, and Safety
Here is the part nobody enjoys but everyone should respect. Many areas require permits for permanent or attached structures, and skipping that step can cost you dearly down the road.
A quick call to your local building office usually clears things up in minutes. Check homeowner association rules, too, if you have one.
I know it feels like a hurdle. It is far cheaper than tearing down a canopy because it broke code, though, so make the call.
Gathering Your Materials and Tools
With a plan in hand, pull together your supplies before you start swinging a hammer. Having everything ready makes the build flow rather than stall.
There is a small satisfaction in laying out fresh lumber and a row of gleaming hardware, the whole project waiting to take shape.
Lumber, Posts, and Hardware
Choose weather-resistant materials, since this thing lives outdoors year-round. Pressure-treated lumber or cedar works well for posts and beams, paired with sturdy brackets, screws, and post anchors.
Quality hardware is not the place to economize. The anchors and fasteners are what keep the whole structure standing safely.
Pick materials rated for outdoor use, and your canopy will shrug off many seasons of sun and rain without complaint.
Canopy Cover and Essential Tools
Your cover choice depends on the look you settled on earlier. Weatherproof fabric, polycarbonate panels, or proper roofing material each suit different styles and budgets.
For tools, you will want a drill, a level, a saw, and a stable ladder. Most homeowners already own a good chunk of this.
Anything missing can usually be rented cheaply for a weekend. No need to buy a tool you will use once.
How to Build a Deck Canopy: Your Step-by-Step Guide
This is the heart of it. I will walk you through each step like a friend on the other end of the deck, holding the level and offering the occasional nudge. Work safely, take your time, and trust that steady progress gets you there.
Step 1: Mark Post Locations and Prepare the Deck
Start by marking exactly where each post will sit, then check that the deck framing below can carry the load. A post resting on a weak spot is asking for trouble.
Confirm solid footing before anything else. This is the foundation, literally, for everything above.
A few extra minutes here pays off through the entire build, so resist the urge to rush past it.
Step 2: Install the Support Posts
Secure each post to the deck using sturdy anchors and brackets. Then check every post for plumb with a level, making sure it stands perfectly straight.
A helper genuinely earns their keep at this stage, holding the post while you fasten and check.
Double-check the alignment now. A post that leans a degree off here becomes a noticeably crooked frame later, and that is hard to unsee.
Step 3: Attach the Support Beams
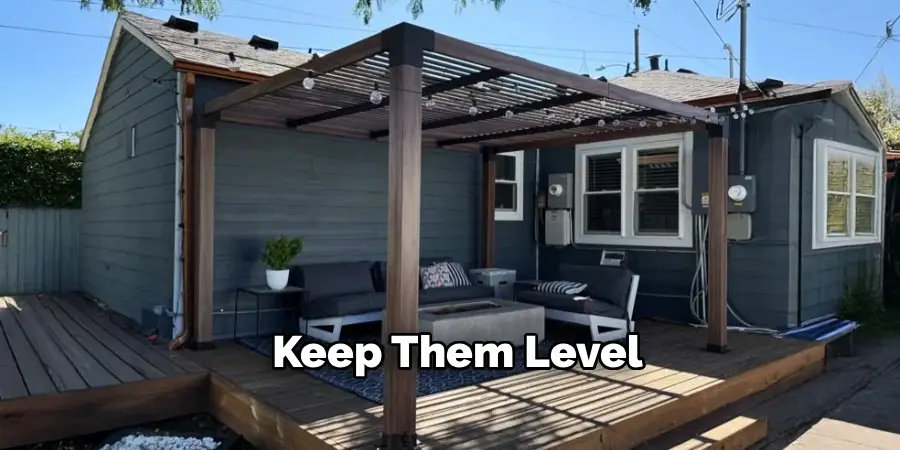
Fasten horizontal beams across the tops of the posts to form the frame of your canopy. Keep them level for an even, finished look.
Bolt the connections securely rather than relying on a couple of screws. These beams carry real weight.
Step back once they are up. The structure starts to look like something now, which is a genuinely encouraging moment.
Step 4: Add Rafters or Cross Supports
Install rafters or cross supports spanning the beams, spacing them evenly for both strength and a balanced appearance. These hold your cover.
Consistent spacing matters more than it seems. It gives the canopy its backbone and makes the next step far tidier.
Take a measuring tape to the gaps as you go. Eyeballing it tends to drift, and uneven rafters show.
Step 5: Install the Canopy Cover
Now attach your chosen cover, whether that means stretching fabric taut, fastening panels, or laying roofing material. Aim for a snug, secure fit that holds up against wind and rain.
A loose cover flaps, sags, and collects water, so pull it tight and fix it well.
Step back when it is on. The shade finally appears, and that is the moment the whole weekend justifies itself.
Step 6: Secure, Inspect, and Finish
Tighten every connection, then check that nothing wobbles when you give it a gentle push. Confirm the cover sheds water properly rather than pooling.
Test the structure honestly. A small wobble now is a simple fix; the same wobble in a storm is not.
This final inspection is what lets you relax underneath without a flicker of worry. Worth the extra ten minutes.
Adding Finishing Touches and Personal Style
With the structure standing, the fun part begins. This is where the canopy stops being a frame and starts being your space.
There is a particular pleasure in sitting beneath the finished thing as soft light filters through, knowing you put every piece in place.
Lighting, Curtains, and Decor
String lights do a lot of work for very little money, turning a functional cover into a cozy evening retreat. Outdoor curtains and hanging plants soften the look further.
These touches transform a practical structure into somewhere you actually want to linger. The difference is surprising.
Small, affordable additions tend to matter most here. You do not need much to make the space feel welcoming.
Staining and Weatherproofing the Frame
Seal or stain the wooden posts and beams to guard them against moisture and sun. A protective finish extends the life of the structure while sharpening its appearance.
One afternoon of weatherproofing now spares you grayed, weathered wood in a couple of years.
It is dull work, admittedly. Still, your future self will be grateful you bothered.
Caring for and Maintaining Your Deck Canopy
A little regular attention keeps the canopy looking sharp and standing safely. None of this is demanding. It mostly comes down to noticing.
Think of it as light upkeep rather than a chore on the list.
Routine Cleaning and Seasonal Care
Gently clean the cover and frame now and then, clearing away dust, leaves, and debris. Watch for standing water, which can damage fabric and panels over time.
Check the cover each season for wear. Catching a small tear early beats replacing the whole thing later.
Quick, occasional care keeps the canopy looking close to how it did the day you finished it.
Checking Stability and Hardware
After storms, especially, give the posts, beams, and fasteners a look. Wind and time loosen things, and a quick tighten protects both the structure and the people beneath it.
This habit takes a few minutes and buys real peace of mind.
A brief, regular check is genuinely all it asks. You glance, you tighten, you move on.
Common Mistakes and Easy Fixes
A few missteps trip up nearly everyone the first time. Wobbly posts, a sagging cover, water that refuses to drain. These are normal, and each has a straightforward fix.
A mistake here is just information about what to adjust next.
When Your Canopy Sags or Pools Water
Sagging usually traces back to a cover that is too loose or a frame without enough slope. Water then collects where it should run off.
The fix is rarely dramatic. Tighten the cover, or adjust the pitch so rain drains freely.
A small change often solves the whole problem and restores that crisp, clean line.
Fixing Loose or Leaning Posts
Posts that shift or lean usually mean weak anchoring or uneven decking underneath. The whole frame feels less trustworthy as a result.
Reinforce the anchors, or add a bit of bracing for extra support. Neither takes long.

Catch it early, and the fix is minor. Leave it, and a small lean becomes a structural headache.
Conclusion
Look how far you have come. You now understand how to build a deck canopy, from planning and measuring through raising the frame and stretching the cover.
The real takeaway is a simple one. Anyone with a little patience and decent preparation can turn a sun-baked deck into a shaded, welcoming retreat with their own two hands.
There is a quiet pride in relaxing beneath something you built yourself, sheltered from sun and rain. It changes how the whole back of the house feels.
So gather your materials, picture the cozy space you want, and simply begin. That frying-pan deck you have been avoiding may just become your favorite spot in the house.

About
Outdoor Fixes is a distinguished figure in the world of Diy design, with a decade of expertise creating innovative and sustainable Diy solutions.
His professional focus lies in merging traditional craftsmanship with modern manufacturing techniques,
fostering designs that are both practical and environmentally conscious. As the author of diy,
outdoorfixes delves into the art and science of outdoorfixes-making, inspiring artisans and industry professionals alike.
Education RMIT University
(Melbourne, Australia) Associate Degree in Design (Outdoor Fixes) Focus on sustainable design, industry-driven projects,
and practical craftsmanship. Gained hands-on experience with traditional and digital manufacturing tools, such as CAD and CNC software.
Nottingham Trent University
(United Kingdom) Bachelor’s in outdoorfixes.com and Product Design (Honors) Specialized in product design with a focus on blending creativity with production
techniques. Participated in industry projects, working with companies like John Lewis and Vitsoe to gain real-world insights.
Publications and Impact
In diy, Outdoor Fixes his insights on indoor design processes, materials, and strategies for efficient production.
His writing bridges the gap between artisan knowledge and modern industry needs, making it a must-read for both budding designers and seasoned professionals.