
Opening your pool cover to find a murky green swamp is a frustrating experience for any pool owner. That green tint means algae has taken over your water, usually due to low chlorine levels, poor circulation, or a chemical imbalance.

While it looks overwhelming, restoring your pool to crystal clear perfection is entirely manageable. You do not need to drain your pool or call in expensive professionals. With the right tools and a systematic approach, you can eliminate the algae and make your water safe for swimming again.
In this guide on how to fix green pool water, you will learn the exact supplies you need, the step-by-step process to eradicate algae, and the common mistakes you must avoid along the way.
What are the Benefits?
Clearing up your green pool water offers several critical advantages beyond just making your backyard look beautiful again.
First, it protects the health and safety of anyone using the pool. Algae blooms harbor harmful bacteria that can cause skin irritation and sickness.
Second, removing algae extends the lifespan of your pool equipment. Thick algae strains your pool pump and clogs your filters, leading to costly mechanical failures.
Finally, maintaining clear water prevents structural damage. Persistent algae can permanently stain your pool liner, plaster, or fiberglass surfaces. Fixing the problem quickly saves you significant money and effort in the long run.
What Will You Need?
Before you start the cleanup process, gather all necessary supplies. Having everything on hand ensures you can complete the treatment without unnecessary delays. You will need:
- A high-quality liquid or strip water test kit
- A heavy-duty leaf skimmer net
- A stiff-bristle pool brush (use nylon for vinyl liners, wire for concrete)
- A manual pool vacuum
- Granular pool shock (calcium hypochlorite is highly effective)
- High-quality pool algaecide
- pH and alkalinity decreaser or increaser
- Filter cleaner solution
10 Easy Steps on How to Fix Green Pool Water
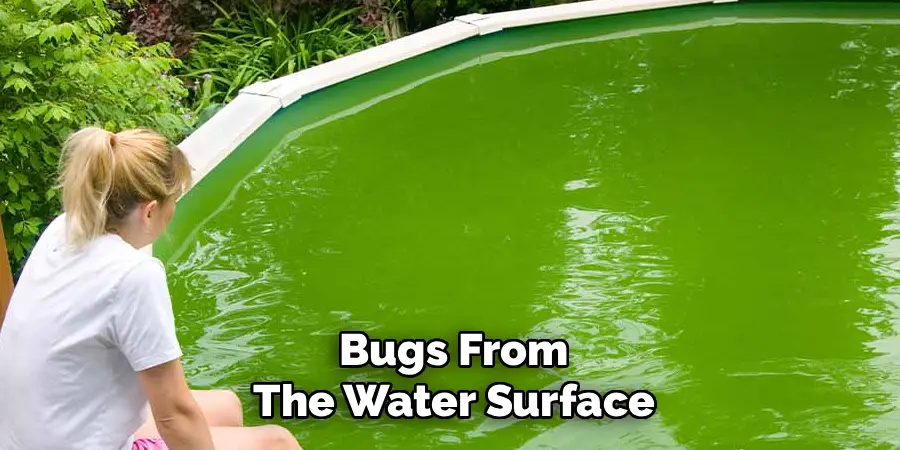
Step 1: Remove the Debris
Begin by clearing out any organic material floating in the pool. Use your leaf skimmer to remove leaves, twigs, and bugs from the water surface. Then, use a deep net to scoop up debris resting on the bottom of the pool. Do not use your pool vacuum for this step, as large debris will quickly clog your system and potentially damage your pump. Removing this organic matter reduces the amount of work your chemicals have to do, allowing the shock treatment to focus entirely on killing the algae rather than breaking down dead leaves.
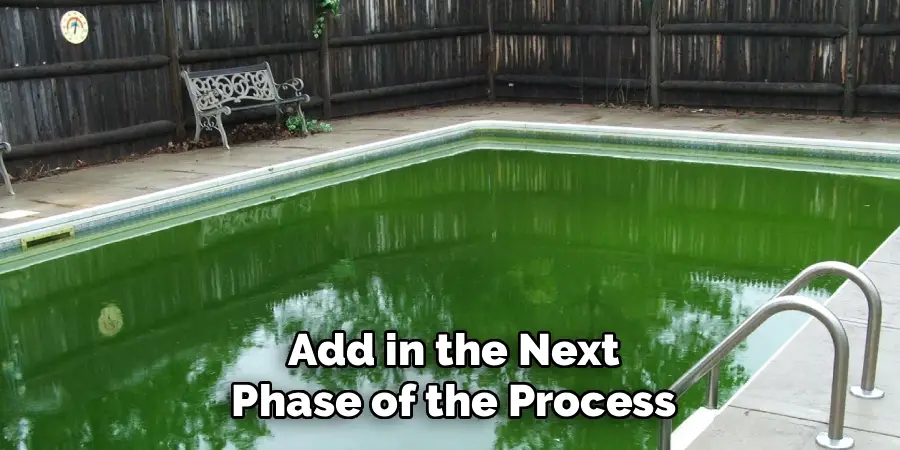
Step 2: Test the Water Chemistry
Once the water is free of physical debris, you need to understand your current chemical baseline. Use your pool test kit to measure the pH, total alkalinity, and free chlorine levels. Pay close attention to the pH reading, as pool shock becomes highly ineffective if the water is too alkaline. Your free chlorine will likely read near zero, which is exactly why the algae bloomed in the first place. Document these numbers so you know exactly how much chemical adjuster you need to add in the next phase of the process.
Step 3: Balance the pH and Alkalinity
Your pool shock needs an optimal environment to destroy the algae bloom. Adjust your total alkalinity first, aiming for a range between 80 and 120 parts per million (ppm). Once the alkalinity is stable, adjust your pH. You want the pH to drop slightly lower than normal for an algae treatment. Aim for a pH level of around 7.2. Adding sodium bisulfate or muriatic acid will lower the pH if it is too high. This slightly acidic environment maximizes the killing power of the chlorine shock you are about to add.
Step 4: Brush the Pool Surfaces
Algae clings stubbornly to pool walls, floors, and steps. You must physically break its grip before applying chemicals. Take your pool brush and aggressively scrub every inch of the pool interior. Brush the steps, the corners, behind the ladders, and along the water line. This scrubbing action breaks the protective slime layer coating the algae cells, exposing them directly to the pool shock. The water will likely turn a deeper, cloudier shade of green during this step, which is perfectly normal as you suspend the algae in the water.
Step 5: Shock the Pool Heavily
Now it is time to kill the suspended algae. You need to perform a treatment known as super-chlorination. A standard dose of shock will not work on a green pool; you must add three to four times the normal amount. Broadcast calcium hypochlorite shock evenly across the surface of the deep end while the pool pump is running. For severe green water, use at least three pounds of shock per 10,000 gallons of water. Always add the shock at dusk or night, as direct sunlight rapidly burns off unstabilized chlorine before it can do its job.
Step 6: Filter and Circulate the Water
After shocking the pool, turn your pool filter system on and leave it running continuously. Do not turn the pump off for at least 24 hours. The water needs constant circulation to distribute the highly concentrated chlorine to every corner of the pool. As the chlorine attacks the algae, the water will gradually transition from a swampy green to a cloudy white or milky blue color. This color change is the visual confirmation that the shock treatment is actively killing the algae bloom.
Step 7: Brush the Pool Again
After the pool has circulated the shock treatment for about 12 to 24 hours, grab your brush again. Scrub the walls, floors, and crevices just as aggressively as you did in step four. Dead algae will start settling on the pool floor, and surviving algae might still be clinging to the walls. Brushing forces the dead organic matter back into the filtration system and exposes any lingering stubborn algae cells to the high chlorine levels remaining in the water.
Step 8: Add Algaecide to the Water
While the heavy dose of chlorine handles the heavy lifting, a dose of algaecide acts as a powerful backup. Read the manufacturer instructions on your algaecide bottle and pour the recommended dosage directly into the pool water while the pump continues to run. The algaecide breaks down the cellular walls of any resistant algae strains that survived the initial shock treatment. It also acts as a preventative measure, stopping new algae spores from taking root while your chlorine levels slowly return to a normal, swimmable range.
Step 9: Vacuum the Dead Algae
By now, the algae is dead, but the microscopic particles are floating in the water, giving it a cloudy appearance. Much of this dead algae will sink to the bottom. Set your pool filter valve to the “waste” setting and manually vacuum the floor of the pool. Bypassing the filter ensures you do not push the fine, dead algae particles straight back into the pool through the return jets. Vacuum slowly to avoid kicking the dead algae back up into the water column. Add fresh water to the pool with a hose simultaneously to replace the water lost during vacuuming.

Step 10: Clean the Pool Filter
Your pool filter has worked tirelessly throughout this entire process, capturing massive amounts of dead algae and debris. It is now heavily loaded and operating inefficiently. If you have a sand or diatomaceous earth (DE) filter, perform a thorough backwash until the water runs completely clear in the sight glass. If you have a cartridge filter, remove the cartridges and hose them down aggressively with a high-pressure nozzle. For best results, soak the cartridges in a specialized chemical filter cleaner to dissolve any embedded organic matter or oils.
Frequently Asked Questions
- Is It Safe to Swim in Green Pool Water?
No, swimming in green pool water is not safe for anyone.
The green color indicates an active algae bloom that harbors harmful bacteria.
Swallowing this water or exposing skin to it can cause infections and illness.
You must wait until the water is completely clear and the chlorine level drops below 5 ppm.
Always test the water chemistry to confirm it is balanced before allowing swimmers back in. - How Long Does It Take for a Green Pool to Clear Up?
Clearing a green pool generally takes between two and five days.
The exact timeline depends on the severity of the algae bloom and your filter size.
Light green water might clear up within 48 hours of shocking and filtering.
A dark, swamp-like pool can take up to a week of continuous pumping and vacuuming.
Consistency in brushing, filtering, and balancing the chemicals significantly speeds up the process. - Why is My Pool Water Cloudy After Shocking It?
Cloudy blue or white water after shocking is actually a positive sign of progress.
This cloudiness consists of millions of microscopic dead algae cells suspended in the water.
The chlorine successfully killed the algae, changing its color from green to white.
Your filtration system now needs time to physically remove these dead particles from the water.
Running your pump constantly and adding a pool clarifier will help eliminate the cloudiness faster.

Conclusion
How to fix green pool water takes a bit of elbow grease and patience, but it is a straightforward process when you follow the right steps.
By properly balancing your pH, aggressively brushing the walls, and applying a heavy dose of shock, you can destroy even the most stubborn algae blooms. Keep your filter running and maintain proper chemical levels moving forward.
Start testing your water weekly to ensure your pool remains clear, healthy, and ready for your next swim.
About
Outdoor Fixes is a distinguished figure in the world of Diy design, with a decade of expertise creating innovative and sustainable Diy solutions.
His professional focus lies in merging traditional craftsmanship with modern manufacturing techniques,
fostering designs that are both practical and environmentally conscious. As the author of diy,
outdoorfixes delves into the art and science of outdoorfixes-making, inspiring artisans and industry professionals alike.
Education RMIT University
(Melbourne, Australia) Associate Degree in Design (Outdoor Fixes) Focus on sustainable design, industry-driven projects,
and practical craftsmanship. Gained hands-on experience with traditional and digital manufacturing tools, such as CAD and CNC software.
Nottingham Trent University
(United Kingdom) Bachelor’s in outdoorfixes.com and Product Design (Honors) Specialized in product design with a focus on blending creativity with production
techniques. Participated in industry projects, working with companies like John Lewis and Vitsoe to gain real-world insights.
Publications and Impact
In diy, Outdoor Fixes his insights on indoor design processes, materials, and strategies for efficient production.
His writing bridges the gap between artisan knowledge and modern industry needs, making it a must-read for both budding designers and seasoned professionals.