
Are you thinking of starting your own vegetable garden but have no idea where to begin? Planning a vegetable garden layout can seem like a daunting task, but with the right steps and considerations, you can create a successful and productive garden.
Growing your own food brings immense satisfaction, but a thriving harvest starts long before you plant a single seed. A well-planned garden layout maximizes space, improves sunlight exposure, and makes daily maintenance manageable.
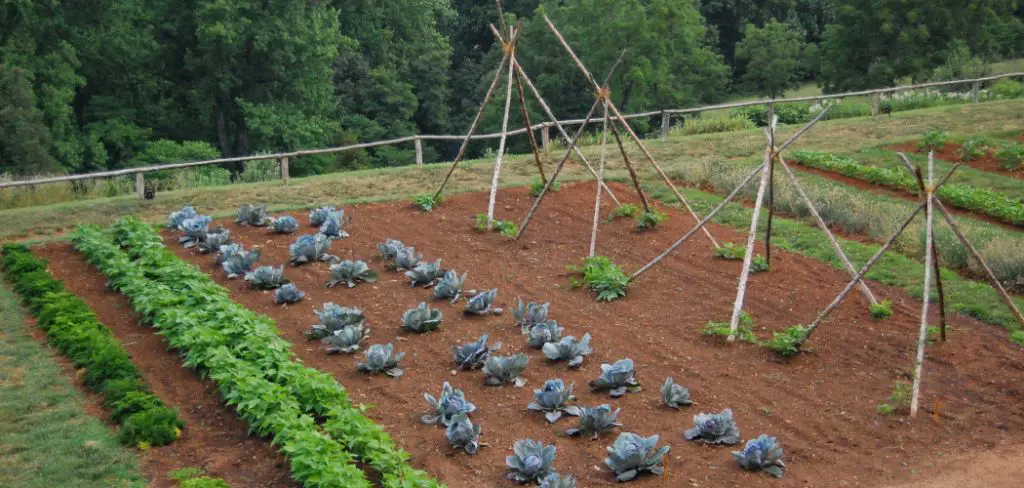
This guide on how to plan a garden layout for vegetable walks you through every phase of designing a vegetable garden that works perfectly for your yard and your schedule. You will learn exactly how to choose the right spot, prep your beds, and map out your crops for maximum yield.
Benefits of Vegetable Gardening
Creating a dedicated space for vegetables offers rewards that extend far beyond the dinner table. When you grow your own produce, you control exactly what goes into the soil, eliminating the need for harsh chemical pesticides. A well-tended garden significantly lowers your grocery bills during the peak harvest season. Gardening also provides a highly effective, screen-free way to reduce stress and get light exercise outdoors. Finally, nothing compares to the crisp, nutrient-dense taste of vegetables picked just moments before you eat them.
What Will You Need?
Before you start sketching your dream garden, gather a few basic planning tools. Having these items on hand makes the design process much smoother:
- A measuring tape (at least 25 feet long)
- Graph paper and a few pencils with erasers
- A soil testing kit
- A notebook to track sunlight and water access
- A list of the vegetables your family actually enjoys eating
- Wooden stakes and string to mark boundaries outdoors
10 Easy Steps on How to Plan a Garden Layout for Vegetable
Step 1: Choose the Best Location
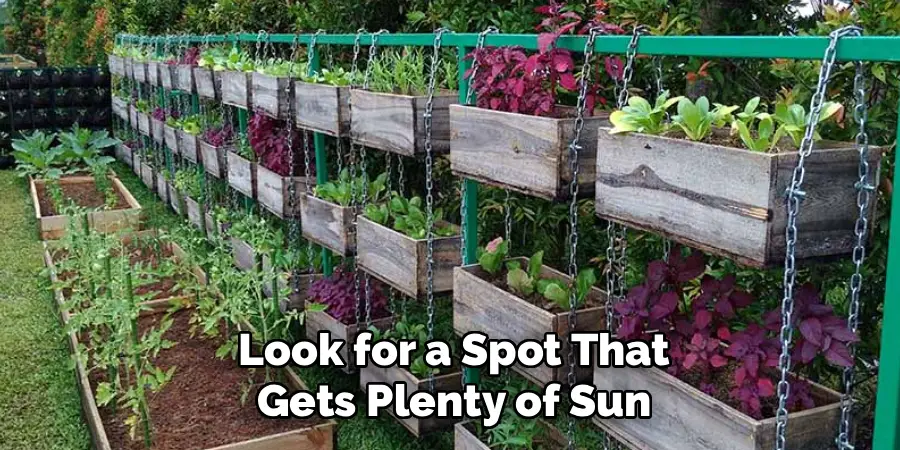
The first step in planning a vegetable garden layout is choosing the right location. Your garden site will affect how well your plants grow, how easy the garden is to maintain, and how much produce you can harvest. Most vegetables need at least 6 to 8 hours of direct sunlight each day, so look for a spot that gets plenty of sun, especially in the morning and early afternoon. Leafy crops may tolerate a bit of shade, but fruiting plants like tomatoes, peppers, cucumbers, and squash need full sun to perform well.
Step 2: Observe Sunlight and Shade Patterns
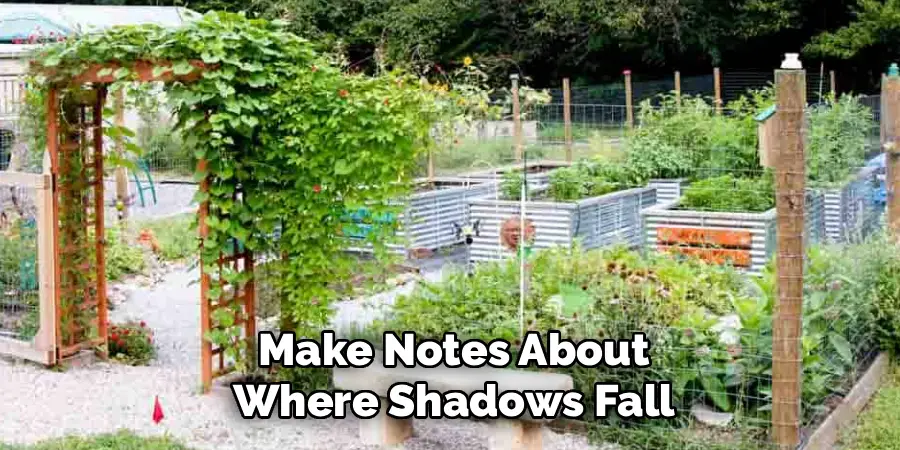
Even if an area seems sunny at first glance, it is important to study how sunlight moves across the space during the day. Buildings, fences, and trees can create shifting shade patterns that may reduce the amount of usable light your vegetables receive. Spend a day observing the area in the morning, midday, and late afternoon. Make notes about where shadows fall and how long sunlight stays in each part of the yard.
This step helps you avoid placing sun-loving crops in poor conditions. It also allows you to plan wisely by putting partial-shade crops, such as lettuce or spinach, in areas that do not receive full-day sun.
Step 3: Check Soil Quality and Condition
Healthy soil is one of the most important parts of a successful vegetable garden. Before planning the exact layout, test your soil to understand its texture, drainage, and nutrient levels. Soil that is too sandy may dry out quickly, while heavy clay can hold too much water and become compacted. A soil testing kit can also help you find out the pH level and whether your soil lacks important nutrients such as nitrogen, phosphorus, or potassium.
Once you know the condition of your soil, you can decide how to improve it. Adding compost is one of the best ways to boost soil quality. It improves drainage in clay soil and helps sandy soil hold moisture better. If your ground soil is poor or difficult to work with, you may want to include raised beds in your layout plan. Good soil supports strong root growth, healthier plants, and higher yields, so this step should never be rushed.
Step 4: Decide on the Type of Garden Layout
Now that you know your site conditions, decide what kind of garden layout fits your space and gardening style. There are several common options, including in-ground rows, raised beds, square-foot gardening, and container gardening. In-ground gardens are often less expensive to start and work well if your soil is already fertile and loose. Raised beds are excellent for beginners because they improve drainage, warm up quickly in spring, and are easier to organize.
Square-foot gardening is ideal if you want to grow a variety of crops in a small area. It helps reduce wasted space and keeps your layout neat and easy to manage. Container gardening works well for patios, balconies, or very small yards. Choosing the right structure for your garden will shape the rest of your planning process. Think about your budget, your physical space, and how much time you can dedicate to upkeep before making your decision.
Step 5: Measure and Map Your Space
Accurate measurements are essential when planning a vegetable garden layout. Use a measuring tape to find the length and width of the area you want to use. If your garden includes more than one bed, measure each section separately. Write everything down in your notebook so you can create a simple map of the space. Many gardeners like to use graph paper because it makes it easier to draw beds, rows, and pathways to scale.
Mapping your garden on paper gives you a chance to experiment before doing any digging. You can test different bed shapes, plant spacing, and path placement without making mistakes in the yard.
Step 6: Choose Vegetables That Fit Your Needs
A successful garden starts with growing vegetables that suit your climate, available space, and household needs. It is tempting to grow everything, but a better approach is to focus on crops your family actually enjoys eating. Think about what you buy most often from the store and begin there. If you have limited space, choose high-yield plants such as tomatoes, peppers, lettuce, beans, and herbs. If you are a beginner, also pick crops that are easy to grow and maintain.
Step 7: Arrange Plants by Size and Growth Habit
When placing vegetables in your layout, think carefully about how large each plant will become. Small seedlings may look harmless at first, but many crops spread widely as they mature. If large plants are placed in the wrong location, they can block sunlight, crowd nearby crops, and make harvesting difficult. Tall vegetables such as corn, trellised beans, and tomatoes should usually be planted on the north side of the garden so they do not shade shorter plants.
Spreading crops like pumpkin, zucchini, and cucumbers need enough room to grow without taking over the entire bed. Root crops such as carrots and onions can be planted closer together, while leafy greens work well in compact spaces. Vining plants may be trained vertically with trellises to save space and improve airflow. Planning by mature size rather than seedling size leads to a cleaner, healthier, and more efficient garden layout.

Step 8: Group Plants with Similar Needs
One smart way to plan a vegetable garden layout is to group plants that need similar amounts of water, sunlight, and care. This makes maintenance easier and helps prevent problems caused by overwatering or underwatering certain crops. For example, moisture-loving vegetables like lettuce and celery can be planted together, while drought-tolerant herbs may do better in a separate area. Grouping crops by needs allows you to water more efficiently and keep growing conditions more consistent.
Step 9: Leave Space for Paths and Access
Many first-time gardeners focus only on planting space and forget to include pathways. However, good access is a major part of a functional garden layout. You need room to walk, water, weed, prune, and harvest without stepping on the soil around your plants. Stepping directly in beds compacts the soil, which reduces airflow and makes it harder for roots to grow. That is why pathways should be included in the design from the beginning.
Step 10: Plan for Seasonal Changes and Future Growth
A great vegetable garden layout is not just for the first week of planting. It should also support your garden through the full season and even future growing years. Some vegetables grow quickly and are harvested early, which creates open space later in the season. You can plan ahead by using succession planting, where one crop is replaced by another after harvest. For example, after harvesting spring lettuce or radishes, you may be able to plant beans or late-season greens in the same area.
Frequently Asked Questions
- How Big Should My First Vegetable Garden Be?
A small layout prevents you from feeling overwhelmed during your very first growing season. A single raised bed measuring four feet wide by eight feet long offers an excellent starting point. This specific size gives you enough room to experiment with several different crop varieties. You can easily reach the center of the bed from any side without stepping on the fragile soil. Once you master this smaller space, you can comfortably expand your garden layout next year. - Can I Plant Vegetables Next to Each Other Randomly?
Placing plants randomly often leads to poor yields and increased pest problems throughout the season. Some plants compete heavily for the same nutrients and will quickly stunt each other’s growth. You must consider companion planting rules to help your vegetables thrive naturally and support one another. For example, planting strong-smelling alliums near leafy greens helps keep hungry insects away from your harvest. Always group plants that share similar water and sunlight requirements to simplify your daily garden maintenance. - When is the Best Time to Plan My Garden Layout?
Winter provides the absolute ideal timeframe to map out your upcoming vegetable beds. Planning early gives you plenty of time to order rare seeds before the popular catalogs sell out entirely. You can carefully review your soil test results and buy the necessary amendments without feeling rushed. Sketching your layout indoors keeps you actively engaged with gardening even when the ground remains completely frozen outside. By the time the last spring frost finally passes, you will feel completely prepared to start planting.

Conclusion
Planning your vegetable garden layout takes a little extra time upfront, but it pays off massively once the growing season begins.
By tracking your sunlight, measuring your space, and grouping your plants strategically, you set the stage for a healthy, abundant harvest. Grab your measuring tape and graph paper today, and take the first step toward a more productive and beautiful backyard garden.
Hopefully, this guide on how to plan a garden layout for vegetable has given you the tools and inspiration to create a vegetable garden layout that works for your space and needs. Remember to experiment, get creative, and have fun with your garden design. Happy gardening!

About
Outdoor Fixes is a distinguished figure in the world of Diy design, with a decade of expertise creating innovative and sustainable Diy solutions.
His professional focus lies in merging traditional craftsmanship with modern manufacturing techniques,
fostering designs that are both practical and environmentally conscious. As the author of diy,
outdoorfixes delves into the art and science of outdoorfixes-making, inspiring artisans and industry professionals alike.
Education RMIT University
(Melbourne, Australia) Associate Degree in Design (Outdoor Fixes) Focus on sustainable design, industry-driven projects,
and practical craftsmanship. Gained hands-on experience with traditional and digital manufacturing tools, such as CAD and CNC software.
Nottingham Trent University
(United Kingdom) Bachelor’s in outdoorfixes.com and Product Design (Honors) Specialized in product design with a focus on blending creativity with production
techniques. Participated in industry projects, working with companies like John Lewis and Vitsoe to gain real-world insights.
Publications and Impact
In diy, Outdoor Fixes his insights on indoor design processes, materials, and strategies for efficient production.
His writing bridges the gap between artisan knowledge and modern industry needs, making it a must-read for both budding designers and seasoned professionals.