
Dealing with a swimming pool should be about relaxation and fun, not about the stress of unexpected repairs. However, a suspected leak in the pipes running under your concrete pool deck can be a daunting problem. This issue not only leads to significant water loss but can also cause structural damage to the pool and surrounding areas if left unaddressed. Prompt action is key to preventing a small problem from escalating into a costly and complex one.
Understanding how to tackle this challenge is the first step toward a solution. While some situations will certainly require professional help, many homeowners with the right guidance and tools can manage this repair themselves. This guide on how to fix pool pipe leak under concrete provides a comprehensive walkthrough, from identifying the leak’s location to patching the concrete, empowering you to restore your pool’s integrity and peace of mind.
Tools and Materials You May Need
Before diving into the repair process, it’s important to have the necessary tools and materials on hand. Here are some commonly used items that you may need for fixing a pool pipe leak under concrete:
Safety Equipment:
This should include gloves, protective eyewear, and a face mask to protect yourself from any potential hazards during the repair process.
Concrete Patching Material:
To patch up the concrete after repairing the leak, you’ll need some type of patching compound specifically designed for use in wet areas. This will ensure a watertight seal and prevent any further leaks.
Epoxy or Sealant:
Epoxy or a waterproof sealant is necessary for sealing the leak in the pool pipe. Make sure to choose a product that is specifically designed for use on concrete surfaces.
Wire Brush:
You’ll need a wire brush to clean and roughen up the surface of the concrete around the leak. This will help the patching material and epoxy adhere better for a stronger bond.
Hacksaw:
If you need to cut out a section of the pool pipe to access the leak, a hacksaw will come in handy. Make sure to use one with fine teeth so you can make precise cuts without damaging the rest of the pipe.
Bucket and Sponge:
Having a bucket and sponge on hand is important for clean up. Use them to collect any debris or residue from the wire brushing and sanding process. This will help ensure that the patching material adheres properly to a clean surface.
Safety Equipment:
When working with pool chemicals, it’s always important to wear appropriate safety equipment such as gloves and protective eyewear. These items should also be worn when using sealant, epoxy, or any other potentially hazardous materials.
8 Simple Step-By-Step Guidelines on How to Fix Pool Pipe Leak Under Concrete
Step 1: Locate the Leak
The most critical and often most challenging step is accurately pinpointing the source of the leak. Guessing the location can lead to unnecessary and expensive demolition of your pool deck. Begin by confirming a leak exists with a bucket test. Place a bucket filled with pool water on a pool step, marking the water level on both the inside and outside of the bucket.
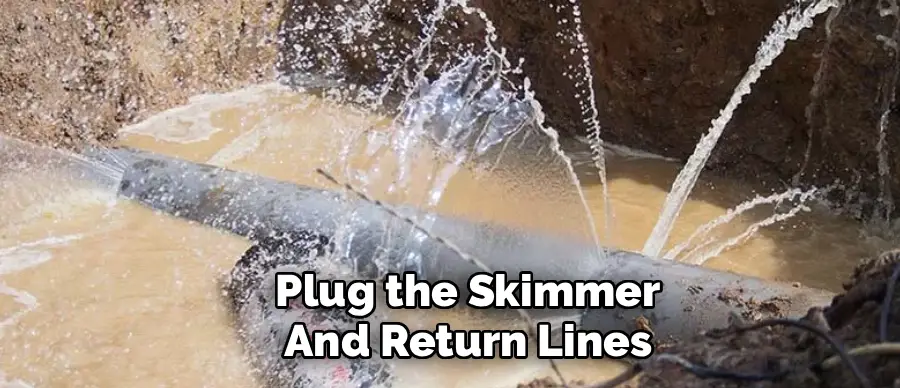
After 24 hours, if the pool’s water level has dropped more than the bucket’s, you likely have a leak in the pool’s structure or plumbing. To isolate the plumbing, turn off the pump and plug the skimmer and return lines. If the water loss stops, the leak is likely in the filtration system. If it continues, the leak is in the pipes.
Once you have confirmed the leak is in the underground plumbing, you need to find its precise location. A common method is to use a pressure testing kit. This involves isolating individual plumbing lines (skimmer, main drain, returns) and pressurizing them with air or water. A drop in pressure indicates which line is compromised.
To find the exact spot along that line, you can use specialized listening devices, which amplify the sound of air escaping the pipe underground. Another technique involves injecting dye near the suspected area with the pump off; the dye will be drawn toward the leak. For many homeowners, renting this equipment or hiring a leak detection specialist for this step is a worthwhile investment to ensure accuracy.
Step 2: Prepare the Work Area
Once you have confidently identified the location of the leak, the next phase is to prepare the area for the repair. Safety and organization are paramount during this stage. Start by completely turning off all power to the pool equipment at the circuit breaker.
This is a non-negotiable safety measure to prevent any risk of electric shock, especially since you will be working with water and power tools. Drain the pool water level below the skimmer and return jets to stop water from flowing into the pipes you will be working on. This ensures a dry and manageable work environment when you cut into the plumbing.
Next, clear the physical space. Remove any pool furniture, planters, toys, or other obstacles from the section of the deck where you will be working. Use a tarp or heavy-duty plastic sheeting to cover the surrounding pool deck and the pool surface itself. This will protect them from dust, debris, and damage during the concrete demolition phase.
Mark the area of concrete you need to remove with chalk or a marker, creating a square or rectangle that gives you ample room to work around the pipe—aim for at least one foot of clearance on all sides of the suspected pipe location. A well-prepared area makes the entire process safer, cleaner, and more efficient.
Step 3: Demolish the Concrete
This step requires physical effort and careful execution to avoid damaging more of the deck or the underlying pipes than necessary. Always wear your safety gear, including goggles, gloves, and a dust mask, before you begin.
For thicker concrete slabs, a rented electric jackhammer is the most effective tool. Start by making controlled cuts along the outline you marked. If using a sledgehammer and chisel, begin in the center of the marked area and work your way out toward the lines. The goal is to break the concrete into manageable pieces that can be easily removed.
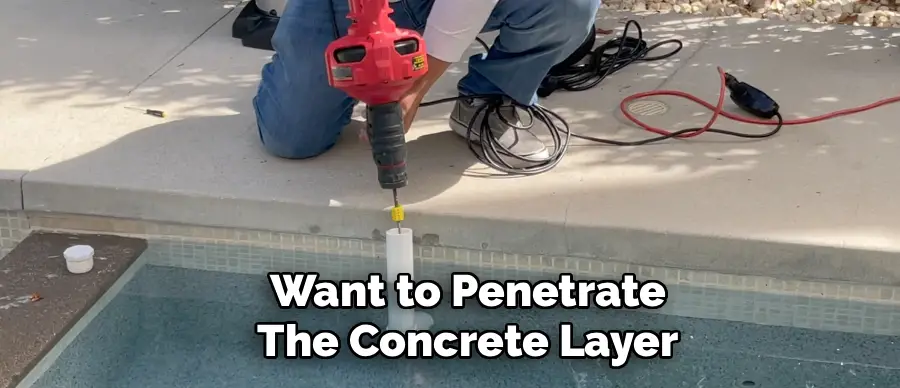
Take your time and work methodically. As you break through the concrete, be mindful of the depth. You want to penetrate the concrete layer without striking the pipes underneath. Use the hammer to fracture the concrete and then use a pry bar to lift out the broken sections.
Place all rubble and debris into a wheelbarrow or bucket for easy disposal later. Once the concrete is removed, you will expose the soil or gravel bed beneath. Having a clear opening that provides unobstructed access to the ground around the pipe is essential for the next stage of the repair. Clean the edges of the remaining concrete to ensure a smooth surface for the eventual patch.
Step 4: Excavate and Expose the Leaking Pipe
With the concrete removed, you can now begin the careful process of excavating the soil to expose the damaged pipe. This stage demands patience and a delicate touch to avoid causing further damage. Start by using a small shovel or garden spade to remove the bulk of the soil and gravel above the pipe. As you get closer to the estimated depth of the pipe (usually 18 to 36 inches deep), switch to a hand trowel or even your hands.
This allows for greater control and reduces the risk of accidentally hitting the pipe with a sharp tool, which could create another crack or break.
Continue digging around the pipe until you have fully exposed a section that is several feet long. You need enough space not just to see the damaged area but also to have room to cut the pipe and install new fittings. As you clear the dirt, inspect the pipe closely for the source of the leak.
Look for obvious cracks, splits, or holes. Sometimes, the leak is at a fitting or joint. If the ground is saturated with water, that is a strong indicator that you are in the right spot. Once you have located the precise point of failure, clear away any remaining mud and water from the area and wipe the pipe clean to prepare it for repair.
Step 5: Cut and Remove the Damaged Section
Now that you have located and exposed the damaged portion of the pipe, it is time to remove it. A clean and precise cut is essential for ensuring the new section fits perfectly and creates a watertight seal. Before you make any cuts, use a tape measure and marker to plan your work. You need to remove the entire damaged area, including any hairline fractures extending from the main break.
A good rule of thumb is to cut at least two inches of healthy pipe on either side of the visible damage. This ensures you are working with a strong, structurally sound pipe for the new connection.
Using a PVC pipe cutter is the best method for this task, as it provides a clean, square cut with no burrs. If you do not have a pipe cutter, a hacksaw can also be used, but you will need to be careful to make the cut as straight as possible.
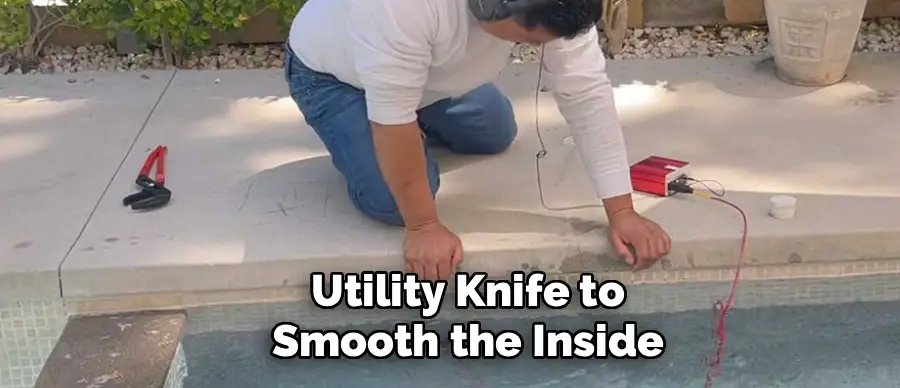
After cutting, use a deburring tool or a utility knife to smooth the inside and outside edges of the remaining pipe ends. Any rough edges or burrs can prevent the new fittings from seating properly and may compromise the seal. Once the damaged section is cut out, remove it from the trench and double-check that the remaining pipe ends are clean, dry, and undamaged.
Step 6: Install the New Pipe Section
With the damaged section removed, you are ready to install the replacement piece. This step requires careful measurement and proper application of PVC primer and cement to create a permanent, leak-proof bond. First, measure the gap between the two cut ends of the existing pipe. Then, measure and cut a new piece of PVC pipe to fit this gap.
Keep in mind that the pipe will need to slide into the couplings on each end, so you may need to adjust your measurement slightly depending on the type of couplings you are using. A “slip fix” or telescoping repair coupling can be very helpful here, as it allows for more flexibility in fitting the new piece.
Before applying any adhesive, do a “dry fit.” Assemble the new pipe section and couplings without any primer or cement to ensure everything lines up correctly and fits snugly. Once you are confident in the fit, disassemble the pieces. Apply a generous coat of PVC primer to the outside of the pipe ends and the inside of the couplings.
The primer cleans and softens the plastic, preparing it for the cement. Immediately follow with a layer of PVC cement on the same surfaces. Quickly push the pipe and fittings together with a slight twisting motion until the pipe bottoms out in the coupling. Hold it firmly in place for at least 30 seconds to allow the cement to set. Repeat for the other side and let the new joints cure completely according to the manufacturer’s instructions, typically for several hours.
Step 7: Test the Repair
After allowing the PVC cement to cure for the recommended time, you must test the repair before backfilling the hole and patching the concrete. This step is your final opportunity to ensure the leak is fixed and that your new connections are secure.
Skipping this test could mean having to undo all your hard work if a small leak remains. To begin, ensure all plugs in the skimmer and return lines are removed and that the water level in your pool is back to its normal operating height. Open any valves you may have closed before starting the repair.
Turn the pool pump back on and allow the system to run for at least 30 minutes to an hour. This will fully pressurize the line you repaired. While the system is running, carefully inspect the new pipe section and fittings for any signs of dripping or water seepage.
Check the joints and the new piece of pipe thoroughly. If you have access to a pressure testing kit, you can also isolate the repaired line again and re-pressurize it to confirm that it holds pressure. If the repair is dry and holds pressure, you have successfully fixed the leak. If you detect any moisture, you will need to cut out the new section and repeat the repair process.
Step 8: Backfill and Repair the Concrete
Once you have confirmed that the pipe repair is successful and completely dry, the final step is to restore your pool deck. Begin by backfilling the hole you excavated. It is important to do this carefully to provide proper support for the pipe and the new concrete slab.
Use the soil or sand you originally removed, adding it back in layers. Gently compact each layer to prevent the ground from settling later, which could put stress on the pipe or cause the concrete patch to sink and crack. Be careful not to drop large rocks directly onto the pipe.
After the hole is filled and compacted to the level of the bottom of the concrete slab, you can prepare to pour the new concrete. Mix the concrete according to the package directions until it reaches a consistent, workable texture. Pour the mixture into the opening, slightly overfilling it.
Use a trowel to spread and level the concrete, ensuring it is flush with the surrounding deck. For a more seamless look, you can try to match the texture of the existing concrete using a broom or float. Allow the concrete patch to cure completely, which can take several days. Avoid walking on it during this time. Once cured, your repair is complete, and your pool is ready to be enjoyed once more.
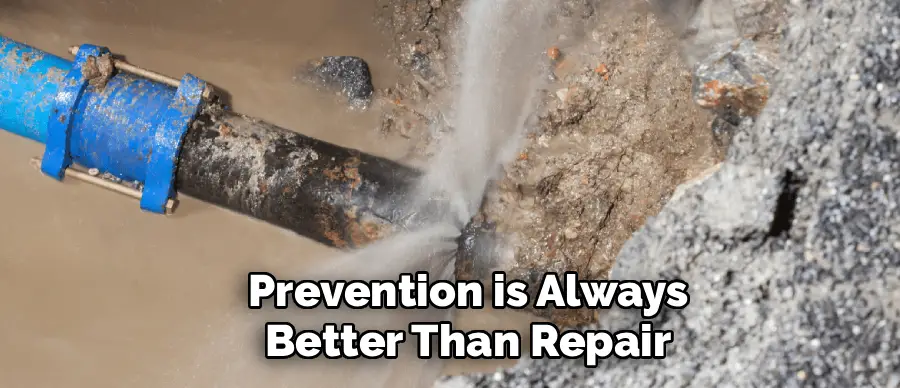
Following these steps on how to fix pool pipe leak under concrete deck, your pool should be back in working order. However, it is important to note that prevention is always better than repair when it comes to pool maintenance. Regularly checking and maintaining the pipes and plumbing of your pool can help prevent leaks and potential damage to your pool deck.
Prevention and Maintenance Tips
- Regularly inspect your pool and equipment for any signs of leaks, such as cracks or damp spots.
- Maintain proper water chemistry to prevent corrosion and degradation of pipes and fittings.
- Avoid making abrupt changes to water flow by closing valves slowly to prevent “water hammer,” which can stress joints.
- During winterization, ensure all lines are properly blown out to prevent ice from forming and cracking the pipes.
- Be mindful of landscaping near the pool deck, as aggressive tree roots can damage underground plumbing over time.
Safety Precautions
When undertaking a repair of this nature, your safety should be your top priority. Always turn off all electrical power to the pool equipment at the breaker before starting any work to eliminate the risk of electrocution. When demolishing concrete, wear appropriate personal protective equipment (PPE), including impact-resistant safety goggles, heavy-duty work gloves, and a dust mask to protect you from flying debris and harmful silica dust.
Be cautious when using power tools like jackhammers, ensuring you have a firm grip and stable footing at all times. When excavating, dig carefully to avoid striking and damaging the pipe or other unknown underground utilities. Finally, work in a well-ventilated area, especially when using PVC primer and cement, as their fumes can be noxious.
How Much Will It Cost?
The cost of fixing a pool pipe leak under concrete can vary dramatically depending on whether you do it yourself or hire a professional. A DIY repair can be relatively inexpensive, with costs primarily coming from tool rentals and materials. You might spend anywhere from $150 to $400 on renting a jackhammer and leak detection equipment, plus the cost of PVC pipes, fittings, and concrete mix. However, if you opt for professional services, the price increases significantly.
Hiring a company for leak detection alone can cost between $250 and $500. The full repair service, including demolition, plumbing work, and concrete patching, can range from $1,000 to over $3,000, depending on the complexity of the job and the amount of concrete that needs to be replaced. While the DIY route is cheaper, the professional option offers expertise and a guarantee, which can be invaluable for a complex problem.
Conclusion
Fixing a pool pipe leak under concrete is a significant undertaking, but it is a manageable one with the right approach. By systematically locating the leak, carefully preparing your workspace, and methodically following the steps on how to fix pool pipe leak under concrete for repair, you can successfully resolve the issue and protect your investment.
The key is to be patient, prioritize safety, and never cut corners, especially when it comes to testing your repair before the final backfill and concrete work.
While a DIY repair can save you a considerable amount of money, it is also important to recognize when a problem is beyond your scope. Professional leak detection and repair services offer valuable expertise and equipment that can ensure the job is done right. Whether you tackle it yourself or call in an expert, addressing a pipe leak promptly is essential to preventing further damage and ensuring you can get back to what matters most—enjoying your swimming pool.
About
Outdoor Fixes is a distinguished figure in the world of Diy design, with a decade of expertise creating innovative and sustainable Diy solutions.
His professional focus lies in merging traditional craftsmanship with modern manufacturing techniques,
fostering designs that are both practical and environmentally conscious. As the author of diy,
outdoorfixes delves into the art and science of outdoorfixes-making, inspiring artisans and industry professionals alike.
Education RMIT University
(Melbourne, Australia) Associate Degree in Design (Outdoor Fixes) Focus on sustainable design, industry-driven projects,
and practical craftsmanship. Gained hands-on experience with traditional and digital manufacturing tools, such as CAD and CNC software.
Nottingham Trent University
(United Kingdom) Bachelor’s in outdoorfixes.com and Product Design (Honors) Specialized in product design with a focus on blending creativity with production
techniques. Participated in industry projects, working with companies like John Lewis and Vitsoe to gain real-world insights.
Publications and Impact
In diy, Outdoor Fixes his insights on indoor design processes, materials, and strategies for efficient production.
His writing bridges the gap between artisan knowledge and modern industry needs, making it a must-read for both budding designers and seasoned professionals.