
There is a timeless, iconic charm to a porch swing. The gentle, rhythmic sway, the creak of the chains, and the feeling of floating while you watch the world go by evoke a sense of peaceful nostalgia. It is an invitation to slow down, enjoy a cool drink, and reconnect. While choosing the perfect swing is a joyful part of the process, the task of installing it can feel intimidating.
The safety of your family and guests rests on a secure installation, which involves more than just screwing a hook into the ceiling. This comprehensive, safety-first guide is designed to demystify the process and show you exactly how to hang porch swing from ceiling structures correctly and securely. With the right knowledge, preparation, and tools, this is a rewarding DIY project that will add comfort and classic charm to your home for many years of enjoyment.

Assessing Your Porch Structure and Weight Capacity
Before you can even think about hardware, the absolute first step is to determine if your porch ceiling is strong enough to support a swing. This is not something to guess about. The decorative ceiling material you see, whether it is plywood, beadboard, or vinyl soffit, has no structural strength. The entire load of the swing—including the weight of the people on it and the dynamic forces of swinging—must be borne by the hidden structural framework of your porch roof: the ceiling joists or beams. A porch swing exerts a significant amount of dynamic force, which is the stress created by moving weight, and this is far greater than the static weight of just sitting still.
Locating the Ceiling Joists
Your first mission is to find these crucial support beams. The most reliable tool for this is a good-quality electronic stud finder. Run it slowly across the ceiling until it indicates the edges and center of a joist. To confirm its location and size, you can drill a very small pilot hole to see if you hit solid wood. Another method is to look for nail or screw patterns in the ceiling material, as these often indicate where the boards are fastened to the joists above. If your porch has an accessible attic or crawl space above it, you can simply go up and visually inspect the framing, which is the most surefire method of all.
Understanding Structural Integrity
Not all joists are created equal. The size of the joist is critical. A swing should be hung from a substantial joist, at least a 2×6, and preferably a 2×8 or larger. A 2×4 joist, commonly found in some porch ceilings, may not be sufficient to handle the dynamic load of a swing over the long term. Inspect the wood for any signs of damage, such as rot, cracks, or insect activity. If the joists seem undersized, are spaced unusually far apart, or if you have any doubts whatsoever about their integrity, it is time to pause and consult a professional carpenter or structural engineer. A small consultation fee is a worthwhile investment for peace of mind and safety.

Choosing the Right Hardware and Chains
With your structural supports identified, the next step is to select the hardware that will connect your swing to the ceiling. This is not the place to cut corners. Using underrated or improper hardware is a direct path to an accident. You must choose components that are specifically designed and rated for the heavy, dynamic load of a porch swing.
Eye Bolts vs. Swing Hangers
The two most common options for ceiling mounts are heavy-duty eye bolts and specialized swing hangers. Forged eye bolts are a traditional and robust choice. It is crucial to select forged, not bent, eye bolts, as they are significantly stronger. They should have a shank diameter of at least 1/2 inch. A more modern and often preferred option is a dedicated swing hanger. These hangers typically feature a bracket that bolts to the joist and a pivoting loop that allows for a smoother, quieter swinging motion and reduces wear on the hardware over time.
Selecting Chain or Rope
The suspension material connects your swing to the ceiling mounts. Galvanized or stainless steel chain is the classic, durable choice, offering excellent strength and weather resistance. Look for a chain with a high working load limit, which should be clearly stated on the packaging. An alternative with a softer, more nautical aesthetic is marine-grade rope. If you choose rope, ensure it is a high-quality, UV-resistant polyester or nylon rope with a diameter and strength rating appropriate for supporting several hundred pounds.
Essential Tools and Materials Checklist
Gathering all your tools and supplies before you begin is a simple step that makes the entire project run more smoothly. This checklist will ensure you have everything you need to measure, drill, and install your swing safely and efficiently, preventing those frustrating mid-project trips to the hardware store.
Measuring and Marking Tools
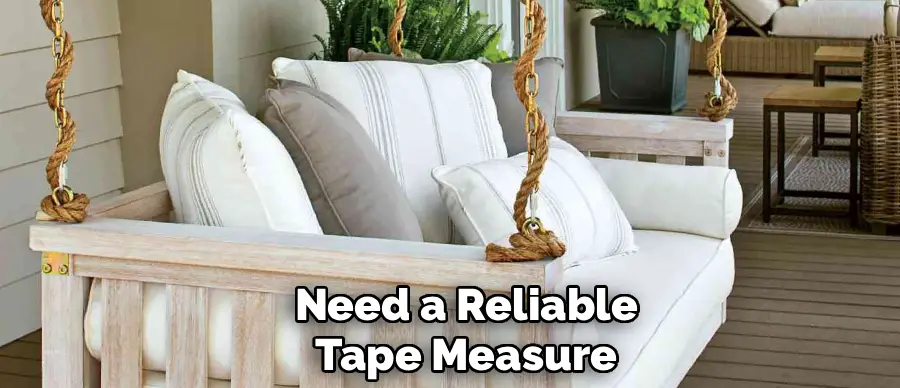
Precision is key to a professional-looking installation. You will need a reliable tape measure to determine the placement of your hangers and the height of your swing. A pencil is needed for marking the joist locations and drill points. A framing square or a T-square can be very helpful for ensuring your marks are perfectly perpendicular to the house, which helps the swing hang straight.
Drill and Installation Gear
The primary tool for this job is a powerful drill. You will also need a set of drill bits to create the pilot holes for your mounting hardware. The size of the bit is critical and will be determined by the hardware you choose. To tighten the hardware, you will need a wrench set or an adjustable wrench. Finally, a sturdy ladder or step stool that allows you to work comfortably and safely at ceiling height is non-negotiable.
Positioning Your Swing for Comfort and Clearance
The perfect spot for your porch swing involves more than just finding a strong joist. Proper positioning is essential for a comfortable and safe swinging experience. You must account for adequate clearance on all sides to prevent the swing from bumping into walls, railings, or columns while in motion.
Distance Behind the Swing
One of the most important measurements is the clearance behind the swing. You need to allow enough space for a full, gentle arc without hitting the wall of your house. A minimum clearance of 2.5 to 3 feet is recommended between the back of the swing and any wall or obstruction. Measure this distance from the wall to determine the placement of your ceiling hooks.
Height From the Floor
The ideal height for a porch swing seat is a matter of personal comfort, but a standard recommendation is to hang it so the seat is between 17 and 19 inches from the floor. This height allows most adults to sit down and stand up comfortably and to gently push off with their feet to start the swinging motion. You can adjust this based on the height of the primary users, but this range is an excellent starting point.

Step-by-Step Guide: How to Hang Porch Swing from Ceiling
This detailed, sequential guide will walk you through the core installation process. Following these steps carefully, with a strong focus on safety and precision, will ensure your porch swing is a secure and lasting addition to your home.
Step 1: Mark the Mounting Points
First, measure the distance between the hanging hooks on the swing itself. You will transfer this measurement to the ceiling, but with a slight modification. For greater stability and to prevent the swing from tipping, the ceiling hooks should be positioned 2 to 4 inches wider than the swing’s suspension points. This slight outward angle of the chains adds stability. Center this measurement on your porch and use your stud finder and pencil to mark the exact locations on your chosen ceiling joists.
Step 2: Drill Pilot Holes
Drilling pilot holes is a non-negotiable step that is crucial for two reasons: it prevents the large screw threads of the hanger from splitting the wooden joist, and it ensures the threads have maximum grip within the wood. The pilot hole should be drilled using a bit that is slightly smaller in diameter than the shank (the solid part) of the screw on your eye bolt or hanger. For a 1/2-inch lag screw, a 1/4-inch or 5/16-inch pilot hole is typically appropriate. Drill straight up into the center of the joist, going at least as deep as the length of the screw.
Step 3: Install the Hangers or Eye Bolts
Now, it is time to install the hardware. Begin threading the eye bolt or lag screw of the hanger into the pilot hole by hand. Once it becomes difficult to turn, you will need more leverage. For an eye bolt, you can insert the shaft of a sturdy screwdriver through the eye and use it as a handle to turn the bolt. Continue turning until the entire threaded shank is buried in the wood, and only the eye or the hanger bracket is visible. The connection should feel completely solid.
Step 4: Attach the Chains or Rope
With the ceiling mounts securely in place, you can attach the suspension chains or ropes. It is often easiest to attach the chains to the swing first. Then, with the help of a partner, lift the swing up to the ceiling hooks. Having a helper is highly recommended, as they can hold the weight of the swing while you focus on making the connections safely and securely using S-hooks, quick links, or carabiners. Ensure all connections are fully closed and secured.
Step 5: Adjust for Tilt and Height
Once the swing is hanging, it will likely need some final adjustments to get the height and angle just right. Use the links in the chain to raise or lower each side until the seat is perfectly level and at your desired height of 17-19 inches from the floor. Many people find that a slight backward tilt makes the swing more comfortable for lounging. You can achieve this by making the front chains one or two links longer than the back chains. Sit in the swing and test the feel, making small adjustments until it is perfect.

Alternative Mounting: Installing Blocking
What if your ceiling joists are not in the right location for your desired swing placement? This is a common problem, especially if the joists run parallel to the direction you want the swing to face. The solution is to install “blocking,” which is a support beam that runs between two existing joists.
Accessing the Ceiling Cavity
To install blocking, you will need to gain access to the space above your porch ceiling. This might involve carefully removing a section of the ceiling material (like beadboard or plywood) or, if accessible, working from an attic space above. This creates the opening you need to install the new support beam.
Installing a 4×4 Support Beam
The blocking itself should be a substantial piece of lumber, such as a 4×4 or a doubled-up 2×6. Cut the beam to fit snugly between two parallel joists, directly above where you want your swing hangers to be. Secure the blocking to the joists on both ends using strong structural screws or joist hanger brackets. This creates a new, incredibly strong mounting point exactly where you need it, allowing you to proceed with your installation as planned.
Safety Testing and Maintenance
Your installation is not complete until you have thoroughly tested it for safety. Once installed, your swing will also require periodic inspection to ensure it remains in safe working condition for years to come.
The Weight Test
Before anyone sits on the swing, perform a careful weight test. Start by gently pulling down on the swing with your hands, listening for any creaks or groans from the structure above. If all seems well, gradually apply more weight. You can use sandbags, weights, or have a couple of people push down on the seat. Finally, sit on the swing gingerly with your feet still on the ground, again listening for any sounds of stress. If everything remains quiet and solid, you can proceed with a gentle swing.
Annual Hardware Inspection
At least once a year, take a few moments to inspect all the hardware. Check the ceiling mounts, chains, and all connection points for any signs of rust, wear, or metal fatigue. Look for any elongation in the chain links or the eye bolts. At the same time, lubricate any moving parts on your swing hangers to prevent squeaking and ensure a smooth motion. A little preventative maintenance goes a long way in ensuring decades of safe use.
Adding Comfort and Style
With your swing safely and securely hung, it is time for the final, fun step: making it comfortable and stylish. Adding a thick outdoor cushion and a few weather-resistant throw pillows can transform your wooden swing into a plush and inviting retreat. A small side table placed nearby provides a convenient spot for a book or a drink, completing your perfect relaxation station.
Conclusion
The process of hanging a porch swing is a project where safety and precision are paramount. Success lies in following a clear set of steps: thoroughly assessing your porch structure to locate strong support joists, selecting robust, load-rated hardware, and taking meticulous care when drilling and installing the mounts.
While the task requires attention to detail, knowing how to hang porch swing from ceiling correctly is the critical difference between creating a peaceful backyard retreat and creating a safety hazard. We encourage you to take your time, double-check your measurements, and if ever in doubt, consult a professional. The reward for your careful work will be a secure, beautiful porch swing and the countless peaceful moments you will spend enjoying it.

About
Outdoor Fixes is a distinguished figure in the world of Diy design, with a decade of expertise creating innovative and sustainable Diy solutions.
His professional focus lies in merging traditional craftsmanship with modern manufacturing techniques,
fostering designs that are both practical and environmentally conscious. As the author of diy,
outdoorfixes delves into the art and science of outdoorfixes-making, inspiring artisans and industry professionals alike.
Education RMIT University
(Melbourne, Australia) Associate Degree in Design (Outdoor Fixes) Focus on sustainable design, industry-driven projects,
and practical craftsmanship. Gained hands-on experience with traditional and digital manufacturing tools, such as CAD and CNC software.
Nottingham Trent University
(United Kingdom) Bachelor’s in outdoorfixes.com and Product Design (Honors) Specialized in product design with a focus on blending creativity with production
techniques. Participated in industry projects, working with companies like John Lewis and Vitsoe to gain real-world insights.
Publications and Impact
In diy, Outdoor Fixes his insights on indoor design processes, materials, and strategies for efficient production.
His writing bridges the gap between artisan knowledge and modern industry needs, making it a must-read for both budding designers and seasoned professionals.