
TL;DR: Patio tomatoes tend to do best when you choose a compact determinate variety, plant it in a container at least 14 inches wide with good drainage, and give it 6 to 8 hours of direct sun each day. Use a loose potting mix rather than garden soil, water evenly, and you can often harvest flavorful tomatoes from a balcony, porch, or small patio.
You do not need a large backyard to grow tomatoes well. A bright balcony, a small deck, even a sunny stretch of porch can be enough. For many gardeners, that is the appeal: the scale feels manageable, but the payoff is still real. A warm tomato picked a few steps from the kitchen rarely tastes like an afterthought.
Container growing also lowers the barrier to entry. If space is limited, or if you are renting and cannot dig up the ground, pots make the whole project possible. That said, patio tomatoes are not quite effortless. They are forgiving in some ways, fussy in others, and they respond quickly—sometimes brutally—to mistakes in watering, light, or container size. Get a few basics right, though, and a modest corner can produce a surprisingly generous crop. In this guide on how to grow patio tomatoes, we will discuss some tips and tricks to help you grow the best patio tomatoes.
Which Tomato Varieties Are Best for Patio Gardens?
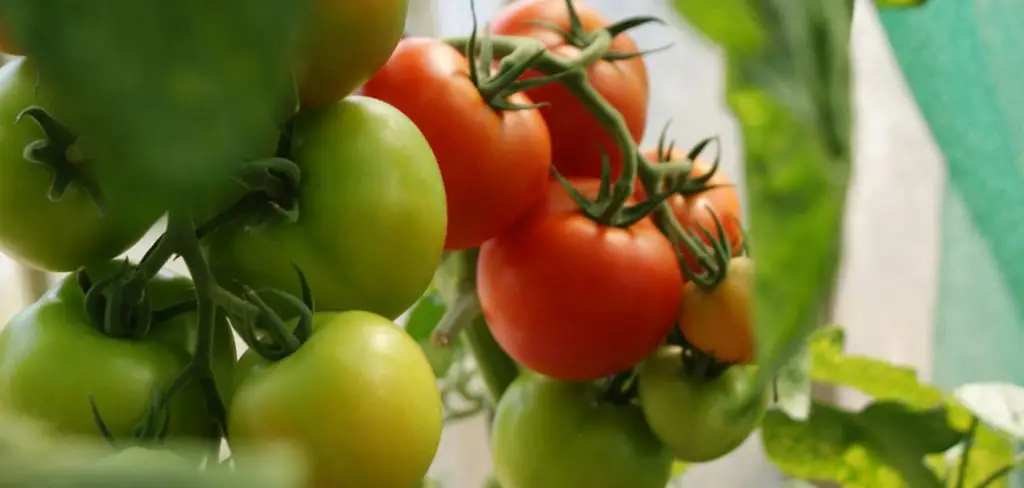
The first decision matters more than people sometimes realize: choose the plant type carefully. Tomatoes are generally grouped into two broad categories, determinate and indeterminate. For container growing, determinate varieties usually make more sense. They stay relatively compact, often around 3 to 4 feet tall, and they set most of their fruit within a shorter window.
That growth habit suits patios and balconies where space, support, and soil volume are all limited. Good choices for containers include Patio Princess, Bush Goliath, and Sweetheart of the Patio. These are bred or selected for tighter growth, which makes them easier to manage in pots. Indeterminate tomatoes can certainly be grown in containers, but they often become large, unruly, and demanding. If you are just starting out, there is little reason to make things harder than they need to be.
7 Simple Step-By-Step Guidelines on How to Grow Patio Tomatoes
Step 1: Select the Proper Container Size
Container size is where many patio tomato attempts begin to go wrong. A pot that looks fine in spring can become obviously inadequate by midsummer, once the plant has leafed out and temperatures climb. Small containers dry too fast, restrict root growth, and make the plant more vulnerable to stress.
As a general rule, use a container that holds at least 5 gallons of potting mix, or one roughly 14 to 18 inches across. Bigger is often better, within reason. More soil means more room for roots and a slower rate of drying, both of which help stabilize the plant during hot weather.
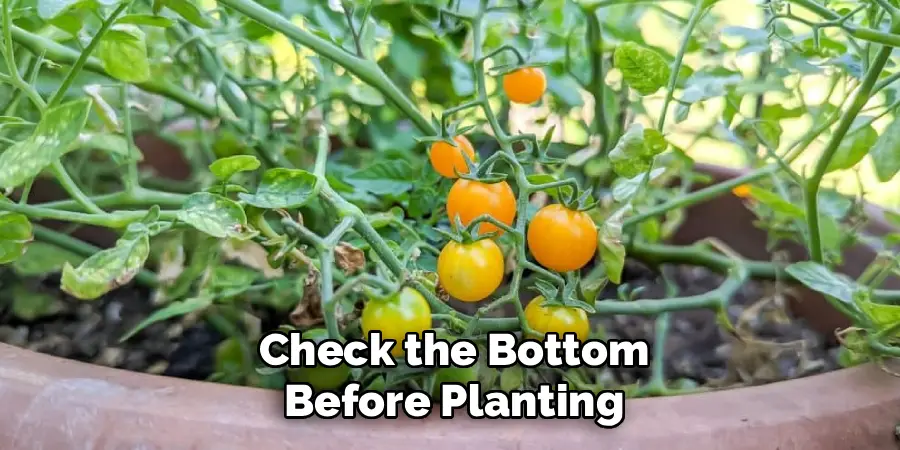
Drainage matters just as much. Tomatoes do poorly in soggy soil, and prolonged saturation can lead to root rot and other disease problems. If you are using a decorative container, check the bottom before planting. No holes, no tomato. If necessary, drill several half-inch drainage holes before you add soil.
Step 2: Choose a High-Quality Potting Mix
It is tempting to fill a pot with soil from the yard and call it a day. Resist that temptation. Garden soil is usually too dense for containers. In a pot, it compacts, drains poorly, and can leave roots sitting in conditions that are far less airy than tomatoes prefer.
A light potting mix made for containers is the better option. Most mixes of this kind include ingredients such as peat moss or coco coir to hold moisture, plus perlite or vermiculite to improve drainage and texture. Some also contain compost or a starter charge of nutrients.
That loose structure matters. Tomato roots need water, yes, but they also need oxygen. A good mix creates that balance more reliably than backyard soil does. It is not the most glamorous purchase in the gardening aisle, but it may have more effect on the season than any fertilizer you add later.
Step 3: Plant the Tomato Seedling Deeply
Tomatoes have a useful quirk: the buried stem can produce additional roots. That is why gardeners often plant them deeper than they were growing in the nursery pot. It looks slightly odd the first time you do it, but the logic is sound.
Remove the lowest sets of leaves, then set the seedling deep enough that part of the stem sits below the soil line. In many cases, this encourages a larger root system to form within the container. More roots generally mean better access to water and nutrients, which can be especially helpful when the weather turns hot or windy.
On patios, that extra anchoring can make a difference. Containers heat up fast, dry out quickly, and are often exposed to gustier conditions than in-ground beds. A deeper-planted tomato may handle those swings with a bit more resilience.

Step 4: Place the Container in Full Sunlight
Tomatoes need real sun. Not bright shade. Not a few scattered hours. If fruit production is the goal, aim for at least 6 to 8 hours of direct sunlight per day.
This is one of those requirements that sounds simple until you start observing your space. A balcony may look sunny in the morning and fall into shadow by noon. Nearby buildings, railings, trees, and roof overhangs can all cut the light more than expected. It is worth checking carefully before you commit to a spot.
South-facing or west-facing spaces often work best, though local conditions vary. If the plant does not receive enough direct light, it will usually tell you: growth becomes lanky, flowering may be sparse, and ripening slows. Gardeners sometimes blame fertilizer or watering first, but weak light is often the more basic problem.
Step 5: Establish a Consistent Watering Routine
Watering is probably the task that requires the most attention once the plant is growing strongly. Tomatoes in containers dry out much faster than tomatoes in the ground, especially when the pot sits on concrete, brick, or another heat-reflective surface. In peak summer, a mature plant may need water every day. In extreme heat, possibly twice.
Rather than watering by habit alone, check the soil. Push a finger about two inches into the potting mix. If it feels dry at that depth, water thoroughly until excess drains from the bottom. That tells you the root zone is being reached, not just the surface.
Consistency matters. Big swings between bone-dry and soaking-wet conditions can contribute to fruit splitting and may be associated with blossom end rot, a disorder often tied to disrupted calcium uptake. People sometimes assume this means the plant simply needs more calcium. Sometimes it does. Just as often, the deeper issue is uneven watering.

Step 6: Apply the Right Fertilizer at the Right Time
A tomato in a pot has only so much soil to draw from, which means nutrients are used up faster than they would be in a garden bed. For that reason, regular feeding is usually necessary.
Start by mixing a slow-release granular fertilizer into the potting mix at planting time. That gives the seedling a baseline supply as it settles in. Later, once the plant begins flowering, switch to a liquid fertilizer labeled for tomatoes and apply it every one to two weeks, following the label directions rather than improvising.
This timing is helpful for a reason. Early on, the plant needs to build roots and foliage. Once flowers appear, the nutritional emphasis shifts. Tomato fertilizers often provide relatively higher phosphorus and potassium, which support flowering and fruiting more than excess leaf production. More fertilizer is not automatically better, though. Overfeeding can produce a lush-looking plant that is all leaves and little fruit.
Step 7: Provide Adequate Support for the Plant
Even compact patio varieties can become surprisingly heavy once they start setting fruit. A branch that looks sturdy in June may bend or split in July. Support is not optional for long.
Install the support when you plant, not later. That timing is practical: it avoids the risk of jamming a stake into established roots midseason. A standard tomato cage works well for wide determinate varieties, and a sturdy wooden or metal stake can also do the job if tied properly.
As the plant grows, secure major stems with soft ties or garden twine. Keep the ties loose enough to avoid cutting into the stem. Good support does more than prevent breakage. It also improves air movement, reduces contact between leaves and wet soil, and makes the fruit easier to spot and pick. Following these steps on how to grow patio tomatoes will help ensure a bountiful harvest.
Common Mistakes to Avoid When Growing Patio Tomatoes
The most common failures are not especially mysterious. Too little sun is a major one. Many patios feel bright to us while still providing fewer than six hours of direct light, which is often not enough for reliable fruiting.
Poor drainage is another frequent issue. A handsome pot without drainage holes may suit a decorative shrub; it is a poor home for a tomato. Waterlogged roots tend to decline quickly, and recovery is not always easy.
Then there is watering inconsistency. Letting the plant wilt repeatedly, then drenching it, puts it under avoidable stress. The result may be split fruit, stalled growth, or blossom end rot. None of this is unusual. Still, it is frustrating, particularly because the problem usually begins with routine care rather than disease.

Patio Tomato Care Throughout the Season
Once the plant is established, care becomes a matter of observation as much as schedule. From late spring through the first fall frost, look over the plant regularly. Check the undersides of leaves. Notice whether new growth appears healthy. Pay attention to changes before they become serious.
Aphids and hornworms are common enough to watch for. If you spot damaged or infested leaves, remove them promptly. Yellowing foliage near the base can also be pruned away, especially if it is touching the soil or restricting airflow around the lower part of the plant. That small bit of maintenance may help reduce disease pressure, including problems such as early blight.
In high summer, conditions can turn harsh fast. A two-inch layer of organic mulch on the surface of the pot may help slow moisture loss and keep the root zone somewhat cooler. It will not replace watering, of course, but it can make the plant less vulnerable during hot spells.
Frequently Asked Questions
Q1: How Often Should I Water My Patio Tomatoes?
A1: Check the soil every day, especially once temperatures rise. If the top two inches feel dry, water deeply until excess runs from the drainage holes. During stretches of intense heat, mature patio tomatoes may need water once or even twice daily. Try to water at the base rather than over the leaves, since wet foliage can encourage fungal problems.
Q2: Why Are the Leaves on My Tomato Plant Turning Yellow?
A2: Yellow leaves often point to stress, though the cause is not always the same. Overwatering and poor drainage are common culprits because they limit oxygen around the roots. In some cases, yellowing may also suggest a nutrient issue, including low nitrogen or magnesium. Start with the basics: make sure the pot drains freely, review your watering pattern, and consider a balanced liquid fertilizer if nutrition seems to be part of the problem.
Q3: Can I Grow Patio Tomatoes Indoors?
A3: It is possible, but difficult. Window light alone is rarely strong enough to support healthy flowering and fruit production for tomatoes. If you want to grow them indoors, you will likely need high-output LED grow lights running 12 to 16 hours a day. Pollination is another challenge. Without insects or wind, you may need to shake the flowers gently each day by hand.
Enjoying Your Homegrown Harvest
There is something satisfying about growing tomatoes in a small space. The scale is modest, but the pleasure is not. When the fruit ripens on the plant and you pick it at the right moment, the flavor is usually better than what you get from standard supermarket tomatoes, especially those harvested early for shipping.
If you choose an appropriate variety, use a container large enough to support steady growth, and stay disciplined about sun and watering, patio tomatoes can be very productive. Not perfect every season. Few garden crops are. Still, they are one of the more rewarding things you can grow in a pot. Get your supplies together, claim the sunniest corner you have, and give it a try. Thanks for reading this guide on how to grow patio tomatoes.

About
Outdoor Fixes is a distinguished figure in the world of Diy design, with a decade of expertise creating innovative and sustainable Diy solutions.
His professional focus lies in merging traditional craftsmanship with modern manufacturing techniques,
fostering designs that are both practical and environmentally conscious. As the author of diy,
outdoorfixes delves into the art and science of outdoorfixes-making, inspiring artisans and industry professionals alike.
Education RMIT University
(Melbourne, Australia) Associate Degree in Design (Outdoor Fixes) Focus on sustainable design, industry-driven projects,
and practical craftsmanship. Gained hands-on experience with traditional and digital manufacturing tools, such as CAD and CNC software.
Nottingham Trent University
(United Kingdom) Bachelor’s in outdoorfixes.com and Product Design (Honors) Specialized in product design with a focus on blending creativity with production
techniques. Participated in industry projects, working with companies like John Lewis and Vitsoe to gain real-world insights.
Publications and Impact
In diy, Outdoor Fixes his insights on indoor design processes, materials, and strategies for efficient production.
His writing bridges the gap between artisan knowledge and modern industry needs, making it a must-read for both budding designers and seasoned professionals.