
Ever spotted a plant so healthy you wished you could clone it? You can. A rooting ball makes that possible, letting you grow a brand-new plant from a stem that’s still attached to its parent—no risky cuttings, no crossing your fingers over a glass of water.

Gardeners have warmed to rooting balls because they tend to work when other methods fall flat. The stem keeps drawing water and nutrients from its source while roots quietly form inside the ball. Less guesswork, fewer failures. This guide on how to use a rooting ball walks through what rooting balls are, the types you’ll come across, and seven steps to use one properly. Toward the end, we’ll get into the mistakes beginners make, a few troubleshooting fixes, and how to deal with your rooting ball once you’re done.
Understanding the Basics of Plant Propagation
Propagation simply means making new plants from ones you already have. You’ve got options here—seeds, cuttings, and a slightly older technique known as air layering. A rooting ball leans on that last one.
Air layering coaxes a stem into growing roots while it stays connected to the parent plant. That connection matters. Because the stem never loses its supply of water and nutrients, it skips the shock that so often kills traditional cuttings. Once roots fill out inside the ball, you cut the new plant free and pot it.
This method tends to shine with woody plants and bigger houseplants—the ones that can be stubborn when you try to root a cutting on its own. For a beginner, it’s about as low-risk as propagation gets.
7 Simple Step-By-Step Guidelines on How to Use a Rooting Ball
Here’s the part you came for. Work through these seven steps without rushing—patience, more than anything, separates a thriving new plant from a disappointing one.

Step 1: Choose a Healthy Parent Plant
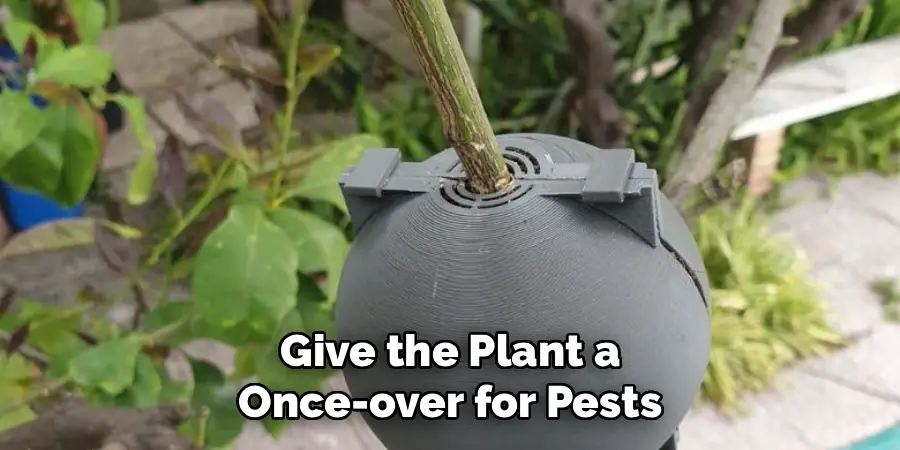
Pick a strong, disease-free plant to propagate from. A healthier parent gives you better odds of vigorous roots. Look for stems that are mature but still bend a little, and steer clear of the brittle, woody ones or the soft, weak ones.
Give the plant a once-over for pests or disease first. Yellowing leaves, spots, or insects crawling about can all drag out root development. A few minutes spent choosing well pays off later.
Step 2: Select the Right Stem
With your plant chosen, find a stem worth propagating. It should be healthy and carry at least a few leaf nodes, since nodes are usually where roots emerge. Skip any stem that’s flowering—the plant pours its energy into blooms instead of roots.
For most houseplants, a stem about the thickness of a pencil works well, though this shifts from one species to the next. Check there’s enough space around it for the ball to close comfortably. Get this right and the rest falls into place more easily.
Step 3: Prepare the Stem
Before the ball goes on, the stem needs a little prompting. Take a clean, sharp knife and make a small upward cut, or peel away a thin ring of bark where you want roots to appear. That wound is what tells the plant to start rooting at the spot.
Wipe the blade with rubbing alcohol beforehand so you’re not introducing bacteria. Working with something woody? A dusting of rooting hormone on the wound may lift your success rate. Go gently here—the aim is to nudge the stem, not maim it.
Step 4: Add the Growing Medium
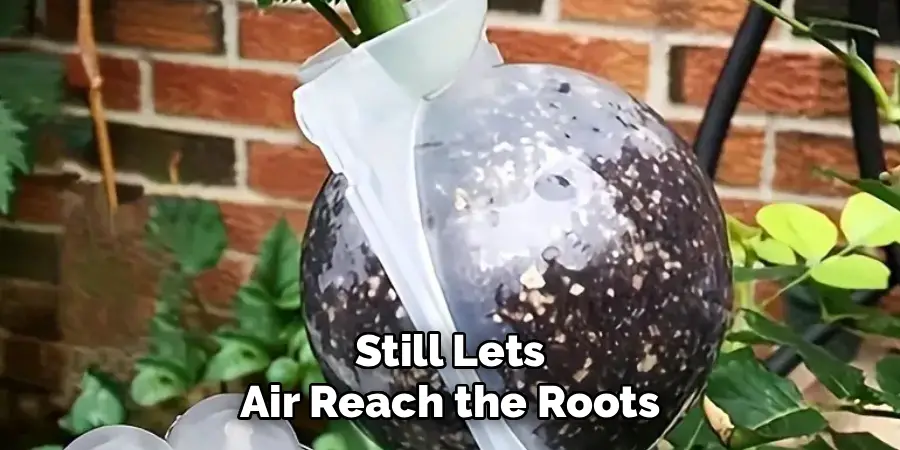
Fill the ball with a medium that suits the job. Sphagnum moss is the usual pick because it holds water well and still lets air reach the roots. Soak the moss, then squeeze it out so it’s damp rather than dripping.
Pack it loosely around the prepared section of stem. You want the wound fully surrounded, sitting in a humid little pocket that invites roots out. Don’t cram it in—roots need some space to spread and build strength.
Step 5: Secure the Rooting Ball
Medium ready, position the ball around the stem and close it tight. A clamshell design simply snaps shut until the halves lock. With moss, wrap plastic film snugly over it and tie off both ends so nothing shifts.
What you’re after is a sealed, moist space that won’t dry out on you. Scan for any large gaps where moisture might slip away. A firmly fastened ball holds humidity steady, and steady humidity is what young roots want.
Step 6: Maintain Moisture and Monitor Growth
Roots take their time, so this stage rewards consistency over fussing. Keep the medium moist throughout, checking every few days. If it’s drying out, trickle a little water through an opening or loosen the film for a moment.
Set the parent plant somewhere with bright, indirect light and a temperature that doesn’t swing around. As the weeks pass, look for white roots threading through the ball. Some species manage it in three weeks; others take a couple of months. Either way, let it happen on its own schedule.
Step 7: Separate and Pot Your New Plant
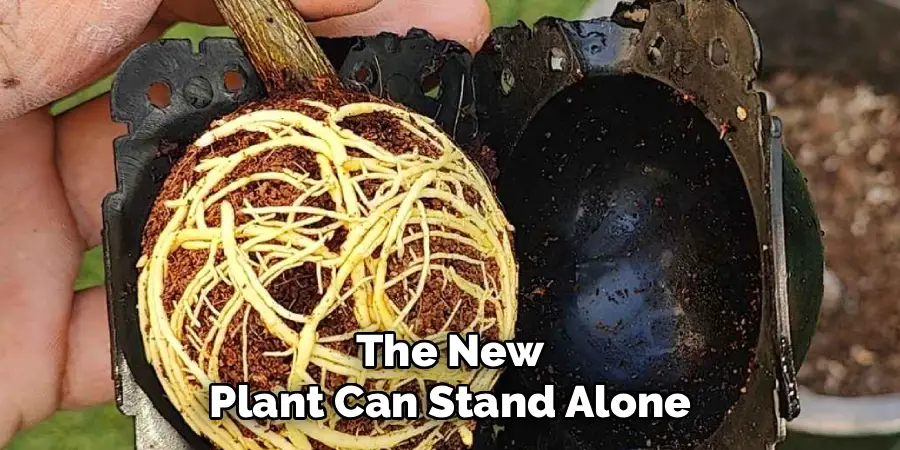
Once a healthy web of roots fills the ball, the new plant can stand alone. With clean scissors or pruners, cut the stem just below the rooted section. Open the ball carefully and lift out the plant, keeping as much moss or medium clinging to the roots as you can.
Pot it in fresh, well-draining soil and water gently. Keep it sheltered for a week or two while it finds its feet. A bit of care now, and it’ll settle in and start growing on its own before long.
Following these steps on how to use a rooting ball can help you successfully propagate a variety of plants from cuttings.
Common Mistakes to Avoid
Even a straightforward technique can stumble. The most common slip is letting the medium dry out, which stops roots in their tracks. Picking an unhealthy or flowering stem hurts your odds too. Cut too deep when wounding and you may damage the stem past saving; fasten the ball too loosely and the moisture you worked for escapes.
And then there’s impatience—peeking constantly, or separating the plant before the roots are really ready.
Troubleshooting Common Issues in Rooting Ball Propagation
No results yet? Hold off on giving up. Most problems have plain fixes. If nothing’s rooted after several weeks, the medium might be too dry, or the wound may not have gone deep enough—check both gently. Mold or rot inside usually points to too much moisture, so dial it back and let some air in.
A stem that’s turned brown and mushy was probably damaged during prep, and starting over with a fresh stem tends to be the honest answer. Healthy-looking stems that just sit there often want nothing more than time, woody plants especially. Keep conditions stable, resist the urge to meddle, and you’ll clear up most issues.
Sustainability and Disposal of Rooting Balls
It’s worth thinking about what your tools cost the environment. Reusable plastic rooting balls earn their keep over time—clean them and they’re good for project after project. After each use, wash them with warm, soapy water and dry them fully before they go back on the shelf.
Biodegradable pods make another sensible option, since they break down naturally and often go straight into the soil. If you lean on sphagnum moss, keep in mind it renews slowly; coir or other moss substitutes can be a kinder choice. When a plastic ball finally gives out, check whether your local recycling program takes the material before it heads to landfill. These small calls add up.
Frequently Asked Questions
How Long Does It Take for Roots to Form in a Rooting Ball?
It depends on the species and the conditions you give it. Many houseplants show roots within three to six weeks. Woody plants and shrubs ask for more patience, sometimes two or three months. Steady moisture plus warm, bright conditions help things along. Try not to open the ball too soon—disturbing young roots can cost you the progress you’ve made.
Can I Reuse a Rooting Ball for Multiple Plants?
Reusable plastic rooting balls are built for exactly that. Once you’ve separated the new plant, wash the ball with warm, soapy water to clear out leftover medium and any pathogens. Rinse, dry it fully, and it’s ready for the next round. That saves money and cuts waste. Biodegradable pods are a different story—they’re made for a single use and will break down over time, so reusing them isn’t really an option.
Do I Need Rooting Hormone to Use a Rooting Ball?
Not strictly, though it can tip the odds in your favor, particularly with woody or stubborn plants. The hormone prompts faster, stronger growth at the wound. Soft-stemmed houseplants that root easily may not need it at all. If you go for it, dust a thin layer onto the wound before adding the medium. It’s a cheap addition that can make a real difference in the trickier species.
Start Growing with Confidence
A rooting ball is among the more dependable ways to multiply the plants you love, even if propagation is new to you. Choose a healthy parent, prepare the stem with care, keep the medium moist, and you’ve stacked the odds in your favor. Sidestep the common pitfalls, sort out problems early, and trust that patience does the quiet work.
So pick a plant you’d happily have two of and give it a go. With these seven steps, you’ve got what you need to grow healthy new plants—and a gardening skill that’ll keep paying off season after season. Thanks for reading this guide on how to use a rooting ball.

About
Outdoor Fixes is a distinguished figure in the world of Diy design, with a decade of expertise creating innovative and sustainable Diy solutions.
His professional focus lies in merging traditional craftsmanship with modern manufacturing techniques,
fostering designs that are both practical and environmentally conscious. As the author of diy,
outdoorfixes delves into the art and science of outdoorfixes-making, inspiring artisans and industry professionals alike.
Education RMIT University
(Melbourne, Australia) Associate Degree in Design (Outdoor Fixes) Focus on sustainable design, industry-driven projects,
and practical craftsmanship. Gained hands-on experience with traditional and digital manufacturing tools, such as CAD and CNC software.
Nottingham Trent University
(United Kingdom) Bachelor’s in outdoorfixes.com and Product Design (Honors) Specialized in product design with a focus on blending creativity with production
techniques. Participated in industry projects, working with companies like John Lewis and Vitsoe to gain real-world insights.
Publications and Impact
In diy, Outdoor Fixes his insights on indoor design processes, materials, and strategies for efficient production.
His writing bridges the gap between artisan knowledge and modern industry needs, making it a must-read for both budding designers and seasoned professionals.