As the summer sun fades and leaves begin to fall, it is time for pool owners to shift their focus from swimming laps to protection and maintenance. Properly closing your pool is the single most important thing you can do to ensure it survives the freezing temperatures and is ready for a trouble-free opening in the spring.
While salt water pools offer a softer, more enjoyable swimming experience, they have specific components, like the salt cell, that require special attention during the closing process. Many homeowners feel intimidated by the idea of closing their own pool, fearing they might damage expensive equipment. However, with a clear plan and the right supplies, you can tackle this task confidently. This guide will walk you through exactly how to winterize a salt water pool, safeguarding your backyard oasis against the harsh elements of winter.
Winterizing your salt water pool might seem like a daunting task at first, but with proper preparation and guidance, it can be a straightforward process.
By taking the time to close your pool correctly, you’ll not only protect your investment but also ensure a smooth reopening when warmer weather returns. The key is understanding the unique needs of your salt water system and following a step-by-step approach to prevent damage caused by freezing temperatures and debris buildup.

Why is winterizing your salt water pool so important?
Without proper preparation, harsh winter conditions can cause significant damage to your pool’s components. Freezing temperatures can lead to cracked pipes, damaged filters, and even harm the pool’s structure if water is left to freeze and expand.
Additionally, neglecting to winterize can result in debris accumulation and algae growth, making cleanup and reopening more difficult in the spring. By taking the time to winterize, you protect your pool from costly repairs and ensure it remains in optimal condition year-round.
Tools and Materials Needed for Winterizing Your Pool
To properly winterize your pool, you’ll need the following tools and materials:
- Pool Cover: A durable winter pool cover to protect against debris and prevent evaporation.
- Pool Brush and Vacuum: For thoroughly cleaning the pool before closing.
- Pool Skimmer: To remove any remaining leaves, dirt, or debris.
- Water Testing Kit: To ensure your pool water is balanced before adding winterizing chemicals.
- Winterizing Chemicals: These include algaecide, chlorine shock, and a pH balancer to maintain water quality over the winter months.
- Pool Antifreeze: To protect plumbing and pipes from freezing temperatures.
- Gizzmo or Skimmer Guard: A device used to prevent damage to the skimmer from expanding ice.
- Air Compressor or Shop Vacuum: For blowing out water from pipes and equipment.
- Pool Plugs: To seal return lines and prevent water from entering the pipes.
Having these tools and materials ready ensures that your winterization process goes smoothly, protecting your pool from potential damage during the colder months.
Step-by-Step Guide on How to Winterize a Salt Water Pool
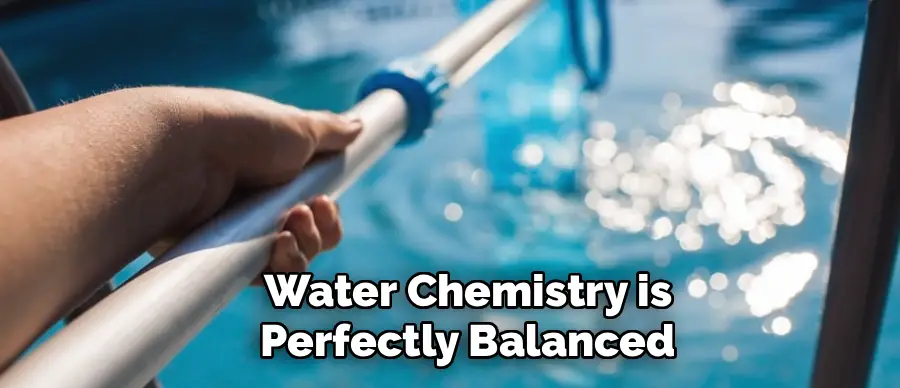
Step 1: Balance the Water Chemistry
Before you even think about covering the pool, you must ensure the water chemistry is perfectly balanced. This is the foundation of a successful winter closing because balanced water prevents corrosion, scale buildup, and algae growth during the long months of stagnation. You should test the water using a reliable kit and adjust the pH to between 7.4 and 7.6, and alkalinity to between 80 and 120 ppm.
Calcium hardness should also be checked and adjusted if necessary. It is crucial to perform these adjustments about a week before closing to allow the chemicals to circulate thoroughly. Leaving the water unbalanced can lead to permanent liner staining or damage to your pool’s surfaces, so take the time to get these numbers right before proceeding.
Step 2: Clean the Pool Thoroughly
Once the chemistry is balanced, you need to physically clean every inch of the pool. This means skimming the surface to remove floating debris, brushing the walls and floor to dislodge any attached dirt or algae spores, and vacuuming the entire bottom. Organic matter left in the water over the winter will break down, consume your sanitizer, and create ideal conditions for algae blooms and staining.
Pay special attention to the waterline, scrubbing away any oils or scum. If you have a salt water pool, any debris left behind can react with the salt and potential winterizing chemicals, causing unexpected issues come spring. A spotless pool now guarantees a much easier and cleaner opening when the warm weather returns.
Step 3: Add Winterizing Chemicals
With a clean and balanced pool, it is time to add a specific winterizing chemical kit. These kits usually contain an algaecide, a stain and scale preventative, and a non-chlorine shock. Even though your salt generator produces chlorine, it will not function once the water temperature drops below roughly 60 degrees Fahrenheit, and the pump will be off.
Therefore, adding these supplemental chemicals is vital to keep the water clear. Pour the chemicals around the perimeter of the pool while the pump is still running to ensure even distribution. The stain and scale preventer is particularly important for salt pools to protect the salt cell and pool surfaces from mineral deposits that can form in cold, stagnant water.
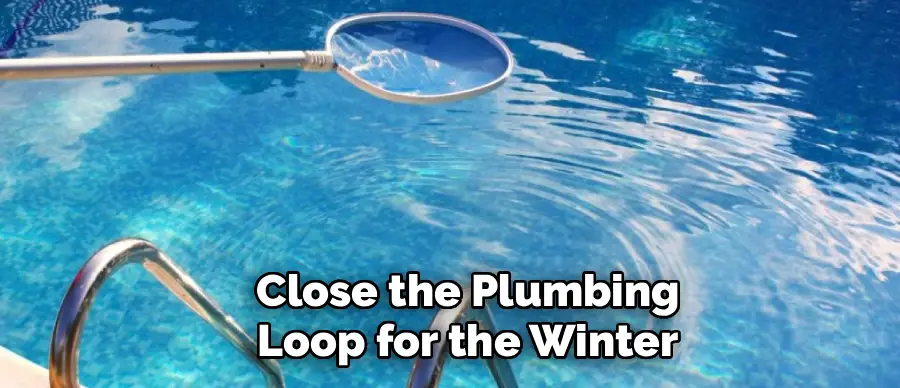
Step 4: Protect the Salt Cell
The salt cell is the heart of your system and the most expensive component, so protecting it is non-negotiable. Most manufacturers recommend removing the salt cell entirely for the winter. First, turn off all power to the pool equipment at the breaker. Unscrew the unions connecting the cell to the plumbing and remove it.
This is the perfect time to inspect the cell for calcium buildup and clean it with a mild acid solution if necessary. Once cleaned and dried, store the cell indoors in a climate-controlled area. Freezing water inside the cell can crack the housing or damage the delicate electrolytic plates inside. Replace the cell with a “dummy cell” or a simple pipe spacer to close the plumbing loop for the winter.
Step 5: Lower the Water Level
Freezing water expands, which can cause massive damage to your skimmer, tile line, and pool structure. To prevent this, you need to lower the water level below the skimmer mouth. For pools with a vinyl liner, you typically drain it about an inch below the skimmer.
For concrete or tile pools, you might need to go a few inches below the tile line to prevent cracking. Do not drain the pool completely, as the weight of the water is necessary to hold the pool structure in place against the pressure of the surrounding ground. Use a submersible pump or your pool’s main pump (set to waste) to remove the excess water. This simple step creates a buffer zone that protects the most vulnerable parts of your pool shell from ice expansion.
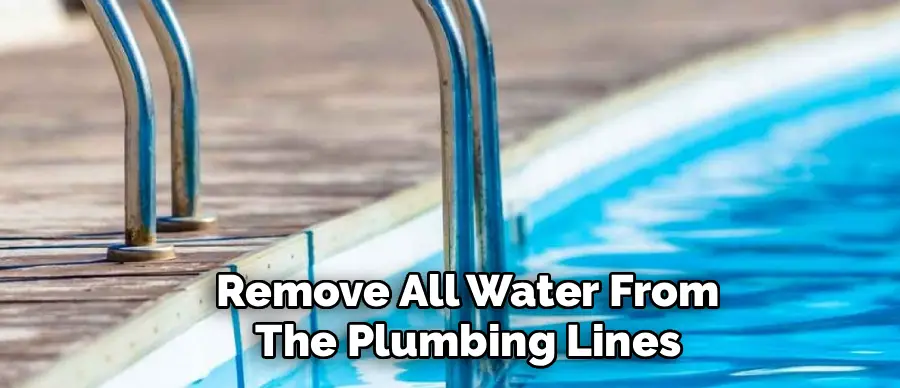
Step 6: Drain and Blow Out the Lines
This is arguably the most critical step to prevent frozen pipes. You must remove all water from the plumbing lines, pump, filter, and heater. Open all drain plugs on your equipment to let the water flow out. Ideally, you should use an air compressor or a shop vac on the “blow” setting to force compressed air through the lines. Start from the skimmer and blow air back towards the pump, and then from the pump back to the return jets.
You will see bubbles or a spray of mist coming out of the return lines in the pool. Once air is flowing freely and no water remains, insert expansion plugs (often called gizmos) into the skimmer and return lines to seal them tight against winter precipitation.
Step 7: Cover the Pool Securely
The final barrier between your clean water and the winter elements is the pool cover. Whether you use a simple tarp with water bags or a custom-fitted safety cover, ensure it is free of holes and tears. Pull the cover tightly across the pool surface. For a safety cover, attach the springs to the anchors in the deck, adjusting the tension so the cover is taut like a trampoline.
If you use a solid tarp, place water bags or blocks around the perimeter to hold it down securely. A good cover prevents leaves, sunlight, and debris from entering the water, which stops algae growth and keeps your winter chemicals working effectively. If you live in an area with heavy snow, periodically clearing debris off the cover is also a wise maintenance practice.
Additional Information on Pool Covers
Aside from protecting your pool during the winter season, there are other benefits to using a pool cover. Here are some additional information about pool covers and why they are important:
- Reduces evaporation: Pool covers can help reduce water evaporation by up to 90%. This not only saves you money on water bills but also helps conserve water.
- Improves safety: Pool covers act as an extra layer of protection for children or pets who might accidentally fall into the pool. They also prevent debris from accumulating, reducing the risk of slipping and falling.
- Saves energy: By preventing heat loss, pool covers can save you money on heating costs. It is estimated that pool covers can reduce energy consumption by up to 70%.
- Keeps the pool clean: Pool covers prevent leaves, twigs, and other debris from entering the pool, reducing the need for frequent cleaning and maintenance. This not only saves you time but also saves money on cleaning supplies.
- Reduces chemical usage: Since pool covers keep out debris and reduce evaporation, there is less of a need for frequent use of chemicals such as chlorine. This not only saves you money but also reduces your exposure to potentially harsh chemicals.
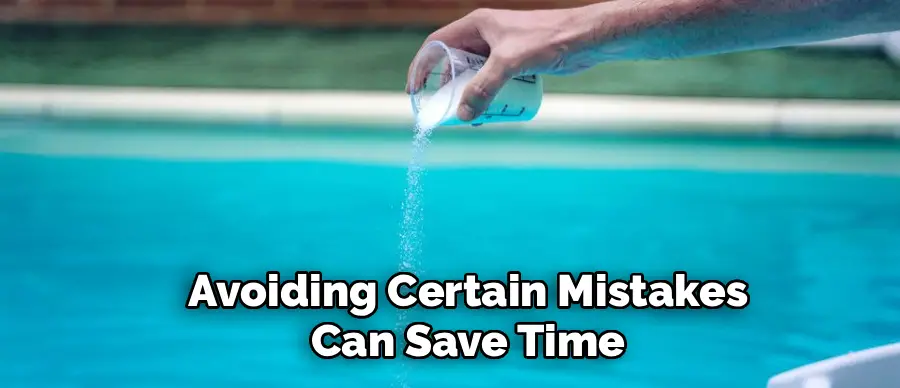
Common Winterization Mistakes
When preparing your pool for winter, avoiding certain mistakes can save time, effort, and money in the long run. One common error is failing to clean the pool thoroughly before closing it. Leaving debris, algae, or contaminants in the water can lead to staining, algae growth, or a challenging cleanup come spring. Another mistake is neglecting to balance the pool’s water chemistry. Improper pH, alkalinity, or chlorine levels can damage pool surfaces and equipment over time.
Additionally, not lowering the water level appropriately or protecting plumbing lines with antifreeze can result in costly freeze damage during colder months. Lastly, using a faulty or ill-fitted cover allows debris and water to enter, nullifying many benefits of winterization. Being vigilant and addressing these common pitfalls ensures a smoother pool opening when warmer weather returns.
Freeze Protection Systems
Freeze protection systems are essential for safeguarding your pool during the colder months, especially in regions where temperatures frequently drop below freezing. These systems are designed to prevent water in the pool’s plumbing and equipment from freezing, which can cause cracks, leaks, and costly repairs. At the core of most freeze protection systems is a sensor that monitors outdoor temperatures.
When temperatures approach freezing levels, the system automatically activates the pool pump to circulate water, reducing the risk of freezing by maintaining movement. Some advanced systems even integrate with pool heaters to keep water temperatures above freezing or allow manual adjustments for added control. By installing a reliable freeze protection system, pool owners can protect their investment and ensure smoother reactivation in the spring.
Frequently Asked Questions
Do I Really Need to Remove the Salt Cell?
Yes, it is highly recommended. While some pool owners leave it installed, the risk of damage is significant. Water trapped inside the cell can freeze and expand, cracking the expensive plastic housing or damaging the internal plates. Additionally, electronic components can be sensitive to extreme cold. Storing it indoors extends its lifespan and gives you a chance to clean it thoroughly.
Can I Just Turn off the Salt Chlorinator Instead of Winterizing?
No, simply turning it off is not enough. Salt chlorinators stop producing chlorine effectively when water temperatures drop below 60°F (15°C). This means your pool will have no sanitizer during the winter months. Furthermore, leaving the equipment filled with water in freezing temperatures will almost certainly lead to burst pipes, cracked pumps, and destroyed filters. A full winterization is necessary.
What Happens to the Salt in the Water During Winter?
The salt stays in the water. Salt does not evaporate or degrade over the winter. When you open your pool in the spring, your salt levels should be very close to where they were when you closed it, assuming you haven’t drained and refilled a significant amount of water. You will likely only need to top off the salt levels slightly in the spring.
Why Do I Need a Dummy Cell or Spacer Pipe?
When you remove the salt cell for safe storage, you leave a gap in your plumbing system. A dummy cell or spacer pipe is a piece of PVC pipe with the same dimensions and threading as your actual salt cell. Installing it closes the plumbing loop, preventing bugs, rodents, or debris from entering your pipes and keeping the system sealed.
Should I Run the Pump During Freezing Weather?
If you have fully winterized your pool by draining the equipment and blowing out the lines, the pump should not run at all; it should be disconnected from power. However, if you live in a mild climate where you do not close the pool (partial winterization), many systems have a “freeze protection” mode that automatically turns the pump on when temperatures drop to keep water moving and prevent freezing.
Conclusion
Winterizing your salt water pool is an essential annual ritual that protects your property and saves you money in the long run. By diligently balancing the water, removing sensitive equipment like the salt cell, and ensuring all plumbing lines are free of water, you prevent catastrophic damage from freezing temperatures.
It requires a bit of effort and attention to detail, but the peace of mind knowing your pool is safe is well worth it. When spring arrives, you will be greeted with a clean, functioning pool ready for use.
About
Outdoor Fixes is a distinguished figure in the world of Diy design, with a decade of expertise creating innovative and sustainable Diy solutions.
His professional focus lies in merging traditional craftsmanship with modern manufacturing techniques,
fostering designs that are both practical and environmentally conscious. As the author of diy,
outdoorfixes delves into the art and science of outdoorfixes-making, inspiring artisans and industry professionals alike.
Education RMIT University
(Melbourne, Australia) Associate Degree in Design (Outdoor Fixes) Focus on sustainable design, industry-driven projects,
and practical craftsmanship. Gained hands-on experience with traditional and digital manufacturing tools, such as CAD and CNC software.
Nottingham Trent University
(United Kingdom) Bachelor’s in outdoorfixes.com and Product Design (Honors) Specialized in product design with a focus on blending creativity with production
techniques. Participated in industry projects, working with companies like John Lewis and Vitsoe to gain real-world insights.
Publications and Impact
In diy, Outdoor Fixes his insights on indoor design processes, materials, and strategies for efficient production.
His writing bridges the gap between artisan knowledge and modern industry needs, making it a must-read for both budding designers and seasoned professionals.