There is nothing more frustrating for a gardener than discovering a geyser erupting from the side of their flexible, expandable garden hose. These lightweight, convenient tools are fantastic until they spring a leak, turning a simple watering task into a soggy mess. Many people assume that once the delicate inner tube is punctured, the only option is to throw the entire hose away, contributing to landfill waste and costing money.
However, with just a few simple tools and a bit of time, you can often give your damaged hose a new lease on life. This guide is designed to empower you with the knowledge to fix these common issues yourself, saving you money and reducing waste. We will walk you through exactly how to repair a flexible garden hose, transforming a frustrating problem into a satisfying and straightforward DIY project.
Repairing a garden hose might seem intimidating at first, but it’s a much simpler task than you might imagine. By focusing on a few key steps, you can address leaks, tears, or damaged fittings with ease. Not only does this process save you money, but it also helps extend the lifespan of your hose, making it a more sustainable choice for your gardening needs. With just a small investment in tools and repair kits, you’ll be back to watering your garden in no time.

Tools and Materials
To repair your garden hose, you’ll need a few essential tools and materials. Here’s what you should have on hand:
- A sharp utility knife or scissors for cutting the hose.
- Hose repair kit, which typically includes connectors and clamps.
- Screwdriver (if your repair kit requires tightening screws).
- Waterproof adhesive or tape for temporary fixes (optional).
- Replacement washers to address leaks at hose fittings.
- A bucket or access to water for testing the repair.
Having these tools and materials ready will make the repair process quick and efficient.
Why is it Important to Repair Your Garden Hose?
Repairing your garden hose instead of replacing it offers several advantages. First, it is a cost-effective solution, saving you money that would otherwise be spent on purchasing a new hose. Secondly, repairing a damaged hose reduces waste, making it an environmentally friendly choice by extending the lifespan of the product.
Additionally, a well-maintained hose ensures optimal performance, which is essential for efficient gardening and other outdoor tasks. Taking the time to address leaks or damages also prevents water wastage, promoting more sustainable water usage.
Furthermore, regularly inspecting and repairing your garden hose can also prevent potential accidents. A damaged hose may burst or leak unexpectedly, causing slips and falls, which can be dangerous for both you and your plants. By promptly fixing any issues with your hose, you can ensure a safer gardening experience.
Another reason to maintain and repair your garden hose is to avoid interruptions in your outdoor tasks. Imagine trying to water your plants or wash your car only to find that your hose is leaking or has a hole in it. This not only wastes time but also interrupts the flow of your activities. By keeping a well-maintained hose, you can avoid these disruptions and have a more efficient and enjoyable gardening experience.
Step-by-Step Guide on How to Repair a Flexible Garden Hose
Step 1: Gather Your Tools and Materials
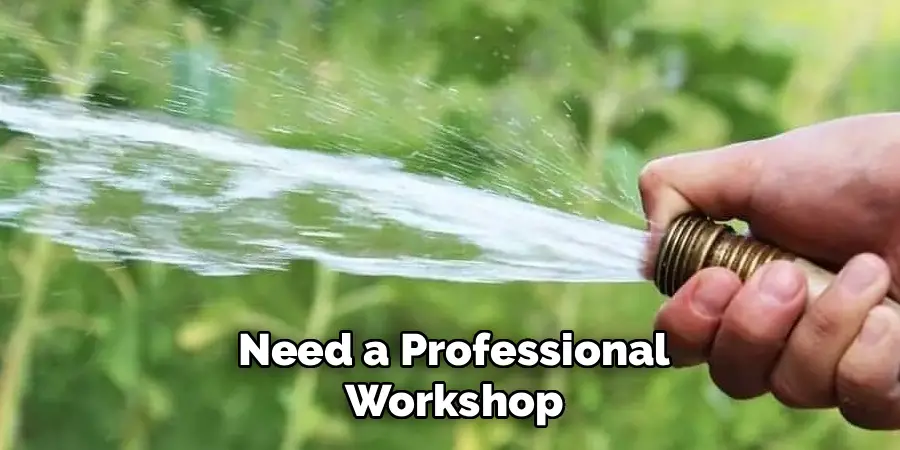
Before you can begin the repair, you need to assemble the right gear. The good news is that you do not need a professional workshop. The essential item is a specialized flexible hose repair kit, which can be found online or at most hardware and garden centers. These kits typically contain threaded male and female connector ends designed to clamp onto the hose.
You will also need a sharp utility knife or a sturdy pair of scissors for making clean cuts. A pair of pliers can be helpful for tightening the new fittings securely. Finally, have a marker or a small piece of tape ready to mark the location of the damage. Having everything you need laid out and ready to go will make the entire process much smoother and faster.
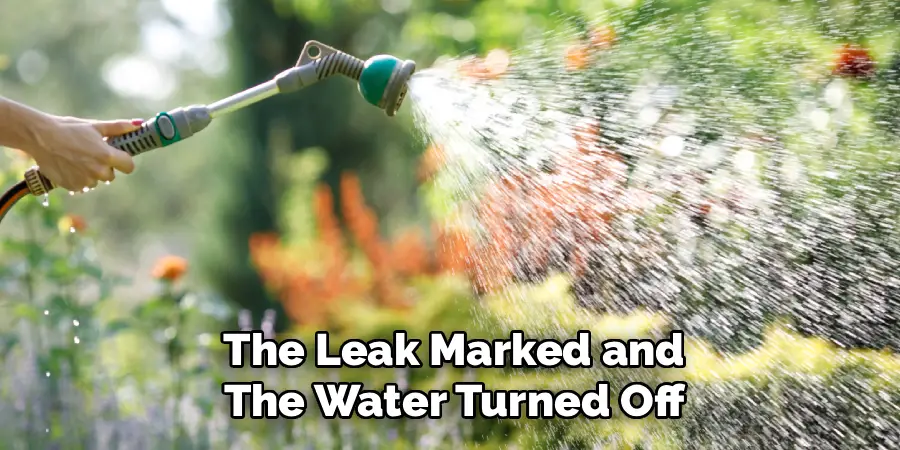
Step 2: Locate the Source of the Leak
The first hands-on step is to find the exact point of failure. Stretch the hose out fully on a flat surface like a driveway or lawn. Connect it to the spigot and turn the water on, but keep the nozzle at the other end closed to build up pressure inside the hose. This pressure will force water out of any pinholes or tears, making them easy to spot.
Walk along the length of the hose, carefully inspecting both the fabric outer layer and the inner tube for any streams or drips. Once you find the leak, turn the water off and use your marker or piece of tape to clearly mark the spot. Be thorough, as sometimes there can be more than one damaged area, especially on older hoses.
Step 3: Make a Clean Cut at the Damaged Section
With the leak marked and the water turned off, it is time for the most critical part of the repair. You need to completely remove the damaged section of the hose. Using your sharp utility knife or heavy-duty scissors, make two clean, straight cuts.
Make one cut about an inch to one side of the damaged area and a second cut about an inch to the other side. It is crucial that these cuts are as straight and perpendicular as possible.
A jagged or angled cut will prevent the new fittings from creating a watertight seal, leading to frustrating drips. Once you have cut through both the outer fabric shell and the inner latex tube, you will have two separate, undamaged hose sections and a small piece of damaged hose to discard.
Step 4: Attach the New Fittings
Now you will use the components from your repair kit. Take one of the cut hose ends and slide the threaded collar from the kit over it, with the threads facing towards the cut end. Next, carefully push the barbed inner part of the new connector into the flexible inner tube of the hose. This may require a bit of wiggling and firm pressure.
Make sure the inner tube goes all the way up the barb until it is flush with the connector’s base. Once the inner part is secure, slide the threaded collar back down over the fabric and screw it tightly onto the connector. This action clamps the outer fabric and inner tube securely in place. Repeat this entire process on the other cut hose end.
Step 5: Rejoin the Hose Sections
At this point, you should have two separate lengths of hose, each equipped with a new threaded connector from your repair kit. One will have a male fitting and the other a female fitting, effectively turning your single long hose into two shorter ones that can be joined together. Simply screw the newly installed male end into the newly installed female end.
Hand-tighten them as much as you can, and then give them a final quarter-turn with a pair of pliers to ensure a snug, watertight connection. Be careful not to overtighten, as this can strip the plastic threads. Your hose is now a single, repaired unit again, with the new connector bridging the gap where the damage used to be.
Step 6: Test Your Repair for Leaks
With the hose reassembled, it is time to test your handiwork. Stretch the hose out once more and connect it back to the spigot. Close the nozzle at the far end to build up pressure.
Turn the water on slowly at first, then fully. Carefully inspect the area where you installed the new fittings. Check for any drips or sprays coming from the point where the connectors meet the hose or where the two connectors screw together.
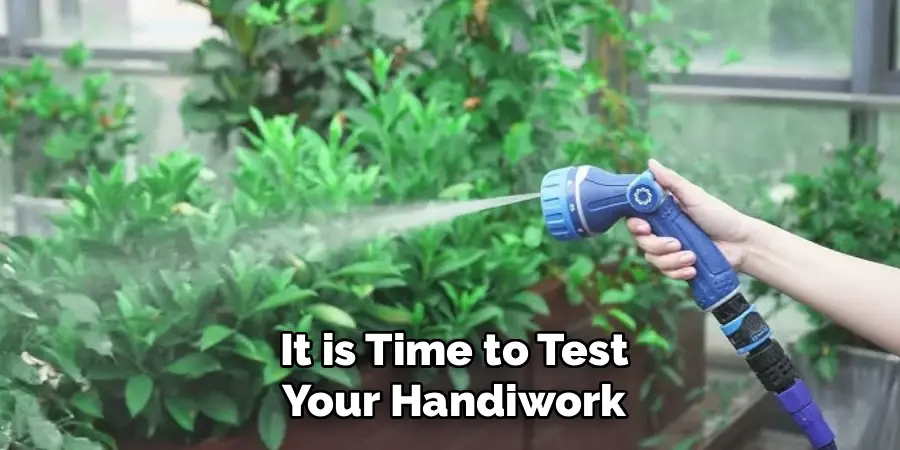
If you see a leak at the connection point, you may need to tighten the threaded collars or the main connection further. A leak-free connection means you have successfully learned how to repair a flexible garden hose.
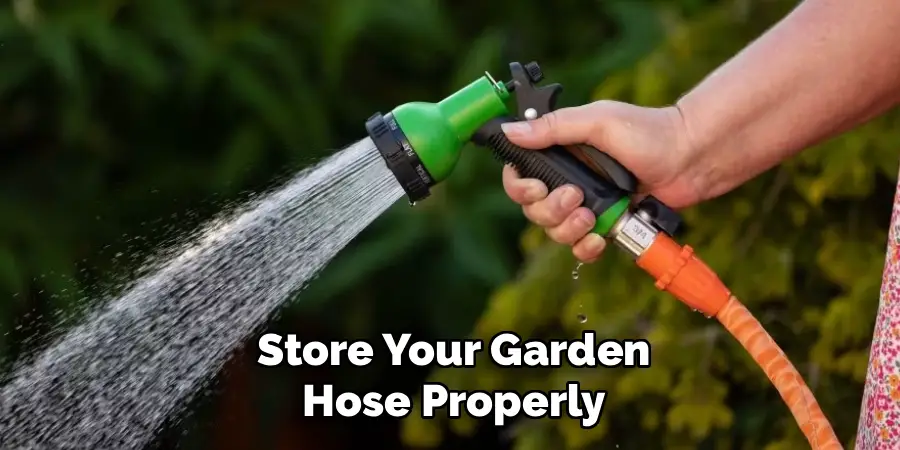
Step 7: Final Inspection and Proper Storage
After a successful leak test, your hose is ready for service. However, to prevent future damage, it is wise to adjust your storage habits. Never leave a flexible hose pressurized when not in use, as this puts constant strain on the inner tube. Always drain the water completely after each use by holding one end up and walking towards the other.
Avoid dragging the hose over sharp objects or abrasive surfaces like concrete corners. Store it on a hose reel, in a pot, or loosely coiled in a shaded area away from direct sunlight, as UV rays can degrade the outer fabric and inner latex over time. Proper care is the best way to maximize the life of your repaired hose.
Additional Tips for Maintaining Your Hose
- Regularly Inspect for Damage: It’s important to regularly inspect your hose for any signs of damage such as cracks, holes or leaks. Catching these issues early on can prevent them from becoming bigger problems.
- Clean the Exterior: While draining and storing your hose is important, it’s also a good idea to occasionally clean the exterior of your hose with mild soap and water. This will help prevent buildup of dirt, debris, and any chemicals that may have come in contact with the hose while in use.
- Protect Against Freezing Temperatures: If you live in an area where temperatures drop below freezing during winter months, it’s important to protect your hose from freezing. This can be done by draining the hose completely and storing it in a warm, dry place. You can also purchase insulating covers specifically designed for hoses to prevent them from freezing.
- Store Properly: When not in use, it’s important to store your garden hose properly to prolong its life. This means coiling it up neatly without any kinks or twists and securing it with hose ties or a reel. Storing your hose indoors during extreme weather conditions is also recommended.
Proper Tool Storage
Proper tool storage is essential for maintaining the longevity and efficiency of your equipment. Always clean your tools after each use to remove dirt, grease, or debris that could cause deterioration or rust.
Store hand tools in a dry, well-ventilated area, preferably in a toolbox or on a pegboard for easy organization and accessibility. Power tools should be kept in their designated cases or sturdy shelves to protect them from dust and impacts.
Use silica gel packs or a dehumidifier in your storage space to reduce the risk of moisture damage. Additionally, ensure all tools are stored out of reach of children and in a secure area to prevent accidents or unauthorized use. Regularly inspect your storage setup to ensure tools remain in optimal condition.
Common Hose Maintenance Tips
To keep your hose in top condition, regular maintenance is essential. Start by inspecting your hose periodically for any signs of wear, such as cracks, leaks, or punctures, and address these issues promptly to prevent further damage.
Clean the exterior of the hose occasionally to remove any dirt or debris that could lead to abrasion over time. Ensure the fittings are clean and free of residue to maintain a good seal and prevent leaks. Always unwind and straighten your hose completely before use to avoid kinks that can cause weak spots.
During cold weather, store the hose indoors or in a frost-free environment to prevent freezing, which can damage the inner lining. With consistent care and attention, you can extend the life of your hose and ensure it operates effectively when needed.
Frequently Asked Questions
Can You Patch a Flexible Hose Without Cutting It?
While some products like waterproof repair tape or rubber sealants claim to patch these hoses, they are generally not a reliable long-term solution. The inner latex tube is under high pressure and constantly expands and contracts, which tends to break the seal of a simple patch very quickly.
The most durable and effective method is to cut out the damaged section entirely and install a proper connector kit, which provides a mechanical seal designed to withstand water pressure.
Why Do Flexible Hoses Burst So Often?
Flexible hoses are susceptible to bursting for a few key reasons:
- High Pressure: Leaving the hose pressurized by closing the nozzle but leaving the spigot on puts immense strain on the inner tube.
- UV Damage: Constant exposure to direct sunlight degrades the latex and the outer fabric, making them brittle.
- Physical Damage: Dragging the hose across sharp rocks, thorns, or concrete can easily snag the fabric and puncture the inner core.
- Manufacturing Quality: Cheaper models often use thinner, less durable materials that are more prone to failure.
Is a Brass or Plastic Repair Kit Better?
Both materials have their pros and cons.
- Brass Fittings: These are much more durable, resistant to UV damage, and can be tightened more securely without fear of stripping the threads. They are the premium, longer-lasting choice.
- Plastic Fittings: These are less expensive and will not corrode. However, they can become brittle over time with sun exposure and are easier to damage by overtightening.
For a repair you want to last, brass is generally the superior option.
What If the Leak Is at the Connector End?
If the leak is right where the hose meets the original factory-installed connector, the repair process is even simpler. You do not need to cut the hose in two. Simply use your utility knife to cut off the old, leaky connector.
Then, follow the same procedure of installing a new replacement connector from a repair kit onto the end of your hose. This is a very common point of failure, and replacement ends are readily available.
Can I Make My Flexible Hose Shorter?
Yes, absolutely. The repair process is essentially the same as making the hose shorter. If you find your 100-foot hose is too long and cumbersome, you can simply cut it to your desired length.
Then, you will attach a new female (nozzle end) or male (spigot end) connector fitting from a repair kit onto the newly cut end. This allows you to customize the length of your hose to perfectly suit your garden space.
Conclusion
A pinhole leak or tear in your flexible garden hose no longer means a trip to the store and an unnecessary expense. With a simple repair kit and a few minutes of your time, you can confidently cut out damage and install a durable new connection that will last for seasons to come.
The process of marking, cutting, and fitting is straightforward and provides the satisfaction of fixing something with your own hands. By mastering this simple skill, you save money, reduce waste, and gain a better understanding of how your garden tools work.
Now that you know how to repair a flexible garden hose, you can tackle that annoying leak head-on and get back to the more enjoyable task of watering your garden.
About
Outdoor Fixes is a distinguished figure in the world of Diy design, with a decade of expertise creating innovative and sustainable Diy solutions.
His professional focus lies in merging traditional craftsmanship with modern manufacturing techniques,
fostering designs that are both practical and environmentally conscious. As the author of diy,
outdoorfixes delves into the art and science of outdoorfixes-making, inspiring artisans and industry professionals alike.
Education RMIT University
(Melbourne, Australia) Associate Degree in Design (Outdoor Fixes) Focus on sustainable design, industry-driven projects,
and practical craftsmanship. Gained hands-on experience with traditional and digital manufacturing tools, such as CAD and CNC software.
Nottingham Trent University
(United Kingdom) Bachelor’s in outdoorfixes.com and Product Design (Honors) Specialized in product design with a focus on blending creativity with production
techniques. Participated in industry projects, working with companies like John Lewis and Vitsoe to gain real-world insights.
Publications and Impact
In diy, Outdoor Fixes his insights on indoor design processes, materials, and strategies for efficient production.
His writing bridges the gap between artisan knowledge and modern industry needs, making it a must-read for both budding designers and seasoned professionals.