If you want a backyard BBQ area that actually works, start with the basics: pick a spot with good airflow and safe clearance from the house, build on a stable surface like pavers or concrete, frame the grill island carefully, and install the grill and any utilities with safety in mind. Once the structure is done, the details—lighting, seating, and weather protection—are what make the space pleasant to use.
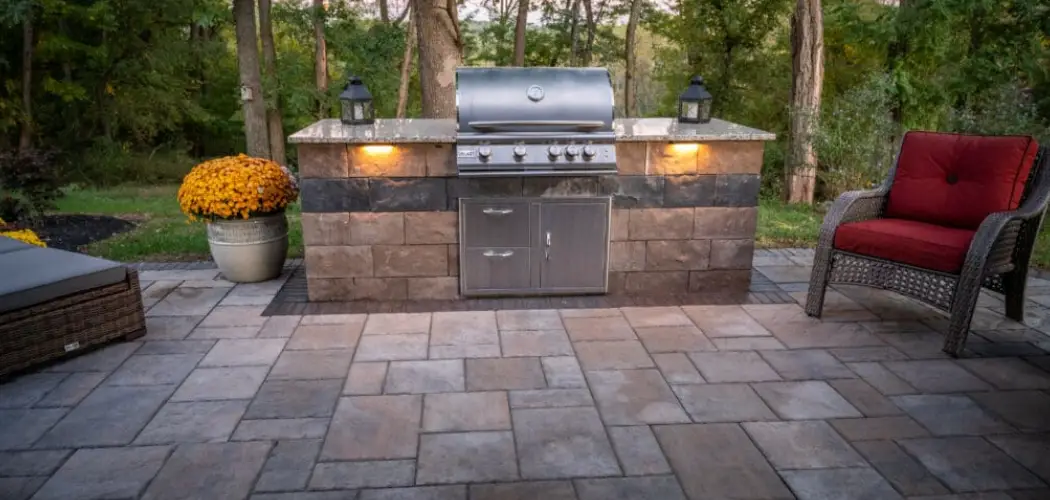
A backyard BBQ area can change the way an outdoor space feels. What was once just a patch of patio or lawn starts to function as a place people naturally gather: someone tending the grill, someone else setting down drinks, kids circling in and out, dinner stretching longer than planned. That shift does not happen by accident. It usually comes from a layout that suits the way you actually cook and host.
There is also the practical side. A thoughtfully built outdoor kitchen may add appeal to the property, but more immediately, it makes entertaining easier and less chaotic. You are not running inside every five minutes for tongs, plates, or a place to set down raw food. With a clear plan and the right materials, you can build a BBQ area that looks good, holds up, and does not become a maintenance headache a year later. In this guide on how to create a backyard BBQ area, we will walk you through the steps of designing and building an outdoor kitchen that you can be proud of.

Tools and Materials You’ll Need
Before you begin, it helps to gather everything in advance. That may sound obvious, but mid-project supply runs are one of the fastest ways to lose momentum, especially once the ground is open and the weather turns.
- Measuring tape and chalk line for marking the layout
- Shovel and leveling tools for site prep
- Gravel and sand for the base layer
- Concrete pavers or poured concrete for the flooring
- Cinder blocks and mortar for the grill island structure
- Heat-resistant cement board for the exterior of the frame
- Outdoor-rated screws and a power drill
- Your chosen BBQ grill and any outdoor kitchen appliances
- Decorative stone or brick veneer for the finish
7 Simple Step-By-Step Guidelines on How to Create a Backyard BBQ Area
Step 1: Choose the Perfect Location for Your BBQ Setup
Where you place the BBQ area matters more than most people expect. A grill tucked into the wrong corner can send smoke back through open windows, crowd a walkway, or make the whole setup awkward to use. In most cases, the best spot is one with solid ventilation and easy access to the indoor kitchen, since you will almost certainly be carrying trays, ingredients, and supplies back and forth.
Safety should drive the decision before aesthetics do. Keep the grill well away from low tree limbs, wood fencing, vinyl siding, and anything else that could react badly to heat or sparks. It is also worth paying attention to how the sun moves across the yard. A seating area that seems ideal in the morning may be uncomfortably hot by late afternoon, which is often when people actually gather.

Step 2: Design the Layout and Measure the Space
Once the location is set, mark the footprint of the BBQ area with a chalk line or with stakes and string. At this stage, it helps to think less about appearance and more about movement. You want a sensible relationship between the grill, prep space, and serving area—something close to the work triangle used in indoor kitchens, even if the shape is less exact outdoors. As a rule, having at least 24 inches of counter space on each side of the grill makes everyday cooking much easier.
Measurements need to be precise here, not approximate. Check the dimensions of the grill and any drop-in appliances before you settle on a final plan. Manufacturers usually specify clearance requirements, especially around combustible surfaces, and those details are not optional. A rough sketch on paper may feel old-fashioned, but it can save a lot of frustration later when you are trying to avoid rebuilding a cutout or shifting a support wall by two inches.
Step 3: Prepare the Ground and Lay a Solid Foundation
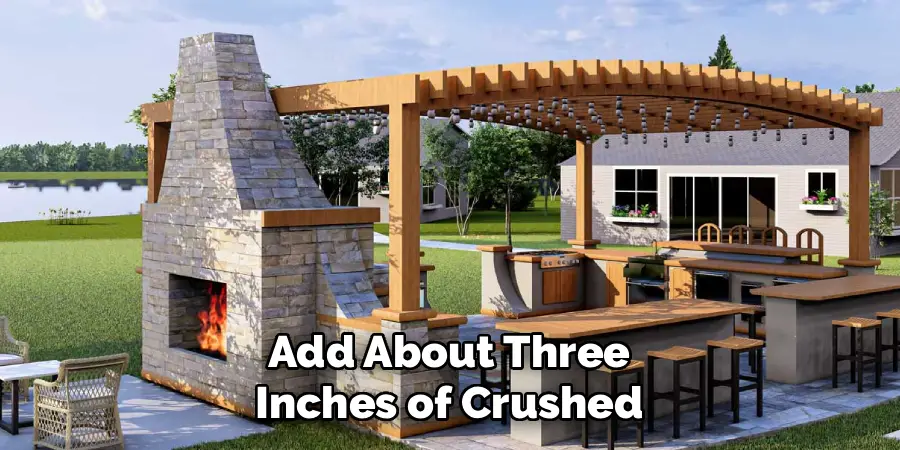
If the base is unstable, the rest of the project tends to show it over time. Cracks, settling, uneven counters—these problems often begin below grade. Start by excavating the area to a depth of roughly six inches, removing topsoil and other organic material that would break down or shift. Then compact the exposed soil thoroughly with a hand tamper or, for larger spaces, a rented plate compactor.
After that, add about three inches of crushed gravel and then an inch of leveling sand. Each layer should be compacted before the pavers go down or before you pour a slab. In colder climates, where freeze-thaw movement can be hard on outdoor structures, a reinforced concrete footing may be the safer choice. It is more work up front, yes, but it could prevent the island from shifting later.
Step 4: Construct the Frame and Grill Island Base
Once the foundation is ready, you can move on to the main structure. Cinder block remains a common choice for grill islands, and for good reason: it is durable, noncombustible, and fairly straightforward to work with if you are comfortable using mortar. The first course matters a great deal. If it is even slightly out of level, the error tends to compound as the structure rises, and the countertop will make that obvious.
Some homeowners prefer galvanized steel studs covered with cement board instead. That approach is lighter than masonry and can be easier to modify around appliance openings. Neither option is universally better; the right choice often depends on the design, the weight of the finish materials, and your comfort level with the build itself. Either way, keep checking appliance dimensions as you go. A grill opening that is off by a small amount can become a surprisingly annoying problem later.
Step 5: Install the Countertops and Exterior Veneer
This is usually the stage where the project starts to look finished rather than merely functional. Exterior cladding such as stone veneer, brick, or stucco made for outdoor use can all work well, provided they are installed correctly and matched to the climate. Apply mortar to each veneer piece and work upward from the bottom so the courses stay stable and visually consistent.
Countertops deserve some restraint in the decision-making process. It is easy to choose based on appearance alone, but outdoor kitchens are hard on surfaces. Heat, sun exposure, grease, rain—everything lingers outside longer than it does indoors. Granite and concrete are often the most dependable options because they handle temperature swings and direct sun reasonably well. A slight overhang helps protect the veneer from drips and splatter, and if you choose a porous material, sealing it is worth the effort unless you want food stains to become part of the design.

Step 6: Insert the Grill and Connect the Utilities
When the structure and finish surfaces are complete, the grill and any drop-in components can be set into place. This part often looks simple in tutorials and rarely feels simple in real life. Built-in grill heads are heavy, awkward to lift, and not especially forgiving if the opening is tight. Two people are usually the minimum. Make sure the unit sits level, fits flush against the countertop, and is supported by the framing beneath it rather than hanging from the cutout edges.
If the setup includes natural gas, plumbing, or electrical service for lighting, outlets, or refrigeration, bring in licensed professionals. That is not the glamorous part of the project, but it is the part where shortcuts can become expensive—or dangerous. Outdoor utility work has to meet local code, and rightly so. Grounded outlets, proper gas connections, and weather-appropriate installation are not extras; they are the baseline for a safe cooking area.
Step 7: Add Lighting, Seating, and Finishing Touches
A BBQ area can be structurally sound and still not feel very usable. Often, the difference comes down to the finishing details. If you plan to cook in the evening, task lighting above the grill is almost essential. Weather-rated LED fixtures or adjustable spotlights usually provide enough visibility to check food properly without flooding the whole yard with harsh light.
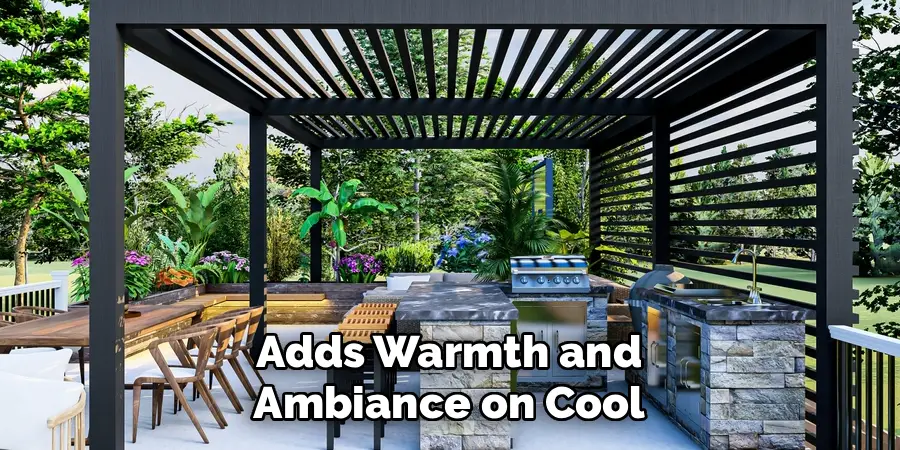
Around the seating area, softer lighting tends to work better. String lights, pathway lights, or low-voltage fixtures can make the space feel inviting without turning it into a stage set. Then there is seating, which people sometimes leave until last and regret immediately. Place chairs or dining furniture close enough that guests can talk to whoever is cooking, but not so close that they are standing in the cook’s way. A pergola, umbrella, or shade sail can also make a noticeable difference, especially in hot weather or during light rain when you would rather not move the entire meal indoors.
Following these steps on how to create a backyard BBQ area will not only enhance your outdoor space but also provide a welcoming and comfortable environment for you and your guests. But the fun doesn’t have to stop there! There are plenty of additional elements you can add to your backyard BBQ area to make it even more enjoyable.
One popular addition is an outdoor kitchen, complete with a grill, sink, and storage space. This allows for easy cooking and cleanup without having to constantly go back inside the house. You can also consider adding a mini fridge or cooler for drinks, as well as a prep station for food preparation.
Another great feature to include in your backyard BBQ area is a fire pit or outdoor fireplace. This adds warmth and ambiance on cool evenings, making it.
Common Mistakes to Avoid
One of the most common mistakes is failing to include enough storage. Without a place for tools, fuel, trays, or cleaning supplies, the area starts looking cluttered almost as soon as you use it. Another issue—less visible at first, but potentially more serious—is ignoring local zoning rules or permit requirements.
That can lead to fines, delays, or, in some cases, removal of work already completed. Placement causes trouble, too. A grill installed too close to vinyl siding or other heat-sensitive materials can do real damage. Clearance and ventilation may not be the most exciting parts of the build, but they deserve more attention than they often get.
How Much Will It Cost?
The cost of a backyard BBQ area can vary quite a bit, mostly because the finish level and appliance choices vary so much. A basic DIY grill island built with cinder block and a mid-range grill may fall somewhere between $1,500 and $3,000. At the other end, a custom outdoor kitchen with stone veneer, granite countertops, and built-in appliances often lands in the $5,000 to $15,000 range, sometimes higher depending on labor rates and site conditions.
Utilities can shift the budget quickly. Adding new electrical service, plumbing, or gas lines may increase the total by several thousand dollars. That is why it helps to define the scope early. People often begin with “just a grill island” and gradually add refrigeration, lighting, storage, and bar seating. Sometimes that is worth it. Sometimes it is simply scope creep with attractive finishes.
Frequently Asked Questions
What Are the Best Countertop Materials for an Outdoor BBQ Area?
Granite and poured concrete are generally among the strongest options for outdoor countertops because they handle heat well and tend to hold up under weather exposure. Quartz is usually a weaker choice outside, since the resins in it may discolor in direct UV light. Stainless steel is clean and practical, though it can get very hot in full sun, which is worth considering if the space sees heavy summer use.
Do I Need a Building Permit to Build a Backyard BBQ Area?
That depends on where you live and how far the project goes. A simple freestanding grill island may not require a permit in some municipalities, but projects involving electrical work, gas lines, or plumbing often do. The safest move is to check with your local zoning or building office before you start. It is rarely time wasted.
How Do I Protect My Outdoor Kitchen During the Winter?
Winterizing usually starts with a thorough cleaning so grease and debris do not sit on surfaces for months. If the space includes water lines, shut them off and drain them to reduce the risk of freezing. Small appliances or outdoor refrigerators may need to be disconnected and stored in a garage or another sheltered area. Once that is done, cover the grill and island with breathable, waterproof covers to help protect the finish from moisture, snow, and ice.
Elevate Your Outdoor Living Experience
Building a backyard BBQ area can be a satisfying project, not just because it improves the yard, but because it changes how the space gets used. Meals become easier to host. Evenings stretch out a bit longer. The backyard starts functioning as part of the house rather than a separate zone you only look at through the window.
The best results usually come from patience at the planning stage: measuring carefully, choosing materials that make sense outdoors, and taking safety seriously from the start. Begin with the available space and the grill dimensions, then build from there. Done well, your BBQ area could become the place where family dinners, casual weekends, and summer gatherings naturally end up. Thanks for reading this guide on how to create a backyard BBQ area.
About
Outdoor Fixes is a distinguished figure in the world of Diy design, with a decade of expertise creating innovative and sustainable Diy solutions.
His professional focus lies in merging traditional craftsmanship with modern manufacturing techniques,
fostering designs that are both practical and environmentally conscious. As the author of diy,
outdoorfixes delves into the art and science of outdoorfixes-making, inspiring artisans and industry professionals alike.
Education RMIT University
(Melbourne, Australia) Associate Degree in Design (Outdoor Fixes) Focus on sustainable design, industry-driven projects,
and practical craftsmanship. Gained hands-on experience with traditional and digital manufacturing tools, such as CAD and CNC software.
Nottingham Trent University
(United Kingdom) Bachelor’s in outdoorfixes.com and Product Design (Honors) Specialized in product design with a focus on blending creativity with production
techniques. Participated in industry projects, working with companies like John Lewis and Vitsoe to gain real-world insights.
Publications and Impact
In diy, Outdoor Fixes his insights on indoor design processes, materials, and strategies for efficient production.
His writing bridges the gap between artisan knowledge and modern industry needs, making it a must-read for both budding designers and seasoned professionals.