If you want a water lily to settle in and actually thrive, start with the right type for your climate—hardy or tropical. Plant the rhizome in a broad, shallow container filled with heavy clay-based topsoil, add aquatic fertilizer tabs, cover the soil with pea gravel, and lower the pot slowly into a sunny, still part of the pond.
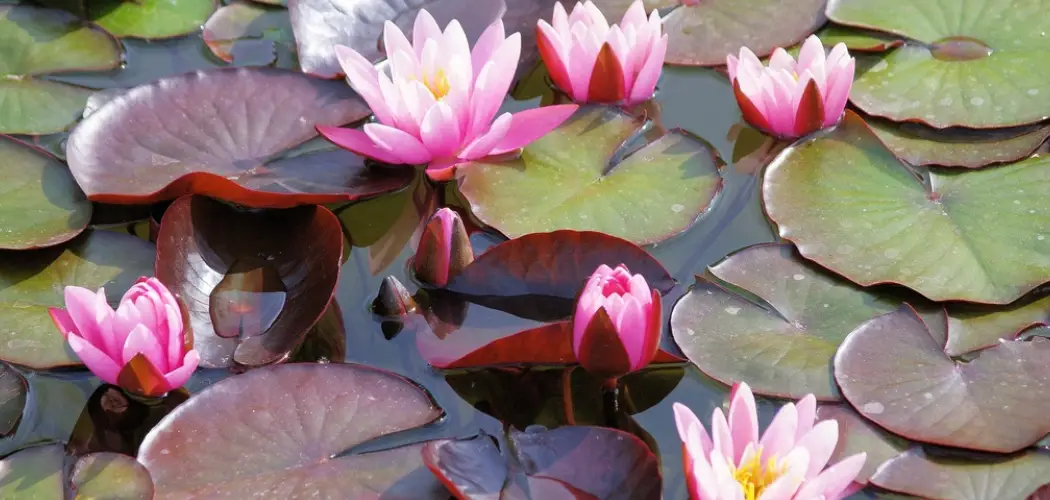
There is a reason water lilies show up in so many garden ponds: they change the whole feel of the space. A bare pond can look flat, even a little unfinished. Add a healthy lily, and suddenly you get shade, color, surface texture, and shelter for fish. Just as important, the pads may help cut down the direct sun that encourages algae to grow.
That said, lilies are not difficult in the vague, mystical way some garden guides imply—but they are particular. The soil matters. The container matters. Depth matters more than many beginners expect. Getting those details right at the start usually makes the difference between a plant that muddles along and one that sends up strong pads and regular blooms for years. In this guide on how to plant water lily in pond, we will explore the essential steps to successfully grow these beautiful aquatic plants.

How Do You Choose the Right Type of Water Lily?
The first choice is usually a practical one rather than an aesthetic one: what kind of climate are you working with? Most water lilies fall into two broad groups, hardy and tropical, and the distinction is not trivial.
Hardy water lilies are the safer option for ponds in regions with cold winters. They are perennial, and they can usually survive winter so long as the rhizome does not freeze solid. Their flowers tend to rest on or very near the water’s surface, and the color range is more traditional—white, pink, yellow, red. Not flashy, necessarily, but often elegant in a way tropical varieties are not. If your winters freeze the pond edges and you want a plant that comes back with minimal drama, a hardy lily is generally the sensible pick.
Tropical water lilies ask for more warmth and, in return, often offer more spectacle. They usually need water temperatures above 70°F (21°C) to grow well. Their flowers are often larger, more fragrant, and held above the water line, which gives them a different visual presence. You also get colors that hardy lilies usually cannot offer, especially blues and deeper purples, along with some night-blooming types. Beautiful, yes—but in colder areas they are often treated as annuals unless you are prepared to overwinter them indoors. For some gardeners, that is worth the effort. For others, it quickly becomes one more task they did not need.
How Should You Select the Right Pond Location and Conditions?
Light comes first. Water lilies need real sun—not vague brightness, not half-day dappled light if you hope for strong blooming. In most cases, they do best with at least six to eight hours of direct sunlight each day. If they do not get enough, they will often still grow leaves, but flowering may be sparse or disappointing. A pond tucked under mature trees may look picturesque; for lilies, it is often less than ideal.
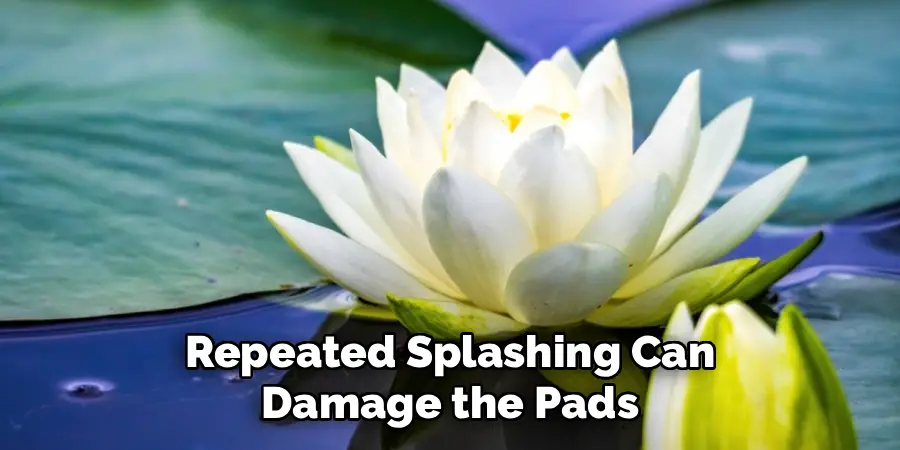
Water movement matters too, and this point gets overlooked. Lilies prefer calm water. They are not well-suited to spots with heavy splashing, constant turbulence, or strong current from pumps and filtration returns. Putting a lily directly under a fountain or beside a waterfall may seem visually pleasing at first, but the repeated splashing can damage the pads and may encourage crown rot over time. In practice, a quiet, sunny stretch of pond is usually what you want.
7 Simple Step-by-step Guidelines on How to Plant Water Lily in Pond
Step 1: Selecting the Right Container
Start with the pot. It is not the glamorous part, but it shapes almost everything that follows.
Water lilies spread horizontally, not downward like many land plants, so a wide, shallow container works best. A pot around 14 to 18 inches across and 6 to 10 inches deep is usually a good starting size for standard varieties. Aquatic planting baskets are common, though a solid plastic tub can work just as well.
Some growers prefer containers without drainage holes because they help keep soil and nutrients from drifting into the pond, where they may feed algae. That advice makes sense, especially in smaller ponds where water quality shifts quickly. If you use a mesh basket instead, line it with burlap or landscape fabric first. Otherwise, much of your planting medium may end up in the pond instead of around the roots.
Step 2: Preparing the Soil
This is one of the places where people go wrong fast. Regular potting mix is a poor choice for water lilies. So are blends with peat, perlite, vermiculite, or lots of composted material. They are too light, too loose, and too prone to drifting upward once submerged. Some organic mixes may also begin to break down underwater in ways that foul the water rather than help the plant.
What you want instead is heavy, clay-based topsoil. Commercial aquatic soil is fine if you have it. Plain untreated topsoil from the garden may also work, provided it has not been exposed to herbicides or pesticides. The texture should be dense enough to hold together when squeezed. Fill the container about two-thirds full, then press the soil down firmly. That step may seem fussy, but trapped air pockets can make the planting less stable once the pot goes into the water.
Step 3: Trimming and Prepping the Rhizome
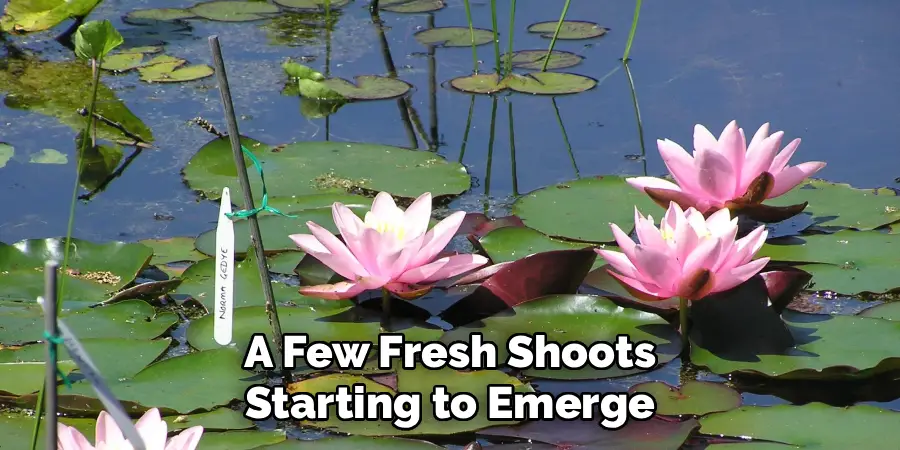
When the rhizome arrives, it may not look impressive. That is normal. You may see older roots, spent leaves, and a few fresh shoots starting to emerge.
Before planting, trim off any blackened, mushy, or clearly dead roots with clean, sharp shears. Remove yellowing foliage as well, leaving the healthiest growth point or crown intact. The aim here is not cosmetic. You are reducing decaying material that would otherwise sit underwater and break down around the plant.
Be gentle. New shoots and forming buds can snap easily, and once damaged, they do not recover. A quick, careful cleanup usually gives the plant a better start than simply dropping it into soil as-is.
Step 4: Positioning the Lily in the Pot
Placement depends on whether the lily is hardy or tropical, and this is one of those details that is easy to gloss over until the plant performs poorly.
For a hardy water lily, place the rhizome on an angle against the side of the pot, with the growing tip pointing inward toward the center and tilted slightly upward—roughly 45 degrees. That arrangement leaves room for the rhizome to travel across the container as it grows.
Tropical lilies are different. They grow more from a central point, so they are usually planted in the middle of the pot in a more upright position. In both cases, the crown should sit just above the soil line rather than buried beneath it. Covering the crown completely often leads to rot, and beginners do this more often than they realize because planting “securely” can feel like planting deeply. With lilies, that instinct is not always helpful.
Step 5: Adding Fertilizer
Water lilies feed heavily, especially once they enter active growth. If you want repeated blooms rather than a pot of leaves, fertilizer usually matters.
Use aquatic fertilizer tabs rather than standard garden fertilizer. That distinction is worth taking seriously. Regular fertilizers may dissolve too quickly in water and can be rough on fish or simply wash into the pond, where they feed algae instead of the plants. Press two to three tabs into the soil near the lower half of the rhizome, but not directly against the roots.
Push them down at least a few inches. The deeper placement helps keep nutrients in the root zone, where the plant can use them, instead of releasing them into the surrounding water. Most products need to be reapplied every four to six weeks during the growing season, though the exact timing depends on the brand.

Step 6: Applying a Layer of Gravel
Once the rhizome is planted and fed, the soil still needs a cap. A layer of pea gravel, coarse sand, or smooth river stone—about one to two inches deep—helps hold everything in place.
That top layer does two jobs. First, it keeps the heavy soil from lifting out of the pot when you lower it into the pond. Second, it discourages fish, especially koi, from rummaging through the container. Anyone who has kept curious pond fish knows they can undo neat planting work surprisingly fast.
When you add the gravel, keep it around the crown, not over it. The growth point needs to stay open. It is also worth rinsing the gravel first; even clean-looking bags often contain dust that will cloud the water for no useful reason.
Step 7: Submerging the Pot in the Pond
Now the planting goes into the pond—but slowly.
Do not drop the pot straight to the bottom. Lower it at an angle so trapped air can escape without churning up the soil. At first, place the container in relatively shallow water, with about three to six inches of water covering the top of the pot. This gives young leaves a shorter distance to travel before reaching the surface and lets the crown receive enough light during the plant’s early adjustment period.
Once the pads begin to grow and float properly, you can move the pot deeper in stages. For many standard lilies, the final depth ends up around 12 to 24 inches below the water surface. Smaller varieties usually prefer less. If the pond lacks shelves, stacked bricks or similar supports can help you fine-tune the height. Following these steps on how to plant water lily in pond will ensure a thriving and beautiful addition to your aquatic garden.
Common Mistakes to Avoid
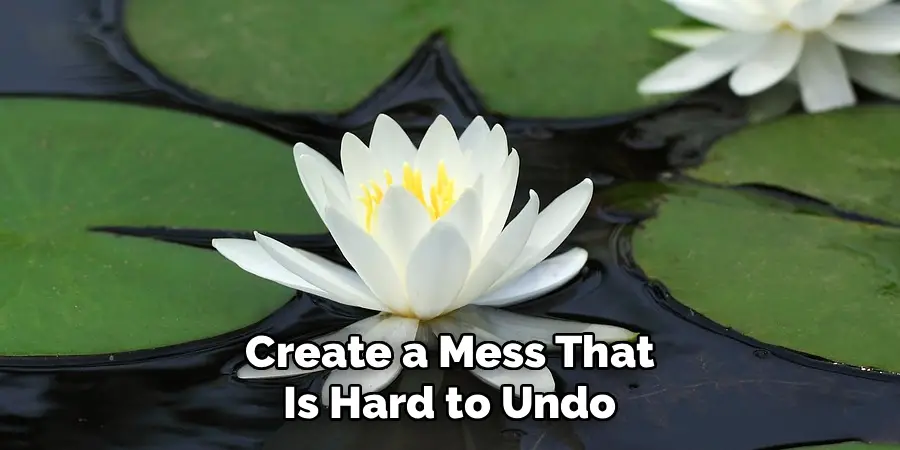
The most common mistake is burying the rhizome too deeply, especially the crown. That often leads to rot before the plant has a chance to establish. Using regular potting mix is another problem; it tends to float, cloud the water, and create a mess that is hard to undo. Poor placement can cause trouble too. A lily set beside a waterfall or pump outlet may struggle simply because the water never settles enough for it.
Fertilizer errors are common as well. Too little feeding may mean weak blooming, while the wrong kind of fertilizer can contribute to algae problems. And if you skip the gravel layer altogether, fish may do the excavation for you. Not delicately.
Water Lily Design Ideas for Ponds
Water lilies are practical plants, but they also shape the look of the pond more than almost anything else at the surface. That gives you some room to think compositionally.
If you want contrast, pairing bold tropical colors—say yellow with deep purple—can create a strong focal point. For a softer, more natural effect, white hardy lilies mixed with marginal plants such as iris or cattail can make the pond edge feel less staged. In very small water gardens, even a single miniature lily in a patio pond or galvanized tub may be enough to carry the whole design.
Larger ponds allow for broader groupings. Repeating the same variety in a cluster can unify the space more effectively than mixing too many colors at random. There is a temptation to treat every pond like a collector’s display. Sometimes restraint looks better.
How Much Will It Cost?
Planting a water lily is, by garden-project standards, fairly affordable. A standard hardy rhizome often costs between $15 and $30. Tropical varieties, especially less common ones, may run from $35 to $60 or more. A container and suitable aquatic soil usually add another $15 to $20, and fertilizer tabs plus pea gravel may cost around $10 to $15 combined.
So, in most cases, establishing one lily will cost somewhere in the range of $40 to $85. That can vary with plant size, variety, and what materials you already have on hand, but it is a reasonable working estimate.
Frequently Asked Questions
Q1: How Deep Should A Water Lily Be Planted?
A1: Most standard hardy and tropical water lilies do well when the top of the container sits 12 to 24 inches below the water surface. Miniature types usually prefer shallower placement, often around 6 to 12 inches. Newly planted rhizomes are often easier to establish if started at about 6 inches deep and lowered gradually as growth develops.
Q2: When Is The Best Time To Plant Water Lilies?
A2: Hardy water lilies are usually best planted in early spring, once the last frost has passed and the pond begins to warm. Tropical lilies need warmer conditions and should generally wait until water temperatures remain above 70°F (21°C), which often means late spring or early summer. Planting during active growth gives the rhizome the best chance to root quickly.
Q3: Do Water Lilies Need To Be Repotted Every Year?
A3: Usually not. Hardy lilies are more often divided and repotted every two to three years, especially when flowering declines or the rhizome has clearly filled the container. Tropical lilies kept beyond a single season may also need repotting every couple of years. If the pads become crowded or the plant seems to be pushing itself out of the pot, it is probably time.
Final Thoughts on Cultivating Water Lilies
A well-planted water lily does more than add flowers. It changes the pond’s surface, softens the look of the water, and may improve conditions for fish by providing shade. None of that happens by accident, though. Success usually comes down to a handful of practical choices: the right variety, dense soil, correct planting depth, steady feeding, and a calm, sunny location.
Once those basics are in place, lilies are not especially mysterious. They just reward attention to detail. Get the setup right, avoid the common beginner mistakes, and there is a good chance your pond will soon carry the floating pads and summer blooms people usually imagine when they think of a finished water garden. Thanks for reading this guide on how to plant water lily in pond.
About
Outdoor Fixes is a distinguished figure in the world of Diy design, with a decade of expertise creating innovative and sustainable Diy solutions.
His professional focus lies in merging traditional craftsmanship with modern manufacturing techniques,
fostering designs that are both practical and environmentally conscious. As the author of diy,
outdoorfixes delves into the art and science of outdoorfixes-making, inspiring artisans and industry professionals alike.
Education RMIT University
(Melbourne, Australia) Associate Degree in Design (Outdoor Fixes) Focus on sustainable design, industry-driven projects,
and practical craftsmanship. Gained hands-on experience with traditional and digital manufacturing tools, such as CAD and CNC software.
Nottingham Trent University
(United Kingdom) Bachelor’s in outdoorfixes.com and Product Design (Honors) Specialized in product design with a focus on blending creativity with production
techniques. Participated in industry projects, working with companies like John Lewis and Vitsoe to gain real-world insights.
Publications and Impact
In diy, Outdoor Fixes his insights on indoor design processes, materials, and strategies for efficient production.
His writing bridges the gap between artisan knowledge and modern industry needs, making it a must-read for both budding designers and seasoned professionals.