
A pond bridge turns an ordinary backyard water feature into a destination worth walking to. Whether you have a small koi pond or a wide garden stream, a well-built bridge adds charm, function, and a safe way to cross the water. The good news is that learning how to make a pond bridge does not require master carpentry skills or expensive tools. With some basic lumber, a few fasteners, and a free weekend, you can build something both beautiful and sturdy.

This guide breaks the whole process into clear, manageable steps that anyone can follow, regardless of skill level. You will learn how to plan the size, choose weather-resistant materials, and assemble a frame that lasts for years. We will also cover the small details that separate a wobbly DIY attempt from a confident, professional-looking result. By the end, you will feel ready to grab your tools and start building. Take it one step at a time, and you will be surprised how achievable this project really is.
Why Building a Pond Bridge Matters
A bridge is more than a pretty addition to your garden. It creates a practical path across water, which means you no longer have to walk the long way around your pond to reach the other side. That convenience matters when you maintain plants, feed fish, or simply want a quiet spot to relax.
Beyond function, a bridge boosts the visual appeal and value of your outdoor space. It draws the eye, frames your pond as a focal point, and gives visitors a natural place to pause and enjoy the view. Building one yourself also saves money compared to hiring a contractor, and it gives you full control over the design. You decide the size, the style, and the finish, so the final result matches your garden perfectly.
Step-by-Step Guide to How To Make a Pond Bridge
Step 1: Measure and Plan Your Design
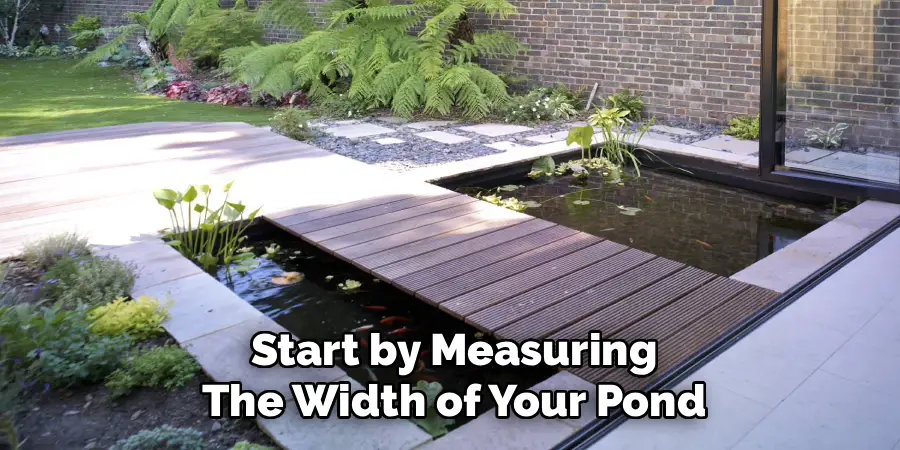
Start by measuring the width of your pond at the spot where the bridge will cross. Add roughly 12 inches on each side so the bridge rests firmly on solid ground rather than on the water’s edge. Sketch your design on paper and decide whether you want a flat walkway or a gentle arch. Knowing how to make a pond bridge begins with a solid plan, because accurate measurements prevent wasted material later. Think about the load the bridge must carry and keep the width between 24 and 36 inches for comfortable walking. A clear plan keeps the rest of the project smooth and stress-free.
Step 2: Gather Your Materials and Tools
Once your design is ready, collect everything you need before you start cutting. For most small bridges you will want pressure-treated lumber or naturally rot-resistant wood like cedar or redwood. Pick up galvanized or stainless steel screws, since these resist rust near water. You will also need a drill, a circular saw, a tape measure, a level, sandpaper, and outdoor wood sealant. Having all your materials in one place saves time and keeps your momentum going. Buy a little extra lumber to account for mistakes, especially if this is your first build. Quality materials cost slightly more upfront but reward you with a bridge that lasts.
Step 3: Build the Support Beams
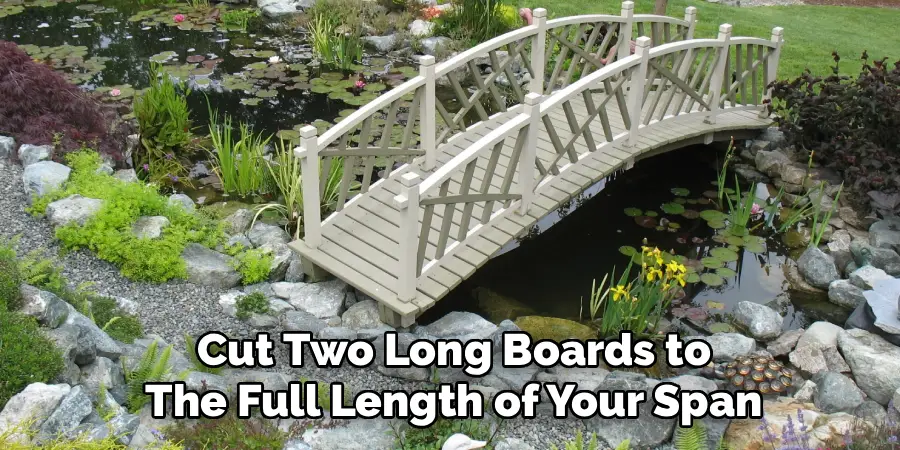
The support beams, often called stringers, form the backbone of your bridge. Cut two long boards to the full length of your span, including the extra overlap onto the banks. If you want an arched look, cut a gentle curve into the top edge of each beam using a jigsaw. Keep both beams identical so the bridge sits evenly. Space them apart to match the planned width of your walkway, usually 24 to 36 inches. These beams carry the weight of everyone who crosses, so choose strong, straight lumber without cracks or knots. Take your time here, because accurate beams make the entire structure stable.
Step 4: Attach the Cross Supports
Cross supports connect the two main beams and hold them at a fixed distance. Cut several short boards equal to the width of your bridge, then attach one near each end and a few more spaced evenly along the span. Use a square to keep every joint at a true right angle, and drive your screws firmly into solid wood. This is the stage where learning how to make a pond bridge really pays off, because tight, level cross supports stop the frame from twisting over time. Check your work with a level as you go. A rigid, well-braced frame now means a safe, wobble-free bridge later.
Step 5: Install the Decking Boards
With the frame complete, you can lay the decking that you will actually walk on. Cut your deck boards to length, then place them across the beams one at a time. Leave a small gap of about a quarter inch between each board so rainwater drains away and the wood can expand. Screw each board down with two fasteners at every beam to prevent lifting and squeaking. Work from one end to the other and check that the boards stay straight and parallel. Pressing each board snug before fastening keeps your spacing even and gives the deck a clean, finished look.

Step 6: Add Handrails for Safety
Handrails make your bridge safer and add a polished, finished appearance. They are especially important if children, older adults, or pets will use the crossing. Attach vertical posts to the outside of the beams at each corner, then add a few more along the length for support. Connect the posts with a top rail and, if you like, horizontal or vertical balusters between them. Keep the rail height around 36 inches for comfortable gripping. Secure every joint with rust-resistant screws and check that each post feels solid before moving on. Sturdy handrails give everyone confidence as they cross the water.
Step 7: Seal and Finish the Wood
The final step protects your hard work from sun, rain, and rot. Sand any rough edges or splinters so the surface feels smooth and safe to touch. Wipe away the dust, then apply a quality outdoor wood sealant or stain with a brush. Coat every surface, including the underside and the ends of each board, since these areas soak up moisture fastest. Let the first coat dry fully, then add a second for extra protection. Reapply sealant every year or two to keep the wood healthy. A well-sealed bridge resists weather, looks vibrant, and serves your garden beautifully for many seasons.

Frequently Asked Questions
What Type Of Wood Is Best For A Pond Bridge?
Cedar and redwood are top choices because they naturally resist rot, insects, and moisture without heavy chemical treatment. Pressure-treated pine is a budget-friendly alternative that also holds up well outdoors. Whichever you pick, always pair it with rust-resistant screws and a quality sealant. The right wood, combined with proper finishing, helps your bridge survive constant exposure to water and weather for many years.
How Long Does It Take To Build One?
Most beginners can finish a small garden bridge in a single weekend. Planning and gathering materials might take a few hours, while cutting and assembly usually fills one full day. Sealing adds extra drying time, so factor in a second day if you apply multiple coats. Larger or arched designs naturally take longer, but breaking the work into clear steps keeps the project manageable and enjoyable.
Do I Need A Permit To Build A Garden Bridge?
For small decorative bridges over private ponds, you usually do not need a permit. However, rules vary by location, so it is wise to check with your local building authority before starting. Larger structures, bridges over public water, or anything attached to a permanent foundation may require approval. A quick phone call to your council saves you from costly surprises and keeps your project fully compliant.
How Much Weight Can A DIY Bridge Hold?
A bridge built with sturdy support beams and proper cross bracing can comfortably hold one or two adults at once. The exact capacity depends on your lumber size, the span length, and how well you fasten each joint. To stay safe, use thick beams for wider spans and avoid skipping cross supports. When in doubt, build stronger than you think you need and test carefully before regular use.
How Do I Keep The Bridge From Rotting?
Moisture is the main enemy of any outdoor wood structure. Choose rot-resistant lumber, seal every surface including the hidden ends and underside, and reapply protective coating every year or two. Keep the wood off direct contact with standing water and clear away leaves or debris that trap dampness. Good drainage gaps between deck boards also help the surface dry quickly after rain, extending the life of your bridge.
Conclusion
Building a bridge across your pond is one of the most rewarding outdoor projects you can take on, and it is far more achievable than it first appears. By measuring carefully, choosing weather-resistant materials, and assembling a solid frame, you create a structure that is both safe and beautiful. Each step builds on the last, so working in order keeps the whole process smooth and stress-free even for first-time builders.
Now that you understand how to make a pond bridge from planning to finishing, the only thing left is to begin. Gather your tools, set aside a weekend, and trust the steps you have learned here. Take your time, double-check your measurements, and enjoy the satisfaction of crossing a bridge you built with your own hands. Your garden, and everyone who visits it, will thank you for years to come.

About
Outdoor Fixes is a distinguished figure in the world of Diy design, with a decade of expertise creating innovative and sustainable Diy solutions.
His professional focus lies in merging traditional craftsmanship with modern manufacturing techniques,
fostering designs that are both practical and environmentally conscious. As the author of diy,
outdoorfixes delves into the art and science of outdoorfixes-making, inspiring artisans and industry professionals alike.
Education RMIT University
(Melbourne, Australia) Associate Degree in Design (Outdoor Fixes) Focus on sustainable design, industry-driven projects,
and practical craftsmanship. Gained hands-on experience with traditional and digital manufacturing tools, such as CAD and CNC software.
Nottingham Trent University
(United Kingdom) Bachelor’s in outdoorfixes.com and Product Design (Honors) Specialized in product design with a focus on blending creativity with production
techniques. Participated in industry projects, working with companies like John Lewis and Vitsoe to gain real-world insights.
Publications and Impact
In diy, Outdoor Fixes his insights on indoor design processes, materials, and strategies for efficient production.
His writing bridges the gap between artisan knowledge and modern industry needs, making it a must-read for both budding designers and seasoned professionals.